Showing posts with label cake. Show all posts

Monday, October 8, 2012

What I Baked On My Summer Vacation


Often, the fist back-to-school assignment in grade school was an essay titled, "What I Did On My Summer Vacation." That was a stumper for me. My friends would busily start writing because they did cool things like travel around the country, spend a month on a houseboat on Lake Powell, or laze around at their lake cabin.

I wasn't that cool. My essays would have to risk falling into the realm of fiction or else be stunningly dull. My family didn't do cool things. We either went on death marches hikes, or stayed at home to do exciting things like mowing the lawn and harvesting tomatoes and beans from the garden.  My birthday was in the summer, but that doesn't mean it was the highlight of the summer. Remember the part about my friends off doing cool things? No one was ever around to come to my birthday parties. I'd plan a huge roller-skating party and get two people to show up, so my mother would kindly offer to take us to a movie.

Perhaps that's the reason I put so much importance on birthday cakes. You may have a lousy no-show birthday party, but if you've got a few presents and a  fabulous cake, it's still a good birthday.

You might think that giving up grains and sugar might mean giving up birthday cakes. Not as long as there is breath in my body! I'm also not willing to settle for some dense, dry, nasty brick pretending to be a cake. No, a birthday cake has to look special and taste amazing. That's the rule.


I made this cake for my son's birthday and we loved it so much I made it again for my birthday. We served it at the same time as a lovely triple-layer lemon cake (which was a birthday cake for someone else) and I even had one person comment that they liked the chocolate grain-free one better! (I'm giving you the recipe as I made it the second time, but the pictures are from the first time. It's just a matter of how it's garnished.)

I found this recipe on The Moveable Feasts and did a bit of modifying. I love it and wouldn't change a thing, but I give you permission to play with the recipe and do what you want to it in order for it to make your heart sing.

Can You Believe It's Grain-Free? Chocolate Cake

1/2 cup coconut flour
1/2 cup unsweetened cocoa powder (not Dutch-processed)
1 tsp baking soda
14 pitted medjool dates
1/4 cup honey
1 cup of unsweetened applesauce
1/2 cup (1 stick) butter, very soft
3 eggs
1 tsp vanilla extract
1/4 cup boiling water
1/4 tsp expresso powder
   (OR, you can substitute 1/4 cup drip coffee for the water and espresso powder)
Coconut milk
Chopped dark chocolate (at least 70% cacao), about 4 oz.
Whipped cream or coconut cream
Sliced strawberries

1- Preheat oven to 350 deg. F.  Butter and 8-inch springform pan and line the bottom with parchment paper.

2- In a small bowl, whisk together the coconut flour, cocoa powder, baking soda, and salt. Set aside.

3- In a food processor, puree the dates until completely smooth, about 20-30 seconds. This should be about 3/4 cup of puree. Add the honey and applesauce and continue to puree until it creates a thoroughly combined and smooth mixture, about another 20-30 seconds.

4- Transfer the date-applesauce mixture to the bowl of a stand mixer. Add in the softened butter and mix on low speed until combined. Continuing on low speed, add the eggs, one at a time, and then the vanilla and coffee. Mix until smooth and well combined. If the mixture looks a little curdled, don't freak out. It'll smooth out.

5- On low speed, sprinkle the dry ingredients into the wet mixture. Mix, scraping down the sides, until the batter is smooth. The texture will be stiff, like a brownie batter.

6- Pour the batter into the prepared pan and smooth the top with a rubber spatula. Bake in the preheated oven for 35-40 minutes or until a toothpick inserted in the middle comes out clean. The cake may look moist and maybe even unfinished, but if the toothpick is clean, it's done. Let the cake cool completely on a wire rack.

7- When the cake is cooled, make the ganache. You'll need to be a bit free-form about this as I eyeballed my ingredients, rather than carefully measuring.  Warm about 1/2 cup of coconut milk in a saucepan over low heat. When the milk is very warm, but before it boils, pour it over the chopped chocolate. Pour only enough milk to barely cover the chocolate. Let it sit for 2 minutes, then stir till it's smooth.

8- Pour the chocolate ganache over the cake, smoothing it to the edges of the cake. It can be refrigerated at this point and pulled out at serving time.

9- To serve, remove the sides of the springform pan. Slice into 12 slices. Serve with a heaping blop of whipped cream or whipped coconut cream and sliced strawberries.

Saturday, August 4, 2012

Baking Birthday


27 years ago it was a very hot summer. I remember this because 27 years ago I was pregnant. Very pregnant. You could say I was great with child, but that would be an understatement. Enormous with hippopotomus might better convey the immensity of this pregnancy.

Because the summer was so very warm and humid and because I was shaped approximately like a garden shed, I bought a bathing suit. I wasn't willing to go to a trendy maternity boutique and buy something to show off a pregnant woman's curves because, a) I had zero monies and b) I didn't want to ever go through this again so I saw no point in "investing" in a cute suit. So I went to the thrift store.

Thrift stores are awesome. For a bargain price, you can find just about anything. I say just about, because a stylish maternity swimsuit is one of the few things you cannot find at a thrift store. What I found, and bought, was atrocious. It was big. It was black. If a bathing suit and a burkha mated, this is what their child would look like. But I wore it because it covered my grotesquely swollen belly and allowed a breeze to caress my legs. Not in public, though. There are laws about that kind of thing!


What I did next was cruel. I'll just be up front and admit that. I took my almost 2 year old son with me to the corner drugstore and bought an inflatable pool. Not a large, deluxe kind of pool with a slide or the kind you can actually swim in. Sadly, that was not to be because, a) no monies (see above) and b) I had to carry it home along with the 2 year old in hand and the hippo in the oven. I got a little two-ring job that was barely bigger than my circumference.

Once home, I inflated the pool, stopping frequently to gasp for air and grab for the stitch in my side (I say "grab for" because it was tough to locate what had formerly been my side. ) When it was as taut as it was going to get with my limited lung capacity, I put the hose in it to fill it up. My son, eyes shining with excitement had his swimmy shorts on, ready for the treat of a backyard pool.

Oh, poor boy! His hopes were dashed when I sat in the pool. Between me and my gestating watermelon, there was no room for him! Well, we took turns. But my turns were longer. And when I forced him to take a nap, I'd spend the time in the pool, like a majestically anchored sailing vessel. Or a beached whale.

Thank heavens for that pool! It allowed me to get through that pregnancy. And if I hadn't endured, I wouldn't have the beautiful daughter that I have now, and she wouldn't have the amazing daughter that she has!

My granddaughter just turned two. Time certainly flies. We celebrated with presents, balloons, and cake. I'll share with you the recipe for the delicious grain-free cake that my daughter made. You can share it with your favorite pregnant lady. And remind her that the time is short, she'll get through, and if all else fails, there's inflatable pools.

Happy birthday to my sweeties!


Raspberry Grain-Free Birthday Cake
 - adapted from Cooking With Coconut Flour by Bruce Fife, ND
 makes a 8 or 9-inch 2-layer cake

1/2 cup butter, melted
3/4 cup + 2 Tbsp coconut milk
12 eggs
1/3 cup coconut sugar
3 tsp liquid stevia
1 tsp salt
1 tsp vanilla
1 cup sifted coconut flour
1 tsp baking powder
Frosting - recipe below

1- Preheat oven to 350 degrees F (175 C). Grease 2 8 or 9-inch round pans.

2- In a large bowl, blend together the butter, coconut milk, eggs, coconut sugar, liquid stevia, salt, and vanilla.

3- In a separate bowl, combine the coconut flour with the baking powder. Whisk this mixture into the batter until there are no lumps.

4- Divide the batter between the prepared pans. Bake for 30-35 minutes, or until knife inserted into the center comes out clean.

5- Cool cakes in pans on cooling racks. When cooled, remove from the pans. Fill and frost.

Raspberry Frosting

1 cup cashew butter
1/3 cup butter, softened
2 Tbsp coconut nectar
1 pint ripe raspberries

1- In the bowl of a stand mixer, combine the butters and blend well.

2- Add the coconut nectar and beat till smooth.

3- Add the berries, reserving a few to garnish the cake. Beat till well blended.

Wednesday, March 14, 2012

Doghouse Gifts


Right before Christmas someone showed me a commercial, the premise of which was that men had to be very careful about the gifts they gave women because the wrong gift would land them in the doghouse. Apparently, demeaning, degrading gifts like household appliances or diet aids were the worst and the only foolproof gift a man could give was jewelry. This got me thinking about what kind of gift my husband could possibly give me that would merit that kind of reproof.

My husband is very sweet and thoughtful and tries to give me gifts that he knows will please me. So when he gave me a washer and dryer, I didn't feel that he was demeaning me, assuming that my only job in life was to wash his underwear. On the contrary, I was thrilled! It's a fact of life that I do the laundry in our home and to finally replace the machines that I've cursed for the last ten years was a huge blessing to me.

Likewise, when my son-in-law gave my daughter a treadmill for Valentine's Day, not only was he not in the doghouse, he was king of the day! His message was not "I'm skipping chocolates and giving you a treadmill because you really need to do something about your figure." Quite the contrary. He knew that she doesn't love chocolate and she really wanted to master treadmill dancing. His gift probably got him almost smothered in kisses.

So, what would get my husband sent to the doghouse? Hmmmm. A new lawnmower? I'm not about to start mowing the lawn. But if it made my husband happier, a happy husband is a good gift. And I could always balance it out by buying him a new sewing machine.

A gift that is always appreciated is pound cake. Especially when it's peppered with luscious, ripe blueberries. I know it's not blueberry season just yet (it snowed here yesterday!), so you'll have to tuck this recipe into a safe spot and bring it out again when fresh berries show up in the grocery store, the farmer's market, or better yet, your own bush!

Blueberry-Lime Poundcake
adapted from Fine Cooking


8 oz. (1 cup) unsalted butter, softened
10-1/2 oz. (2-1/3 cups) all-purpose flour
1-1/2 tsp. baking power
1/4 tsp. plus 1/8 tsp. salt
1-3/4 cups granulated sugar
2 tsp. finely grated lime zest
6 oz. cream cheese, softened
4 large eggs plus 1 large egg yolk, at room temperature
2-1/2 cups room-temperature blueberries (about 13 oz.), washed and drained on paper towels
4 oz. (1 cup) confectioners’ sugar
2 Tbs. fresh lime juice; more as needed

1- Preheat oven to 350 deg. F. with a rack in the center of the oven. Butter and flour a 12-cup Bundt cake pan.

2- Sift the flour, baking powder, and salt into a medium bowl. Set aside.

3- Place the sugar and lime zest into a food processor and pulse 20 times. If you don't have a food processor, you can omit this step and just work the zest into the sugar with your hands.

4- With an electric mixer, beat the butter and cream cheese at medium speed until smooth, about 1 minute.

5- Add the sugar mixture and continue to beat until the mixture is light and fluffy, an additional 1 to 2 minutes.

6- With the mixer running, add the eggs and egg yolk, one at a time, beating well after each addition, and stopping the mixer to scrape down the sides as necessary.

7- Reduce the mixer speed to low and slowly add the flour mixture. Scrape down the bowl and beat at medium speed for about 20 seconds.

8- With a rubber spatula, gently fold in the blueberries.

9- Pour the batter into the prepared pan and smooth the top with a spatula. Run a knife through the batter or gently tap the pan on the counter to eliminate any air pockets. Bake 50-55 minutes, until a cake tester comes out clean.

10- Set the pan on a wire rack to cool for 10 minutes, then remove the cake from the pan and let it cool on the rack to room temperature.

11- To glaze the cake, combine the confectioner's sugar and lime juice. Whisk until the mixture is smooth and runny, adding more lime juice if necessary. Pour the glaze over the cake and allow it to set before cutting.

Note: as you can see from the photos, I skipped the glaze and the cake was still wonderful!

Wednesday, August 10, 2011

Birth Day Cake


I recently had a birthday. It was a very good day with lots of well wishes, cards, presents, and a cake. But it started me thinking about what an odd thing it is to celebrate your birthday. You are queen (or king) for a day with no chores, no hassles, just your choice of cake, your choice of dinner, and presents (at least, that's how it works in our family.)

So what is it the birthday girl (or guy) did to deserve all this attention? Arrive. Yup, that's basically it. You just show up, take a breath, and all of a sudden you're a super star. But who made it all possible? Who put in the work to make it happen? That's right, the mother. 9 months of pregnancy, up to 3 days of labor, excruciating pain, possible surgery, and she gets nada.

Why doesn't the mother get the credit and recognition every year? She's the one who should get the cake. She should also get to retell the birth story every year, in graphic detail, including how long the labor was, how much it hurt, and how many stitches were required. And the baby that she birthed should give her a thank-you gift every year.

Since my mother lives in another state, I couldn't share my birthday cake with her. Which is too bad, because it was really nice. I usually go with a chocolate overload cake, but this year I wanted something a little lighter. I had some nice, ripe mangos on the counter, so I chose a recipe that combined layers of sponge cake with a delicious mango mousse. Topped off with fresh mango puree, it was lovely.

Sorry you couldn't have a slice, Mom. Thanks for giving me life. Oh, and there's a little something for you at The King's English. :-)

Mango Mousse Cake
- adapted from Sky High - Irresistible Triple-Layer Cakes


Cake:
6 eggs
1 cup sugar
1 tsp vanilla extract
1-1/3 cups cake flour
3 Tbsp unsalted butter, melted and slightly warm


Rum Syrup:
1/4 cup sugar
1/4 cup lime juice
1/4 cup water
1/4 cup light rum


Mango Mousse:
2 cups diced mango, from 4 or 5 mangoes
1/3 cup water
1/3 cup plus 1-1/2 Tbsp sugar
2 tsp unflavored gelatin powder
2 Tbsp light rum
1 cup heavy cream


1- Preheat the oven to 350 deg. F. Line the bottoms of three 8-inch cake pans with rounds of parchment paper. Place a large bowl and beaters from a hand-held electric mixer in the freezer.

2- Place the eggs in a large heatproof bowl. Gradually beat in the sugar and the vanilla. Set over a pan of simmering water and whisk constantly until all the sugar dissolves and the eggs are warmer than body temperature. Remove from the heat and, with the mixer on medium-high, whip the eggs until very fluffy and stiff enough so that a slowly dissolving ribbon forms from the dripping batter when the beaters are lifted.

3- Sift the flour and return it to the sifter. Carefully sift about a third of the flour over the top of the eggs. Using a rubber spatula, gently fold it in. Repeat with the remaining flour, folding just until blended evenly. Drizzle the melted butter over the batter and gently fold it in. Divide the batter between the three prepared cake pans.

4- Bake the layers for 12 to 14 minutes, or until a cake tester inserted in the center comes out clean. Transfer the pans to wire racks and let the layers cool completely in the pans. To unfold, run a butter knife around the rims to gently release the edges of the cakes. Tap them out gently and remove the paper on the bottom of each layer.

5- In a small saucepan combine the sugar, lime juice, and water for the rum syrup. Cook over medium heat, stirring to dissolve the sugar. Boil until the syrup is reduced to 1/2 cup. Remove from the heat and add the rum.

6- Place the mango chunks in a medium saucepan. Add the water, bring to a simmer, and cook, stirring occasionally, until soft, 10 to 15 min. Remove from the heat and let cool to room temperature.

7- Transfer the cooled mangoes, along with any liquid in the pan, to a food processor or blender. Puree until smooth. Remove 1/2 cup of the mango puree, stir in 1-1/2 Tbsp of the sugar, and set aside for garnish. Place the remaining mango puree in a large bowl.

8- Put the gelatin in a small glass or ceramic dish. Add the rum and let soften for about 5 minutes. With a microwave on low, heat the gelatin until dissolved, 10 to 15 seconds.

9- Whisk the gelatin and remaining 1/3 cup sugar into the mango puree until the sugar dissolves.

10- In the large chilled bowl, whip the cream until stiff. Using a rubber spatula, fold the cream into the sweetened mango puree.

11- To assemble the cake, place one cake layer on a cake stand or serving plate, flat side up, and soak it with 1/4 cup of the Rum Syrup. Spread one 1/3 of the Mango Mousse over the layer evenly. Repeat with the second cake layer, using another 1/4 cup syrup and another 1/3 of the mousse. Add the last cake layer. Soak this with the last of the syrup and mousse. Chill for about an hour, to allow the mousse to set up. Garnish with chopped mangoes, if desired.


Wednesday, July 13, 2011

Party Paranoia

For the most part I am a fairly rational person. I can look at situations and think through the possible outcomes, arriving at conclusions supported by data, probability, and experience. There are, however, a few cases that defy logic. Heights, spiders, and birthday parties.

We recently visited Hoover Dam. Did you know that thing is freaking tall? And that above it they've built a brand new bridge that spans the gorge? And that unwary fools can walk out onto that bridge, cluelessly taking pictures, seemingly unaware of the perils posed by the combination of strong, gusting winds and extremely high bridge? I suppose they just think logically that, hey, if it was dangerous, people wouldn't be allowed to walk out there, right? Or that since thousands of people have done it before without dying, the odds are that they'll survive. I know all these things, and yet I just can't get my brain beyond, "high, windy, slipping, falling, plummeting to certain, splatting death below."
It's the same with spiders. I've been through the exhibit at the zoo, designed to soothe the arachniphobe with informational plaques about the harmless, beneficial spiders, placed right next to the case containing the "HOLY COW! There's no glass on this case! That huge, hairy spider could jump right out and land on my face!! What kind of place is this, putting innocent kids at risk?!! Someone give me a shoe so I can smash that thing!!" My husband had to escort me out and put a paper bag to my face so I wouldn't hyperventilate and pass out. (If I had, I'm sure the spiders would have rushed out and dragged my body away to be wrapped in the spider equivalent of Tupperware to be sucked dry at a more convenient time.)

Perhaps you're wondering why birthday parties might fall into the same category as heights and spiders. Let me clarify - it's not all birthday parties that reduce me to a quivering wreck, huddled in a corner, rocking and sobbing. Just the birthday parties that I have to put on for my children.

My first two children were born in the same month and it ruined that month for me. I dreaded having to put on their parties and the dread swallowed up the whole month in a cloud of worry, guilt, and dread. (Yes, I know I've said dread 3 times, but I really, really dreaded those parties.)

First of all, there was the question of theme. What would be fun? What would be different? What wouldn't break the bank? And what would make all the kids happy? I've done basket weaving, tie-dyeing, card making, nail decorating, American Girl doll, and several piƱatas. There's been playland, beach, pool, and backyard parties. I've done theme cakes till I see Pixar toys in frosting in my dreams.

Through all my years as a party planner, I've learned that the key to happiness is low expectations. I no longer do huge shindigs. We alternate friend party years with family party years. And I strive for the lowest stress possible. For my youngest son's birthday we invited friends to come to the pool. I brought cupcakes and watermelon slices. They swam, opened presents, and ate cupcakes. Ahh, the sweet smell of another birthday party over!


I ended up making three different kinds of cupcakes. I wanted to make minion cupcakes, not because they fit so naturally with a pool party theme, but because they're cute. So I made Twinkies, doubling the recipe, and making cupcakes with the rest of the batter. Then I made strawberry cupcakes, because I had strawberries in the fridge that needed to be used up. Then I made chocolate gluten-free, egg-free cupcakes for a guest with special dietary requirements. After all, what fun is it to go to a party and not be able to eat cake?

Today you get the strawberry cupcakes and next time I'll give you the chocolate speciality recipe. So you'll be doubly prepared next time you're called on to throw a party. Do not fear, they're easy to make and even with lousy decorating skills like mine, you can still wow the crowd.


Strawberry Minion Cupcakes
- adapted from Sky High, Irresistible Triple-Layer Cakes

1/4 lb strawberries, hulled and halved
2-1/4 cups cake flour
1-1/2 cups granulated sugar
2-3/4 tsp baking powder
1/2 tsp salt
1-1/2 sticks (3/4 cup) unsalted butter, at room temperature
4 large egg whites
1/3 cup milk

1 batch of Twinkies (preferably homemade)
1 batch of your favorite buttercream frosting
Smarties - yellow and white ones
Edible food pen
Thin black licorice ropes, or black gel paste food coloring

1- Preheat oven to 350 deg. F. Line cupcake pans with 18 cupcake liners.

2- Place strawberries in a food processor or blender. Process till no lumps remain. Measure out 3/4 cup puree and set the rest (if there is any) aside for smoothies or pouring over ice cream or french toast.

3- In a medium bowl, sift together the flour, sugar, baking powder, and salt; set aside.

4- In a large bowl with an electric mixer, cream the butter. When it's fluffy, add the strawberry puree.

5- Add the dry ingredients and blend until light and fluffy (the batter will be very thick).

6- In another bowl, whisk together the egg whites and milk to combine. Add the whites in three parts to the batter, mixing only until incorporated after each addition.

7- Fill the cupcake liners about 3/4 full. Bake 18 to 22 minutes, or until toothpick inserted in center comes out clean.

8- Let cupcakes cool in the pan 10 minutes before removing to wire rack to cool completely.

9- To assemble the minions, cut the Twinkies in half. With the edible food marker, draw around the outside of 1/2 the Smarties and color in a circle for the eyeball. Then glue together pairs of Smarties with frosting. When the frosting has dried and the goggles are stable, use frosting to glue the goggles to the Twinkie halves. If you like, for some of the minions, use a single goggle, instead of a pair.

10- If you have the licorice, cut small lengths to use as goggle holders, smiles, and hair spikes. I didn't have licorice (my husband can tell you precisely how many stores in a 5 mile radius of my house don't carry it), so I used an ample amount of black food coloring gel with a small portion of the frosting to do the smiles and goggle straps. We had to make do with bald minions.

11- Frost the cupcakes and plant the minions into the frosting.

Saturday, May 28, 2011

Flutterbyes


They say that April showers bring May flowers. That's true, but just because a month flips over on the calendar, it doesn't mean that the rain stops around here. So what do May showers bring? Babies!

Just over a year ago I blogged about making a small wedding cake for my daughter's maid of honor. The first year of marriage has gone so well that I was invited to help with the food for her baby shower!

The mum-to-be has a nursery beautifully decorated with a Classic Pooh theme. The challenge with that is that Classic Pooh is no longer in vogue. Good thing she's an ebay diva and my daughter is queen of the thrift stores. Between them they've been able to score crib bedding, stuffed animals, books, wall hangings, and a pile of baby outfits with Pooh bear and friends on them.


My contribution? I made a sling (a necessity for new mothers, in my opinion). But it was my younger daughter who brought the biggest smile to her face. When Serena was born, her nursery was also done in Classic Pooh. So Serena passed along the framed print of Christopher Robin and friends gathered around a table for a party that had hung over her crib. I love recycling, especially when it brings so much joy!

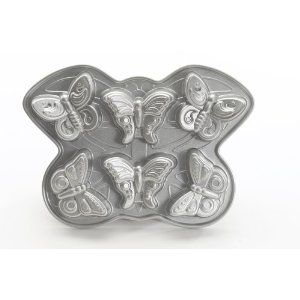
And for the food, I was thrilled to have an excuse to buy yet another cake pan. This one makes a flock of butterflies (which, according to Wikipedia's page on collective nouns should be a rabble of butterflies). Very spring-timeish and very Pooh Bearish.

I came up with a recipe for a moist cake (I hate dry cupcakes!) and then was in a quandary as to how to decorate them. I wanted the beautiful details from the pan to show through, so I just lightly iced them with an almond glaze and dusted with just a hint of purple sparkling sugar for fun.

You can still make these, even if you don't have the specialty pan. Just bake them up as regular cupcakes and decorate with lovely crystallized violets or lavender sprigs.


Butterfly Cupcakes

1/2 cup unsalted butter, softened
1-1/2 cup + Tbsp cake flour
1-1/2 tsp baking powder
1/2 tsp salt
1-1/3 cup granulated sugar
3 large eggs at room temperature
1 large egg yolk at room temperature
1/3 cup vegetable oil
1 tsp vanilla extract
1 tsp almond extract
1/2 cup buttermilk at room temperature

Glaze:

3/4 cup powdered sugar
1 tsp almond extract
2 Tbsp water

1- Preheat oven to 350 deg. F.

2- Using a pastry brush, thoroughly butter the cake pan, being careful to brush the butter into all the crevices. Lightly dust the pan with cake flour and tap off the excess flour. (If making standard cupcakes, place cupcake papers into a cupcake pan.)

3- Sift the flour, baking powder, and salt into a large bowl. Sift a second time into another bowl.

4- In the bowl of an electric mixer, beat the butter on medium speed until it is light in color, about 4 minutes. Add the sugar in a steady stream with the mixer running. Beat until light and fluffy, about 4 minutes.

5- Add the eggs and egg yolk, one at a time, beating well after each addition, scraping the sides of the bowl down as necessary. Beat on medium speed for 2 more minutes.

6- With the mixer on low speed, add the oil and beat for 1 minute.

7- In a small bowl combine the vanilla and almond extracts and the buttermilk. Using a rubber spatula, fold in half of the dry ingredients into the batter. Scrape down the sides of the bowl and add half of the buttermilk mixture. Fold in the remaining dry ingredients, scrape down the sides of the bowl, and add the remaining buttermilk.

8- Pour the batter into the prepared pan, filling each cup about 2/3 full, smoothing the surface with a spatula.

9 - Bake for 15 to 18 minutes, until a cake tester inserted in the center comes out clean.

10- Allow the cakes to cool in the pan on a cooling rack for 10 minutes, then gently loosen the cupcakes with a plastic knife or fork and turn them over to finish cooling on the rack.

Because the pan makes 6 butterflies at a time, I had to bake these in 3 batches. Between each baking, wipe out the pan then regrease and flour before putting in more batter.

11 - For the glaze, combine the powdered sugar, almond extract and enough water to give a smooth, runny consistency. You can either dunk the cooled butterflies into the glaze or drizzle the glaze over the cooled cakes on the cooling rack.

Makes 18 cupcakes

Saturday, May 14, 2011

Bi-Winning


There is no such thing as an unmixed blessing. For every upside, there is a downside. It's part of the physics of life.

For example, if I were to win the lottery (which I won't because I don't buy tickets) and trade in my amazingly large mom-mobile and drive off the lot a brand new sexy Porsche, my insurance rates would go up, I'd probably get tons of speeding tickets, and my husband would be cross because my Porsche couldn't haul a half sheet of ply from Home Depot.

The Bible tells us that children are a blessing, and that's true. But along with the blessing part comes the bleary-eyed, awake all night, baby screaming, poopy-diaper-that-leaked-and-soiled-the-whole-outfit part. And just because they grow up doesn't mean the poop stops.

Going on a dream vacation to the tropics also means that you have to deal with the TSA, time changes, rental hassles, lost luggage, and possibly bringing home a tropical disease as a souvenir.


Recently, though, I think I might have found a crack in this otherwise iron-clad rule.

Ice cream is one of my favorite things about summer. I keep my ice cream maker humming busily all summer long. But that means that the egg whites pile up in my refrigerator. Since I pay out some big bucks to buy free-range organic chicken eggs, I'm not about to just toss out those egg whites! But what is one to do with 5 egg whites?

In another post, I explained what to do with 6 egg whites, but it was with glee that I found a delicious way to use 5. Angel Food Cupcakes. And the best part for me is that cupcakes are so easy to share! You can put 6 in a box and it's an extravagant gift. Try putting 6 slices of angel food cake in a box. Not so impressive.

So now you know. 5 egg yolks will make fabulous ice cream. Try lavendar, almond cherry chocolate, double mint, blueberry, lemon gelato, or my favorite, chocolate. (I have made a ridiculous amount of ice cream, haven't I?) Then with the extra whites, you can make these beautiful, airy, lightly tangy, totally delicious cupcakes.

In the words of Charlie Sheen, it's bi-winning!

(This video makes me giggle every time I watch it)


Lemony Angel Food Cupcakes
- adapted from Baking Bites

3/4 cup superfine sugar*, divided
1/2 cup sifted cake flour
5 large egg whites, room temperature
1/2 tsp cream of tartar
1/8 tsp salt
1 tsp vanilla extract
zest of one lemon


* If you don't have superfine sugar on hand, you don't need to run to the grocery store for it. Just throw regular granulated sugar into your food processor and run it till the sugar is fine. Not too long, though, or you'll end up with powdered sugar!

1 - Preheat oven to 350F. Line a 12-cup muffin tin with paper liners.

2 - In a small bowl, sift together cake flour and 1/4 cup superfine sugar.

3 - In a large bowl, beat room-temperature egg whites until foamy, then add in cream of tartar and salt. Gradually add in the remaining 1/2 cup of superfine sugar while the mixer is on high speed, beating the egg whites to soft peaks. With a rubber spatula, gently fold in the vanilla and lemon zest.

4 - Fold in flour mixture, adding it in two or three additions.

5 - Divide evenly into prepared muffin tins. Fill them almost full.

6 - Bake for 16-18 minutes, until golden brown. The tops will spring back when lightly touched.

7 - Cool in the pan on a wire rack for 10 minutes, then remove the cupcakes to the wire rack to cool completely.

Lemon Icing Drizzle

2 Tbsp fresh lemon juice
Confectioner’s Sugar


Add enough confectioner's sugar to the lemon juice to make a drizzling consistency. Whisk until smooth. Drizzle on top of cooled cupcakes.

Makes 12 - 16 cupcakes. (The recipe says it makes 12, but mine made 15, I think because of the size of my farm eggs.)

Wednesday, May 4, 2011

Fabulous Foodie Feast


It's been a year since the amazing Val of More Than Burnt Toast organized a Food Bloggers' Tour of Pike Place Market. She comes to the Seattle area twice a year and it's always a treat to get to hang out with her. Since we all had such a great time doing the Market tour, it was decided that we needed to get together again. This time the venue was the wood-fired oven in the backyard of Sortachef, Don. He has an authentic wood-burning oven which he built himself (directions and pictures are on his blog), and offered to share it with us. Along with people from the tour, we added some new faces and had a lovely time getting to know each other, sharing our passion for all things food (and wine!).

When a wood-fired oven pizza is the centerpiece of the meal, an Italian theme is a natural. Start with fun food bloggers (being Italian was optional, although a trip to Tuscany didn't hurt), add antipasti,


add several different delicious wines,


design and make your own pizza,


bake it in a real, wood-fired oven,


and add a dash of dessert


and you've got a recipe for a fabulous evening!

I, of course, volunteered for dessert. My first thought for an Italian dessert was cannoli, but the logistics of transporting and filling on site, plus my fear of frying, made that option a no-go. Instead, I went with cannoli cake. It's a sponge cake with a cannoli filling, redolent with the flavors of almond and orange, which I found on the website of Cream Puffs in Venice. Since I didn't alter the recipe a bit, you can go here to get the recipe.

Thanks, Don and Kathy, for hosting this fun event! We'll have to do it again.

Tuesday, April 26, 2011

Spring Takes The Cake


It's been a long, dreary winter. Here in the Pacific Northwest sightings of the sun have been few and far between. Many people are affected by SAD (Seasonal Affective Disorder) and become depressed and morose. I just get SOTSER (Sick Of The Stinking Endless Rain), which has essentially the same effect. What a lift it is to the spirits when finally the signs of spring start popping up! Birds have returned from their condos in Phoenix to serenade me in the morning. Tulips and daffodils wave their cheerful colors in counterpoint to the grey skies. And strawberries are back in the stores. Hooray!

What better way to celebrate the return of spring than to make a cake? Spring is perfect for baking as there are beautiful, fresh ingredients available and it's not so hot that you dread turning on the oven.

This cake is unique in that the cake layer and the meringue layer topping it are baked together. Then the layers are piled with cream cheese filling and strawberries. Plus, as a bonus, you end up with 5 egg yolks - ice cream time! Whether you're looking for a special dessert for Mother's Day or just want an excuse pick up a flat of strawberries, you won't regret trying this cake. Not too filling, not too sweet, not too fussy - just right.


Blitz Torte With Strawberries and Cream
- adapted from Have Your Cake and Eat It, Too by Susan Purdy

Cake:

1-1/4 cups sifted cake flour
1-1/4 tsp baking powder
1/8 tsp salt
1/4 cup plus 2 Tbsp milk
1 large egg yolk
1 tsp vanilla extract
1 tsp almond extract
3/4 cup granulated sugar, divided
2 large egg whites


Meringue layer;

4 large egg whites at room temperature
1/4 tsp cream of tartar
1 cup plus 1 Tbsp superfine sugar, divided
1 tsp cinnamon
1/4 cup sliced almonds (I used toasted, slivered almonds, coarsely chopped)


Vanilla Cream Filling:

8 oz cream cheese, at room temperature
1/2 cup vanilla yogurt, drained in a strainer for 15 minutes (I used plain whole milk yogurt, and added an extra bit of vanilla and sugar)
1 Tbsp granulated sugar, or to taste
1 tsp vanilla extract


Fruit:

2 Tbsp almond or hazelnut liqueur
3 cups fresh strawberries, rinsed, hulled, dried, and sliced
1 Tbsp granulated sugar


1- Position the rack in the center of the oven and preheat to 350 deg. F. Coat two 8-inch round cake pans with baking spray, line the pans with parchment paper, and spray the paper. Dust the pans with flour and tap out the excess flour.

2- Prepare the cake batter: Sift together the flour, baking powder, and salt onto a sheet of wax paper or into a bowl. Set aside.

3- In a small saucepan, heat the milk to just below a simmer. Remove from the heat and let cool until tepid.

4- In a medium bowl, using an electric mixer, beat the egg yolk and vanilla and almond extracts until blended. Add 1/2 cup of the sugar and beat until light in color. Scrape down the bowl and beaters. With the mixer on low speed, gradually add the warm milk. Increase the speed to medium and whip until the sugar is completely dissolved. Scrape down the bowl and beaters.

5- In a clean bowl, with clean beaters, whip the egg whites until foamy. Gradually add the remaining 1/4 cup sugar and whip until the whites are stiff but not dry. Fold about one third of the whipped whites into the egg yolk mixture. Then alternately fold in the flour mixture and the remaining whites. Divide the batter equally between the prepared baking pans and smooth the tops. Set aside.

6- Prepare the meringue layer: In a clean bowl, using the electric mixer, whip the egg whites with the cream of tartar until foamy. Gradually add the 1 cup sugar and whip until the whites are stiff but not dry.

7- Divide the meringue between the cake pans, spreading it evenly over the cake batter. Combine the cinnamon and the remaining 1 Tablespoon sugar and sprinkle it over the meringue layers. Then sprinkle the sliced almonds over each layer. Baker for about 30 minutes, until the meringue top is ivory-colored and crisp to the touch.

8- Cool the layers in the pans on wire racks for about 10 minutes. Run a knife blade between the cakes and the sides of the pans, top each layer with a plate covered with foil or plastic wrap, and invert. Remove the pans and papers, invert the layers again onto racks, and cool completely.

9- Prepare the filling: Combine all the ingredients in a mixer or a food processor and process until completely smooth. Refrigerate until needed.

10- To assemble the cake, place 1 cake layer, meringue side down on a flat plate. Brush the almond or hazelnut liqueur over the cake. Spread the cream filling on top, then cover it with a generous layer of sliced strawberries. Add the second layer, meringue side up. Refrigerate until serving time. Place the remaining berries in a bowl, sprinkle them with the sugar and toss lightly.

11- To serve, place a spoonful of berries alongside each slice of cake.

I added a dollop of whipped cream to the top to pretty it up.

Thursday, April 14, 2011

The Brosetta Stone


Recently my family and I were watching a video of a young man of our acquaintance introducing his "friend who is a girl but not a girlfriend" to his guy friends. From the banter and mild ribbing that took place, it was obvious that this lady friend had been previously discussed between them and they were here to check her out. As the guy friends were were leaving, one reached over and clapped the young man three times on the shoulder. The young man flushed and grinned.

My husband, ever the astute observer, paused the video and said, "He just got a 'Way to go!'"

My daughter and I both said, "What? What are you talking about?"

My husband said, "Didn't you see that shoulder clap? That was totally a 'way to go, man' shoulder clap. Didn't you see that?"

We played it again about 5 times in slo-mo. Yep, there it was - clap, clap, clap, flush, grin.

My daughter and I were stunned. All that slapping and grunting that guys do means something? We challenged my husband. "What if it had only been two claps?"

"Oh, that would have meant 'bummer, dude.'"

"And one clap?"

"That's either hi or goodbye."


I was amazed. I felt like I'd been handed the Rosetta Stone of guy speak! What could I do with this powerful information? Should I, armed with a discreet video camera, go to football games and locker rooms to study these wild yet gentle creatures in their natural habitat? Perhaps I could open peace talks between the sexes, acting as translator. Or maybe I could figure out how to communicate effectively with my husband, resulting in the toilet seat being left down at night.

With great power comes great responsibility. I must ponder this and figure out the best way to wield my knowledge. And while I'm pondering, I'll eat cake.

This cake doesn't take any figuring out. It's simple to make and even simpler to eat. And with apples and a streusel topping, it says delicious in all known languages, including guy speak.

Country Apple Cake
- adapted from Muffins and Other Morning Bakes by Linda Collister

7 Tbsp unsalted butter, at room temperature
1/2 cup plus 1 Tbsp sugar
2 large eggs, beaten
1/2 tsp pure vanilla extract
1 cup all-purpose flour
1/2 tsp salt
1-1/2 tsp baking powder
2-3 Tbsp milk
1-1/2 cups thickly sliced tart eating apples (I used organic Fuji)


Topping:
1/2 cup raw sugar
6-1/2 Tbsp unsalted butter, chilled and diced
1 cup all-purpose flour, sifted


1- Preheat oven to 350 deg. F. Grease a 8-1/2 x 4-1/2 - 2-1/2-inch loaf pan, then line the bottom with parchment paper.

2- In the bowl of an electric mixer, beat the butter until creamy. Add the sugar and beat until light and fluffy.

3- Add the eggs slowly, then add the vanilla.

4- Sift or sieve the flour, salt, and baking powder over the mixture. Add 2 Tbsp of milk and stir just till combined. The batter should be a soft mixture that just drops from the spoon. If it's too dry, add an additional Tbsp of milk.

5- Spread the batter into the prepared pan, smoothing the top with a spatula. Arrange the apple slices in an even layer over the top.

6- Place all the topping ingredients in a medium bowl and rub together with your fingertips until the mixture looks like coarse crumbs. (This can also be done in a food processor.) Sprinkle the topping evenly over the apples, then press down gently.

7- Bake for about 1 hour until golden and a cake tester inserted into the center comes out clean.

8- Let cool in the pan until lukewarm, then serve warm from the pan or cool completely on a wire rack. Eat within 3 days. When thoroughly cooled, the cake can be wrapped and frozen for up to 1 month.

Wednesday, April 6, 2011

Happiness On A Plate


In high school I had a boyfriend that drove me nuts. As we parted company at school on Friday he'd say something vague like, "I'll call you." Then I'd spend the whole weekend waiting by the phone for the call that never came. On Monday I'd find out that he'd been out with his buddies doing something wonderful like shooting bunnies in the desert. It made me feel tremendously special that I came in second to that.

After several weeks of this I got fed up and started making sure I had plans to be elsewhere. I'd call up girlfriends and invite them to go to a movie, ask if they needed to go to the library, or just invite myself over to watch TV. I wanted to be sure that if he did actually call, he'd get the message that my life didn't revolve around him and that I wasn't just sitting around pathetically waiting for the phone to ring.

I learned several things from that relationship, one of which was that I couldn't sit and wait for other people to make me happy. I need to be in charge of my own happiness.

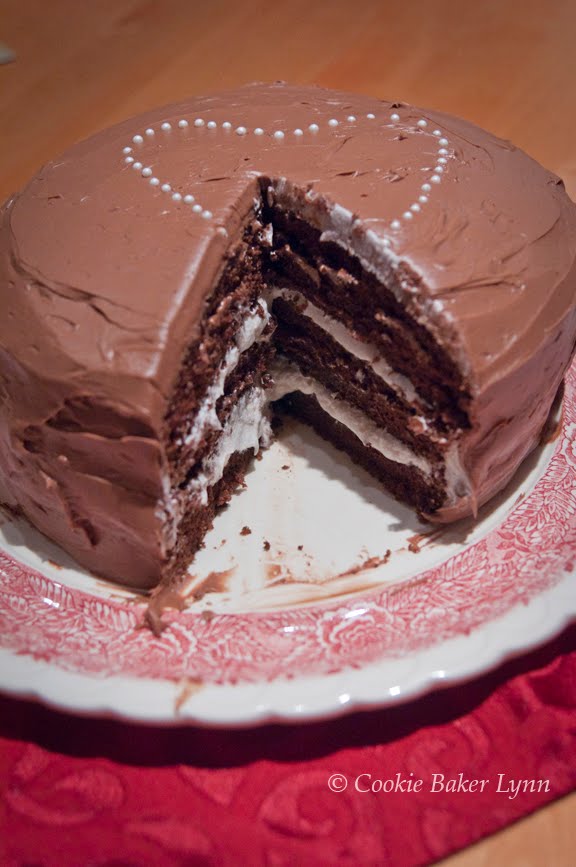
Recently I was flipping through a back issue of Bon Appetite and saw a chocolate stout cake recipe. This was just before St. Patrick's Day and I thought it would be fun to put the beer in the cake and blog about it for the great boozefest, I mean Irish celebration. But life interfered and it didn't get made in time. But I had the can of stout sitting on the counter and I still wanted to make it. I had not birthdays coming up, no celebration to justify a cake, but I wanted it. So I made it. Because some things always make me happy, and chocolate cake is one of them.

The stout in the cake was really interesting. The flavor was elusive, but present. The very best part, though, was the frosting. Oh my ganache, it was good. Like a truffle turned into frosting. I'm not sure that I'll make the stout cake again, but give me a bowl of that frosting and I'll be a happy camper for sure!

Chocolate Stout Cake
- adapted fromBon Appetite

Cake:
3 ounces unsweetened chocolate, chopped
2 1/4 cups all purpose flour
2 teaspoons baking powder
1/2 teaspoon baking soda
1/2 teaspoon salt
14 tablespoons (1-3/4 sticks) salted butter, room temperature
1-1/4 cups plus 3 tablespoons sugar
3 large eggs, separated
3/4 cup chocolate stout, regular stout, or porter
2/3 cup freshly brewed strong coffee


Frosting:
1 pound bittersweet chocolate (54% to 60% cacao), chopped
2 cups heavy whipping cream
1 teaspoon instant espresso powder


For cake:
Position rack in center of oven and preheat to 350°F. Butter and flour two 9-inch-diameter cake pans with 1 -1/2-inch-high sides. Line bottom of each cake pan with parchment paper round; butter and flour parchment. Place chopped chocolate in medium metal bowl. Set bowl over saucepan of barely simmering water and stir until chocolate is melted and smooth. Remove bowl from over water and set aside.

Whisk flour, baking powder, baking soda, and salt in medium bowl to blend. Using electric mixer, beat butter and 1-1/4 cups sugar in large bowl until fluffy and pale yellow, about 2 minutes. Add egg yolks 1 at a time, beating until well blended after each addition. Beat in lukewarm melted chocolate, then stout and coffee. Beat flour mixture into chocolate mixture in 2 additions just until incorporated.

Using clean dry beaters, beat egg whites and remaining 3 tablespoons sugar in another medium bowl until stiff but not dry. Fold 1/3 of egg whites into cake batter to lighten, then fold in remaining egg whites in 2 additions. Divide batter between prepared cake pans (about 3 cups for each); smooth tops.

Bake cakes until tester inserted into centers comes out clean, about 30 minutes. Transfer cakes to racks and cool in pans 20 minutes. Invert cakes onto racks; remove parchment paper and cool completely. DO AHEAD: Can be made 1 day ahead. Cover and store at room temperature.

For frosting:
Place chopped chocolate in medium heatproof bowl. Combine whipping cream and espresso powder in medium saucepan. Bring cream mixture to simmer over medium-high heat, whisking occasionally. Pour cream mixture over chopped chocolate; let stand 1 minute, then whisk until chocolate is melted and mixture is smooth. Chill chocolate frosting until slightly thickened and spreadable, stirring occasionally, about 2 hours (or for quick chilling, place frosting in freezer until thickened and spreadable, stirring occasionally, about 30 minutes).

Using serrated knife, trim rounded tops from both cake layers so that tops are flat. Place 1 cake layer, trimmed side up, on 9-inch-diameter tart pan bottom or cardboard round, then place on rack set over baking sheet. Drop 1 1/4 cups frosting by large spoonfuls over top of cake layer; spread frosting evenly to edges with offset spatula or butter knife. Top with second cake layer, trimmed side down. Spread remaining frosting evenly over top and sides of cake. DO AHEAD: Can be made up to 1 day ahead. Cover with cake dome and refrigerate. Let cake stand at room temperature at least 1 hour and up to 3 hours before serving.

Monday, February 28, 2011

I'm Done With Pies


That's it. I give up. I'm quitting pies. I've tried and I've tried, but I just don't like making pies. I've taken classes on pies, I've practiced making pies, and I still get frustrated. The effort to result ratio is way too high, plus the results are never certain until you cut into the pie.

This past weekend we celebrated two birthdays. For birthdays I am always happy to make a cake, tailored to the tastes of the birthday boy or girl. When asked what they wanted, both birthday boys, independent of each other, requested pie. Sigh.

To accomodate the tastes of all involved (ie, my husband hates peaches), I made two pies - one peach, one apple. I started out two days ahead of time because the pie dough has to be made then chilled. I carefully went through all the required steps, cutting in the butter till pea-sized (no shortening here, all good butter), carefully adding the ice water a bit at a time, chilling the dough disks, rolling out, filling, baking.

I suspect the baking time was the problem. The pies had different baking temperatures and times. And by the time I got the final pie in the oven it was bedtime. My sweet husband volunteered to stay up and babysit the pies. Then when I heard the timer beep I sat bolt upright in bed, remembering that I'd forgotten to turn the oven temp up for the second pie. I ran into the kitchen, cranked the temp, and set the timer for another 15 minutes, hoping for the best.

Well, if hopes were dollars, we'd all be millionaires, right?

The pies looked beautiful, resting on the counter. The birthday boys eyed them appreciatively as they arrived. But looks alone don't make a good pie. When we cut into them, we had.....sigh....pie soup. So disappointing. Everyone said it tasted fine, but this was a polite group. The final word came when I sent some leftover pie home with my sister. Her report? "The peaches were good, but the pie crust was...eh. Tasted flat, like you forgot the salt."


Now, understand that I really do appreciate honest feedback. I can't improve unless I get those kind of comments. But knowing that I'd served bland pie soup to a birthday boy was the final straw. If you want a birthday cake, call me. If you want pie, go to Marie Calendar's.

(My family isn't panicking about this edict. They're confident I'll forget all about it by Thanksgiving, and will take on three different kinds of pies, just to make everyone happy. We'll see.)

You might have already noticed the lack of pie pictures here today. I was so angry at the pies, I refused to take their pictures. So, instead, I give you the cake I made for Valentine's Day. Yes, the layers did slide a bit as I frosted it. Yes, it was a bit on the sweet side. But at least it wasn't a pie!

Raspberry Chocolate Cake
- adapted from Taste of Home

3 cups sugar
2-3/4 cups all-purpose flour
1 cup baking cocoa
2 teaspoons baking soda
1-1/2 teaspoons salt
3/4 teaspoon baking powder
1-1/4 cups buttermilk
3/4 cup canola oil
3 teaspoons vanilla extract
3 eggs
1-1/2 cups strong brewed coffee, room temperature


FILLING:
3 tablespoons all-purpose flour
6 tablespoons milk
9 tablespoons butter, softened
3 cups confectioners' sugar
2 tablespoons raspberry liqueur
1/4 teaspoon salt
2 drops red food coloring, optional (I didn't use it)
4 tablespoons seedless raspberry jam, melted


FROSTING:
1 package (8 ounces) cold cream cheese
1/3 cup butter, softened
1/2 cup baking cocoa
1 tablespoon raspberry liqueur
4 cups confectioners' sugar


1- Butter three 9-inch round cake pans. Line the bottoms with parchment paper rounds. Butter the parchment paper. Dust the pans with baking cocoa. Preheat the oven to 350 deg. F with a rack in the center of the oven.

2- In a large mixing bowl, combine the sugar, flour, baking cocoa, baking soda, salt, and baking powder.

2- In a separate bowl combine the buttermilk, oil, and vanilla. Add this mixture to the flour mixture.

3- Add the eggs, one at a time, beating well after each addition. Beat for 2 minutes. Gradually add the cooled coffee (the batter will be thin.)

4- Pour batter into prepared pans. Bake at 350° for 35-40 minutes or until a toothpick inserted near the center comes out clean. Cool for 10 minutes in the pans before removing to wire racks to cool completely. Peel off and discard the parchment paper.

5- For filling, in a small saucepan, whisk together flour and milk until smooth. Cook over medium heat for 1 minute or until thickened, stirring constantly. Remove from the heat and let stand until cool.

6- In a large bowl, cream butter until light and fluffy. Gradually add confectioners’ sugar and mix well. Gradually add cooled milk mixture; beat for 4 minutes or until light and fluffy. (It will look odd, but will eventually come together). Beat in liqueur, salt and food coloring if desired.

7- If the cake layers have domed, using a long, serrated knife, level the tops. Place one layer on a serving plate; spread with about 2 tablespoons jam. Spread one of the remaining layers with the remaining jam. Let stand for 30 minutes.

8 - Spread 1/2 cup filling over cake on the plate to within 1/4 in. of edges. Top with jam-covered layer, then spread with remaining filling. Top with remaining cake layer.

9- In a large bowl, beat cream cheese and butter until smooth. Add in cocoa and liqueur. Gradually beat in confectioners’ sugar until light and fluffy. Frost top and sides of cake.

(If at any point the cake starts sliding around, pop it in the refrigerator to firm up the filling.)

Store in the refrigerator.

Friday, February 18, 2011

Gone But Not Totally Forgotten

There was a headline in the news today about a graveyard that had bodies stacked up 8 deep in the graves. There was zero organization, so that people would not be able to track down the remains of their loved ones. Sad.

Reading that, I was reminded of the folder on my computer that's labelled "Blog Photos." Although I try to have neatly labelled folders and a list of items to post, more often than not, the photos languish in limbo until I unearth them months (years?) later and say, "What was that??? And why did I think I would ever post that?" Or if I'm really desperate for material to post, "What was that and where can I find the recipe to post it. And is there any way to make those pictures resemble something edible?"

Here is a case in point. I don't even remember making this cake. It looks good, though, doesn't it? I can't tell if I put cocoa in the whipped cream, or maybe folded some pudding in there to make it kind of like a mousse. Did I bake that cake in a half-sheet pan, or two 9x13's? I don't know.


And why were there pictures of pudding in the same folder? Oh, light begins to dawn. I was making a chocolate trifle with the leftover cake. Cake, pudding, whipped cream. See? But still no recipe.

Well, you're all big boys and girls out there. If this calls to you, I'm sure you can figure it out yourself. And then post the recipe. Because I'd like to make it again, and I'm clueless.

Friday, January 28, 2011

High Maintenance By Choice


I think I was one of the last people on the planet to see the movie When Harry Met Sally. I didn't see it in theaters. I didn't rush to rent it when it came out on video. I didn't even request it from the library. I think I taped it when it aired late night on TV. And then I laughed. A lot. Because I finally got the joke.

Several years ago, when my sister got married, she had a lovely chocolate wedding cake, with a large tureen of chocolate sauce on the side. Not knowing I hadn't seen the movie, she didn't understand why it didn't make me laugh. In case you've never seen the movie, with the scene of Meg Ryan ordering a chef salad and pie in a restaurant, the sauce on the side signified that my sister was high maintenance.

In my own way, I'm high maintenance, too. I order my salad with the blue cheese on the side. It makes me gag, but my husband loves it. I bring my own hot water along because I use filtered water and the nasty chlorine taste of tap water spoils my tea. If the toast is brown at all, it's overdone. And don't even get me started on bad cookies- I can't bear to waste the calories on yucky baked goods.


Those are all matters of taste, though. There are some people who are high maintenance and just can't help it. Allergies and medical conditions make it necessary for them to politely, sometimes apologetically, ask for special treatment. One of my favorite people to bake for, my chiropractor, is one such person. He's on a restricted diet and can't have gluten. Does that mean that he's a second class citizen, restricted to nasty, cardboardy baked goods? Not if I can help it!

I wanted to try to make a gluten-free version of a cupcake and since he's a huge peanut butter fan, I remade a recipe from Cupcakes to fit the bill. I substituted Bob's Red Mill Gluten-free Flour for the all-purpose flour. I hadn't worked with it before and was surprised at how different the batter tasted. It was strongly bean-flavored and I was afraid the whole batch would have to go into the garbage can. Surprisingly, though, baking dissipated the bean flavor, and any that lingered was covered up by the delicious peanut butter frosting. All in all, I would call them a success.

Sadly, though, I can't make them again for the good doctor. He's been put on a no yeast, no sugar regimen. Sigh. If you have a yummy recipe that's gluten, yeast, dairy, and sugar-free, let me know. Because otherwise he's on his own!

Gluten-free Peanut Butter Cookie Cupcakes
- adapted from Martha Stewart's Cupcakes

for the cupcakes:
1-3/4 cups Bob's Redmill Gluten-free Flour
1/4 tsp baking soda
3/4 tsp baking powder
1/2 tsp salt
3/4 tsp xantham gum
3/4 cup (1-1/2 sticks) unsalted butter, room temperature
1-1/3 cups granulated sugar
2/3 cup natural creamy peanut butter
3 large eggs
1/2 tsp pure vanilla extract
1/2 cup sour cream


for the frosting:
8 oz cream cheese, at room temperature
1 cup confectioner's sugar, sifted
2 Tbsp unsalted butter, at room temperature
1 cup creamy peanut butter


1- Preheat oven to 375 deg. F. Line standard muffin tins with paper liners (about 20).

2- Whisk together the flour, baking soda, baking powder, salt, and xantham gum.

3- With an electric mixer on medium-high speed, cream butter and granulated sugar until pale and fluffy. Reduce speed to low. Beat in peanut butter until combined. Add eggs, one at a time, beating until each is incorporated, scraping down sides of bowl as needed. Beat in vanilla. Add flour mixture, and mix until just combined. Beat in sour cream.

4- Fill each lined cup about 2/3 full. Bake until pale golden and a cake tester inserted in center comes out clean, about 13 minutes. Transfer the pan to a wire rack to cool completely before removing the cupcakes.

5- With a mixer on medium-high speed, beat the cream cheese, confectioners' sugar, and butter until pale and fluffy. Stir in peanut butter by hand.

6- Spread 1 to 2 Tbsp frosting onto each cupcake. Refrigerate until frosting is firm, about 10 minutes. Using a fork dipped in confectioners' sugar, make a crosshatch pattern in the top of the frosting.

Store cupcakes in the refrigerator in an airtight container for up to 2 days. Bring to room temperature before serving.

Monday, November 1, 2010

I Love Cakes and Giveaways!

I love reading a fabulous book with engaging characters, believable settings, and engrossing story lines. Even better is finding out that the book is the first in a series, knowing there are many hours of reading pleasure ahead.

That's how I felt when a friend introduced me to At Home In Mitford, by Jan Karon. The tale of a small town priest and how he got a dog, and discovered he had diabetes, and was introduced to a beautiful new neighbor, and....I know, it sounds pretty dull when I say it. But in the hands of Jan Karon, it is a page-turner. As you read, you can't wait to find out what happens next to the characters that you come to love.

I was with a group of women and we were discussing what books we'd recently read. Most of them were Oprah picks, fairly gritty and grim. Then one woman mentioned the Mitford books and a wave, like a sigh of happiness went around the room. Once woman summed it up best - "Reading the Mitford books is like putting on a pair of soft, flannel pajamas and fuzzy slippers."

When I was approached by the publisher, asking if I'd like to do a blog giveaway of the new paperback edition of the Mitford cookbook, I naturally jumped for joy and shouted, "Yes, yes!" That was a waste of time, since they were asking by email, but I had to do it anyway, because I was so excited.


The cookbook is wonderful. Besides giving full recipes for comestibles that are mentioned in the books, there are quotes, book excerpts, charming illustrations, and kitchen tips. This must be why it's called Jan Karon's Mitford Cookbook & Kitchen Reader. You'll have plenty to read while you're roasting a chicken, baking Deep Dish Blackberry Pie, or cooling a Rhubarb Tart. Plus you can learn about how to season a cast-iron pan, how to keep strawberries fresh for ten days, and how to take starch build-up off an iron. And how can you help but love a cookbook that has four different biscuit recipes?

It was easy choosing which recipe to make for this post. The signature dish of Esther Bolick was her Orange Marmalade Cake. It was an easy win in any baking competition, a sure fire fund-raiser at a bake sale, and the recipe was jealously guarded.


In the cookbook Jan Karon reveals that at every speaking engagement, she'd get requests for the recipe. People wrote to her begging for the recipe. The problem was that there was no recipe. The cake was a work of fiction!

Finally, Scott Peacock, a well-known chef, was commissioned to create a recipe in keeping with the fame of the cake. And boy, did he get it right. The cake is amazingly moist, flavorful, and deliciously rich without being heavy. If you make this cake, you might well become known as the premiere cake baker in your town!


Perhaps because of my exuberance, the publishers sent me not just the cookbook, but also the newest hardback in the series, In the Company of Others, which takes place not in Mitford, but in Ireland. So I have not one, but two giveaways! To enter to win, leave a comment with either "cookbook" or "In The Company of Others" in your comments. You can enter for both, but they need to be separate entries. The contest is open only to the US or Canada.

Esther's Orange Marmalade Cake
- from Jan Karon's Mitford Cookbook & Kitchen Reader

For the cake:
1 cup unsalted butter, softened, more for dusting the pans
3-1/4 cups cake flour, more for dusting the pans
1 Tbsp baking powder
1 tsp salt
2-2/3 cups granulated sugar
5 large eggs, at room temperature
4 large egg yolks, at room temperature
2/3 cup vegetable oil
1 Tbsp grated orange zest*
2 tsp vanilla extract
1 cup buttermilk, at room temperature


For the orange syrup:
1 cup freshly squeezed orange juice
1/2 cup granulate sugar


For the filling:
1 (12 oz) jar orange marmalade

For the frosting:
1 cup heavy cream, chilled
4 Tbsp granulated sugar
1 cup sour cream, chilled


( *Note: I used 2 organic Valencia oranges and that yielded enough zest and juice for the cake)

1- Preheat the oven to 350 deg. F. Lightly butter three 9-inch round cake pans, line them with parchment paper, then lightly butter and flour the paper, shaking out any excess.

2- Sift the flour, baking powder, and salt into a large bowl. Sift a second time into another bowl. In the bowl of an electric mixer, beat the butter on medium speed until light in color, about 4 minutes. Add the 2-2/3 cups sugar in a steady stream with the mixer running. Beat until light and fluffy about 4 minutes. Add the eggs and yolks, one at a time, beating well after each addition. Be sure to stop at least once to scrape down the batter from the sides of the bowl. After all of the eggs have been added, continue to beat on medium speed for 2 more minutes. With the mixer on low speed, add the oil and beat for 1 minute.

3- In a small bowl combine the orange zest, vanilla, and buttermilk. Using a rubber spatula, fold in half of the dry ingredients. Scrape down the sides of the bowl and add half of the buttermilk mixture. Fold in the remaining dry ingredients, scrape down the sides, and add the remaining buttermillk.

4- Pour the batter among the prepared pans, smooth the surface, rap each pan on the counter to expel any air pockets or bubbles, then place in the oven. Bake for 30 to 35 minutes, or until a toothpick inserted into the center comes out clean. Let the cakes cool in the pans on racks for 20 minutes.

5- In a small bowl stir together the orange juice and 1/4 cup sugar until the sugar is dissolved. While the cakes are still in the cake pans, use a toothpick or skewer to poke holes at 1/2-inch intervals in the cake layers. Spoon the syrup over each layer, allowing the syrup to be completely absorbed before adding the remainder. Let the layers cool completely in the pans.

6- Heat the marmalade in a small saucepan over medium heat until just melted. Let cool for 5 minutes.

7- In a chilled mixing bowl using the wire whisk attachment, whip the heavy cream with the 4 Tbsp sugar until stiff peaks form. Add the sour cream, a little at a time, and whisk until the mixture is a spreadable consistency.

8- Invert one of the cake layers on a cake plate and carefully peel off the parchment. Spread one--third of the marmalade over the top, smoothing it into an even layer. Invert the second layer on top of the first, peel off the parchment, and spoon another third of the marmalade on top. Place the third cake layer on top, remove the parchment, and spoon the remaining marmalade onto the center of it, leaving a 1-1/4 inch border around the edges. Frost the sides and the top border with the frosting, leaving the marmalade on top of the cake exposed. Or, if your prefer, frost the entire cake first, adding the marmalade as a garnish on top. Chill for at least 2 hours before serving.