Showing posts with label snack. Show all posts

Tuesday, March 5, 2013

Snack Time

There are a lot of things that I did with my older kids that I shudder about now, particularly what I fed them. Besides always (and I mean ALWAYS) having the cookie jar full, and making plenty of homemade cakes, pies, and breads, I also succumbed to the pleas for snack food from the grocery store.  I bought Otter Pops, Twinkies, and Frosted Flakes. Particular favorites were chips, gummy candies, and granola bars. (I felt pretty righteous about the granola bars. Until I read the labels.)

Now that we're doing the gut-healing GAPS diet, all of those snack choices are out the window. My cookie jar is in storage, as is the bread machine, and I'd  gnaw my left hand off at the wrist rather than buy candy to feed my son. So, what do I do when my child is in a growth spurt and haunts the kitchen, cheeks sucked in to indicate imminent starvation? The question asked daily is "What can I eat?"

Fruit, while a fresh, whole food, isn't a snacking option right now. My son is still not able to handle sugars well. Adding just a bit to his diet negatively affects his behavior and cognitive abilities. We won't even talk about what happened when he ate his sister's homemade brown sugar/ honey facial scrub that was sitting on the counter. That was not a good day.

So when he asked for something besides eggs the other day, I asked if he'd like squash. A year ago if you'd asked him that, he would have screwed up his face to indicate repulsion, possibly feigning retching. This time he said in a cheerful voice, "Yes, please!"


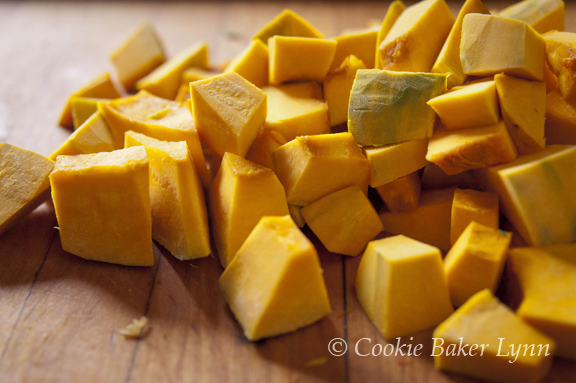
I had on hand a Kabucha squash. I'm very fond of them. They are sweet (unless you're comparing them to a Snicker's bar) and are great baked and in stir fries and soups.  You might need to go to an Asian market to find one; they are used in a lot of Asian dishes.


I cut it in half, vertically, scooped out the guts, cut it into slices, peeled the slices (this is optional. You can eat the skin, but if you have a family member with texture issues, I recommend not skipping this step.). Then I cut the slices into chunks.


I heated my large cast iron skilled over medium heat and added a generous amount of coconut oil. Truly generous, like a politician with taxpayers' money, about 3 Tbsp or more.  When a small piece of squash tossed in the pan made small bubbles come up around it (and if you you don't have enough oil to see bubbles, you don't have enough oil!), I added the rest of the squash and stirred it, coating all the pieces with oil. Then I took my cinnamon shaker and coated them so they looked like they'd taken a dirt bath in cinnamon. If you like sweet/ salty as a combination, toss some salt in there, too.

Stir the chunks every couple of minutes, adding more cinnamon and oil as necessary.


When the squash is fork tender, scoop it into a bowl and add a BIG pat of butter. Not just any butter. Beautiful butter from grass-fed cows. Which is now available at Whole Foods, Trader Joe's, and Costco under the Kerrygold label. Woo hoo! Butter is amazing stuff and makes everything taste better. Besides all it's other healthy properties, it provides satiety, that feeling of fullness. Just what a hungry boy needs!

Tuesday, July 17, 2012

Gluten-Free Glut


My daughter and I were recently having a discussion about how the Paleo diet seemed to be the new, trendy thing. She commented that although Paleo is quite popular, she didn't think it would ever become huge. The reason? You can't market it.

If you look at food trends and fads of the past, they were almost always because someone was selling something. One day a study shows that salt will kill you and the next day there are a gazillion "low sodium" products on the grocery store shelves. The next week a headline reads that Fats Make You Fat, and by the following week, you can barely squeeze your grocery cart through the maze of low-fat packaged foods. I read that when the Adkins boom went bust, there were warehouses full of Adkins bars and shakes that didn't sell.

It's hard to market a way of eating that focuses on healthy meats and lots of fresh produce. If the whole point of the diet is to eschew processed foods, who's going to market it? Aside from cookbooks, blenders, and dehydrators, there's not a lot for corporations to sell.

Another reason that Paleo won't become mainstream is the laziness factor. It is time-consuming to make all your own food from scratch. For ... Every ... Meal. No frozen waffles in the morning. No drive-through burgers for lunch or on the way home from work. No Costco lasagna to pull from the freezer because you don't have a clue what else to feed the family. Plus, a lot of things need planning ahead. Nuts take at least a day to soak and dehydrate. You might have a hankering for lacto-fermented sauerkraut or lemonade, but that's three days away! And my amazing lacto-fermented bean dip is almost a week in the making.

A current food trend that's very marketable is Gluten-Free. As a lot more people have become aware that they either have coeliac disease or that they just do a lot better without gluten, and as they talk about what a difference being gluten-free has made to their health, gluten-free products have proliferated like bunnies on a honeymoon. They're popping up everywhere!

The label Gluten-Free has become associated with "healthy living", so you see it on all kinds of products, even products that have never had gluten. Gluten-free soda, yogurt, and lollipops. Seriously. But does slapping a GF label on food really mean it's healthy?


As a baker, I've learned something in my experiments with gluten-free baking. If you're trying to recreate a product that normally contains gluten, you usually use a fair amount of starch, primarily tapioca starch, potato flour, or rice flour. In the body starches are quickly converted to sugar, and consistently spiking your blood sugar levels is hard on your body and can lead to insulin resistance. Ie, Not Healthy.

Besides not being pancreas friendly, a lot of gluten-free packaged foods  don't actually nourish you. Tapioca starch doesn't come loaded up with proteins, vitamins, minerals, and friendly fats like an egg or a handful of nuts does. Plus they come with preservatives and weird chemicals a normal person doesn't stock in their pantry.

So what's a health-loving consumer to do? Push back from the table and say, "No more gluten-free jello for me, Ma." Again, I repeat my mantra, READ LABELS. Check out whether it's a nutrient dense food that will give your body fuel to grow and repair itself, or if it's just a waste of calories that will unduly burden your pancreas, bloat your body, and make you feel wretched. And when in doubt, make it yourself. Your body will thank you. And once your kids go through the withdrawal, they'll thank you, too!


Real Food Gluten-Free Crackers (to put some crunch into a Paleo life)
 - adapted from The Gluten-Free Almond Flour Cookbook

3 cups almond meal
1-1/2 tsp sea salt
1 cup sesame seeds (preferably soaked and dehydrated)
2 Tbsp olive oil
2 egg whites, whipped till frothy

1- Preheat oven to 350 deg. F with racks in upper and lower thirds of the oven.  Cut 3 pieces of parchment paper to fit 2 large baking sheets.

2- In a large bowl, combine the almond meal, salt, and sesame seeds. In a medium bowl, whisk together the olive oil and egg whites. Stir the wet ingredients into the almond meal mixture until thoroughly combined.

3- Divide the dough into 2 pieces. Place 1 piece of dough between 2 sheets of the parchment paper and roll to 1/16-inch thickness. (Getting it really thin is the key to crispy crackers.) Transfer the dough (still between the papers) onto a baking sheet. Remove the top piece of parchment paper. Cut the dough into 2-inch squares with a knife or pizza cutter. Repeat with remaining dough.

4- Bake for 12-15 minutes, until lightly golden. Let the crackers cool on the baking sheets for 30 minutes, then serve. Store any extras in an airtight container.

Monday, June 27, 2011

Milk Gone Wild

Thank you so much to all of you who took the time to comment on my last post. It was very encouraging! I haven't abandoned the blog; I've just been busy with day camp at church and letting ideas percolate. I'm ready to hit you with my first hippie post!


The elementary school I attended was set up in an unusual way. Outside the old stone building was the standard playground with monkey bars, tetherball poles, and four-square lines painted on the cracked blacktop. There was also a large field area with a diamond for playing kickball (or my version, trip over the ball), and a track (on which one could barf up a lung running the 600). This area was separated from the school by a very busy 4 lane street.

I'm not sure which brilliant planner thought that was a good idea, but they avoided having to scrape little kids off the street by installing a tunnel under the street. On each side of the street was an entrance with doors that could be locked, stairs that descended to a dark, dank tunnel, and stairs that led to freedom on the other side. Well, relative freedom. The misery of sports awaited on one side and the purgatory of math and spelling tests waited on the other.

I digress.

The point was that the tunnel was a closed environment. And the worst thing imaginable was if a child, say one hurrying to run home on a Friday afternoon, dropped his or her milk carton in the tunnel. And it stayed there all weekend, leaking, and getting nasty. The first kids to use the tunnel on Monday morning were hit by a wave of stomach-turning putrid milk smell, and there was no escaping it. You had to hold your breath and run all the way across, hoping that no tender-tummied child added their morning bowl of Lucky Charms to the odor melange. Because if one did, they all did. And that smell would merit hazardous duty pay to the poor janitor who got to go down there to clean it up.

I've had that smell memory in my mind all these years and it was with amazement that I learned that milk doesn't necessarily go bad when it's left unrefrigerated. It's only pasteurized milk that putrifies. Raw milk, milk which hasn't been pasteurized, will sour, but it's not the same stomach-heaving smell that I associate with kick ball.


My daughter, queen of nutrition research, started telling me about raw milk and it's benefits last year. She told me about how pastuerized milk is not good for you, and convinced me to try raw milk. I was initially skeptical. Isn't pasteurization a good thing, done to protect milk drinkers? Won't drinking raw milk make me sick? After some research and a little logical thinking, I realized that people have been drinking raw milk a lot longer than pasteurization has been around. If raw milk was deadly, people would have stopped drinking milk altogether.

(Caveat - to be healthful, raw milk must come from grass-fed cows that are healthy. If you drink the milk that is destined for pasteurization before it's pasteurized, that's very risky. Much lower standards of hygiene are called for in non-raw milk dairy cows, and those cows can have antibiotics, growth hormones, or pus in their milk.)

There is friendly bacteria in raw milk which is really important for gut health, and those friendly bacteria do some amazing things. When raw milk has soured, you can leave it at room temperature and something magic happens. The milk separates into two layers, one semi-solid, and one clearish. The clearish layer is whey and it is chock-full of fabulous bacteria which can be used to lacto-ferment.

What is lacto-fermenting? Basically it is letting the friendly bacteria convert the starches and sugars in food into lactic acid. This preserves the food and makes it tremendously beneficial to your gut health, as well. I have previously lacto-fermented, even though I didn't know I was doing it. Yogurt is lacto-fermented milk!

My first attempt at lacto-fermenting with my raw milk whey was this fabulous bean dip. This is one of the times I long for the advent of scratch and sniff technology for computer monitors. Pictures of bean dip just don't adequately convey the full tangy, garlicky allure of this dip. One scoop of it on your favorite chip or veggie and you'll quickly come back for more. You'll just have to trust me and try it.

If you are not fortunate enough to live in a state where raw milk is available (don't get me started on a rant about why our government thinks that staging raids on Amish dairy farmers who sell raw milk is a priority for our tax dollars!), you can use the liquid that separates from yogurt as your fermenting agent.


Lacto-Fermented Bean Dip
- from Nourishing Traditions by Sally Fallon

2 generous cups black beans (you can also use kidney, pinto, or white beans)
warm, filtered water (Chlorinated tap water will kill your helpful bacteria)
2 Tbsp whey or lemon juice(not necessary for the other types of beans)
1 onion, peeled and coarsely chopped
4-6 cloves garlic
1 Tbsp sea salt
4 Tbsp whey


1- In a large bowl, cover beans with warm water. The water level should be well above the beans, as the beans will absorb water and swell. Stir in the whey or lemon juice, and leave in a warm place 12-24 hours.

2- Drain, rinse, place in a large pot and add water to cover the beans. Bring to a boil and skim off the foam. Reduce heat and simmer, covered, for 4-8 hours. Check occasionally and add more water as necessary. The beans are done when they will mash easily.

3- With a slotted spoon, scoop out and measure 3 cups of the beans. (Save the rest of the beans in liquid, covered, in the refrigerator and I'll tell you next post an idea on how to use them.)

4- Place the onion and garlic into a food processor. Process until well chopped. Add the 3 cups cooked beans, sea salt, and whey. Process until smooth. Place the bean purée into a 1 quart glass jar, leaving at least 1-inch of headroom at the top. If you have extra bean purée, put it into a smaller glass jar, leaving at least 1-inch headroom.

5- Cover tightly with a lid and leave at room temperature for about 3 days. If your room temperature is on the coolish side, place the jar in a warm spot. I have under-cupboard lights which make an ideal warming spot inside the cupboard.

6- Check the jar daily. At first there will be no signs of activity. After 2 to 3 days, you should start to see little pockets forming in the purée. As the pockets grow, the level of the dip rises. If it starts rising dramatically, it can force liquid out of the lid, so keep an eye on it and scoop some out to another jar, if you need to.


7- Once the dip has fermented, transfer it to the refrigerator or cool storage. Enjoy with your favorite chips or veggies, spread it inside a taco, or eat it by the spoonful!

Wednesday, November 17, 2010

Toddler Treats


Everyone knows that when you're pregnant what you eat matters. Every bite should count to make sure you're getting the proper nutrition your baby needs, and that you're not feeding your growing baby nasty, toxic stuff. Even after they're born babies aren't fully finished developing and need special food developed just for their tender digestive systems that augments their brain development and builds their immune systems (it's called breastmilk, in case you were wondering).


So why is it that after they start eating solids, common wisdom says to load up their little bodies with.....umm..... how can I phrase this delicately?.....poop? Ok, that wasn't that delicate, but you get my drift. If you look at the "toddler foods" section in a grocery store and start reading labels, it's appalling. It becomes something of a game to see if you can find anything that doesn't have High Fructose Corn Syrup. Or hydrogenated fats. Really? This is what we're supposed to feed that precious miracle that took so long to grow?


Fortunately, a baker, like a three year old, can "do it myself!" So as the first in an ongoing effort to "redo" classic kids foods, preparing for when my granddaughter comes over to Gramma's for a snack, here's my take on graham crackers. They have whole grain nutrition and taste great! Perfect food for my little sweetie to suck on, gum up, crumble on the carpet, feed to the hamster, and fill up the cracks of her carseat with.

If the sugar amount is too much for you, you can play with that. But because sugar is considered a liquid in baking, be aware that reducing the sugar will affect the texture and consistency of your crackers. To add a little more kid appeal to them, I used my zoo animal cutters, but the dough was kind of sticky for that. Next time, I'll just roll them out and cut them in squares like the ones at the store.


Gramma's Graham Crackers
- adapted from King Arthur Flour Whole Grain Baking

1 cup (4 oz) whole wheat flour
1/2 cup (2 oz) whole barley flour
1/2 cup (2 oz) graham flour
1/4 cup (1-7/8 oz) packed light or dark brown sugar
2 Tbsp granulated sugar
1 tsp baking powder
1 tsp ground cinnamon
1/2 tsp salt
1/2 cup ( 1 stick) unsalted butter, chilled
1/4 cup (2 oz) milk
2 Tbsp honey
Cinnamon-sugar (optional)


1- Combine flours, sugars, baking powder, cinnamon, and salt in a mixing bowl or bowl of a food processor. Cut or process the chilled butter into the dry ingredients until very crumbly.

2- Add the milk and honey and combine until you have a stiff dough - you may need to add a bit more or less milk.

3- Knead the dough lightly till it's smooth, cut it into 2 pieces and flatten each into a rectangle. Wrap each in plastic wrap and chill until firm, about 1 hour, or overnight.

4- Preheat the oven to 350 deg. F. Line baking sheets with parchment paper.

5- Working with one piece of dough at a time, turn it out onto a floured surface and roll it to 1/16th-inch thickness. The thinner you roll it, the crisper the cracker. If you prefer, you can roll your dough out directly onto the parchment paper, to save the step of transferring.

6- When you're done rolling, trim the edges so you have a 9 x 12-inch rectangle. Set the scraps from both pieces aside and roll them for a third rectangle.

7- Cut the dough into 3-inch squares, then cut each square in half. Prick the crackers several times with a fork and place the crackers on the prepared baking sheet. If you rolled onto the parchment paper, this step is done. If you like, sprinkle the crackers with the optional cinnamon-sugar.

8- Bake the crackers until they're lightly browned, 12 to 15 minutes. They'll brown more quickly if they have cinnamon-sugar on top. Remove the crackers from the oven, transfer to a rack, and let cool completely before serving.

Sunday, January 31, 2010

Healthy Changes


January was the month for starting fresh, making good choices, and committing to taking care of yourself. I'm all for that. But it's always easier to make the resolution than to keep it up. February is the month of follow-through for the resolutions, and that can be a lot tougher.

I have many healthy habits already in place (exercising, cutting back on diet Coke, eating more veggies), but I know I have room for improvement. Certainly, when Mr. White Flour and Mrs. White Sugar are your best friends, there is room for improvement.

Now, don't get alarmed! I'm not swearing off my best friends. We've shared so much quality time together, I know we won't be strangers. But I can make better choices when I'm reaching for a quick something on my way out the door. Something that won't spike my blood sugar level and leave me lethargic in an hour. Something that doesn't contain enough preservatives to keep it "shelf fresh" for two years. And something that gives my body the nutrients it needs to be healthy.

Meet my new friend, the Power Bar. No, not the kind you buy at the store in a package. These are homemade, customized, and need to be refrigerated because they have no preservatives (but I'd feel OK keeping them out for the same length of time that you'd have a peanut butter sandwich unrefrigerated.) With all the antioxidant berries in them, I think I'll call them Berry Powerful Bars. Crammed full of healthy nuts, nut oils, seeds, rolled oats, and dried fruit, these bars will give you the power to cruise through your day. Plus they're super easy to make. You could even have your kids help you. But if you do that, you know they'll want some, and then there's less for you. Oh well, I guess if you want your kids to have healthy snacks, too....

Berry Powerful Bars
- adapted from Eating Well

1 cup old-fashioned rolled oats
1/4 cup slivered almonds
1/4 cup sunflower seeds
1 tablespoon flaxseeds, preferably golden
1 tablespoon sesame seeds
1 cup unsweetened whole-grain puffed cereal (see Note)
1 cup assorted dried fruits (blueberries, cranberries, cherries, golden raisins)
1/4 cup creamy almond butter
1/4 cup turbinado sugar
1/4 cup honey
1/2 teaspoon vanilla extract
1/8 teaspoon salt


1- Preheat oven to 350°F. Coat an 8-inch-square pan with cooking spray.

2- Spread oats, almonds, sunflower seeds, flaxseeds and sesame seeds on a large, rimmed baking sheet. Bake until the oats are lightly toasted and the nuts are fragrant, shaking the pan halfway through, about 10 minutes. Transfer to a large bowl. Add cereal and dried fruit; toss to combine.

3-Combine almond butter, sugar, honey, vanilla and salt in a small saucepan. Heat over medium-low, stirring frequently, until the mixture bubbles lightly, 2 to 5 minutes.

4- Immediately pour the almond butter mixture over the dry ingredients and mix with a spoon or spatula until no dry spots remain. Transfer to the prepared pan. Using a silicone spatula, press the mixture down firmly to make an even layer (wait until the mixture cools slightly if necessary). Refrigerate until firm, about 30 minutes; cut into 8 bars.

Note: I used Kashi Go Lean, which says on the front that it has "crunchy fiber twigs." Really? What marketing genius thought that was a selling point for a cereal? Have you ever gone to the store, hoping to find some crunchy fiber twigs for breakfast? I hope not.

Another note: All of the ingredients for this I purchased at Trader Joe's. Not that I'm paid to tell you that, I just thought you might want to know that it's not that tough to get all of those items you might not have in your pantry.

Just one more note: If you work for Trader Joe's corporate office and want to pay me to tell people things like I just did, please feel free to contact me any time!

Friday, January 29, 2010

Poultritarian


My father used to be an avid hunter. Every fall he and his hunting buddies would don their vibrant orange vests and head off to the hills in hopes of bringing home a deer. On a good year (in my opinion), they would come home empty-handed. On a bad year (in my opinion), there would be a bloody carcass on the back porch to horrify me and my friends as the men skinned and butchered the deer.

I understand that it wasn't the thrill of the hunt that lured my father to the mountains every year. It was economic necessity. The single salary of a teacher doesn't stretch far for a family of 5 and having meat for a year laid up in the freezer was a godsend. It's just that I hated venison. I didn't like the taste or the texture and having for every meal made me like it even less. Venison steak, venison stew, venison sausage, venison kababs......you get my drift.

The deer glut in my youth perhaps contributed to my current aversion to red meat. It's nothing moral for me, I just don't really care for it. I am a proud poultritarian. Almost all the meat I cook with is either chicken or turkey, with the occasional piggy product thrown in for flavor.

My daughter loves beef jerky and asked if we could make some. Since I don't buy beef, I made my own version. Chicken jerky. Turkey jerky works really well, too. It's way cheaper than what's in the store (always a boon for tough economic times) and since I don't have to go hunt my own chickens, I consider it a win-win.

Chicken Jerky

1/4 cup liquid smoke
1-1/2 cups soy sauce
1/4 lb (1/2 cup + 1 Tbsp) brown sugar
Chicken or Turkey breasts, very thinly sliced


Mix the first three ingredients in a non-reactive bowl and let stand for 5 minutes. Add the thinly sliced meat and let stand for at least 10 minutes. Drain and place the strips in a food dehydrator. Dry at 240 degrees for at least 4 hours, until the meat is dry to touch, but still pliable. Thinner slices will dry faster than thicker ones, so check it and remove pieces as they are done so they don't become brittle.

Note: to make it easier to achieve thin slices, partially freeze the chicken breasts.