Showing posts with label bread. Show all posts

Sunday, January 15, 2012

What's New


It's strange how some arbitrary things become meaningful. Birthdays that end in zero have much more importance than the rest of the decade. Anniversaries that are divisible by 5 are held in higher esteem than the others. And buying a new calendar makes us feel that somehow there's a new start; everything's new, fresh, and open to reinvention.

One of the things I've been reinventing is our diet. I'm constantly tinkering to see what will help us all be our healthiest. This past Christmas we spent passing the flu around like a White Elephant gift being regifted over and over. We were sick of being sick! So my family didn't grumble too much when I informed them that we were going to be trying something new - going grain-free and sugar-free.

Shocked? I know, me too!

How's it going? Well, it's been interesting. The refrigerator has been fairly bare as I try to figure out what we can eat in place of what we used to eat. Snacks, treats, and meals are all impacted. Empty are the bread drawer and the cookie jar. This is a hardship for the family of the Cookie Baker and former Bread Baking Babe.

My husband's standard lunch is a sandwich and some sort of chips. Well, that's not working out. Take away the bread and chips and you're left with... well ... stuff piled on a plate.

I've figured out that the job of grains is to:

   1- Define portions. A taco is clearly one serving; remove the taco shells and you've just got a big taco salad.
   2- Provide transportation for the meat. Ever try to eat a big double decker hamburger with all the trimmings sans buns? Sloppy mess. Speaking of which, what's a Sloppy Joe with buns? Stew!
   3- Act as a filler. If you eat a bowl of rice with your stir fry, you only eat 1/4 as much of the stir fry, so it stretches further and is more economical.

Once of the hardest things to do without has been bread. No sandwiches. No toast. Nothing to sop up the egg yolk from the morning fried egg. :-(

I realized something had to give when we were at the grocery store and the bread aisle just about did us in. Rolls, loaves, wraps, pitas, and bagels. Ahhh, bagels.....  So I went home and searched one of my favorite sites for special dietary needs,  The Spunky Coconut. I found just what I was looking for - a bread that would be safe for out new diet. I had some pumpkin puree in the fridge leftover from a holiday flurry of pumpkin smoothies and whipped up a loaf.

I wish that I had taken a picture to share with you of my son's happy face when he saw there was bread he was allowed to have. We demolished the loaf in a day and he anxiously asked if I had any more pumpkin puree.

Pumpkin Bread
 - adapted from The Spunky Coconut


1 cup pumpkin puree
4 eggs at room temperature*
1/3 cup coconut sugar (which is low glycemic index)
3 Tbsp liquified coconut oil**
1/4 tsp vanilla creme liquid stevia
1/2 tsp sea salt
2 tsp cinnamon
2 tsp pumpkin pie spice
1/4 cup tapioca flour
1/2 cup coconut flour, sifted (don't skip the sifting!)
1/2 tsp baking soda
1/2 tsp baking powder
1/2 cup chopped walnuts
1/2 cup raisins

1- Preheat oven to 350 deg. F. Line the bottom of a loaf pan with parchment paper and grease the pan.

2- Place all of the ingredients into a large bowl. Beat with an electric mixer. (One advantage of baking gluten-free is that you don't have to worry about over-mixing and getting a tough product.)

3- Scoop the batter into the loaf pan, smoothing it to make an even loaf.

4- Bake for about 50 minutes. Remove from oven and let rest in pan for 5 minutes then remove from pan and allow to cool on a cooling rack.

Serve with butter or cream cheese.

*If the eggs are cold, it will cause the coconut oil to harden. To bring refrigerated eggs to room temperature, float them in a bowl of warm water for about 5 minutes.

** To liquify the coconut oil, spoon it into a small, heatproof bowl and set that in a larger bowl of very warm water.

Monday, October 10, 2011

The Three S's

Can you guess where I am?

Here's a clue.


Here's another clue.


Got it yet? How about this. It pretty much says it all.


Yup. I'm in Hawaii. Maui, to be specific. The sun, the sand, the surf. It's pretty fabulous. Especially knowing that back home people are breaking out their extra warm sweatshirts and snuggling up to warm mugs of tea. Here the tea is iced and we debate whether to turn on the AC or just let the ocean breeze blow through the screen doors.

We've gone snorkeling, boogie boarding, body surfing, swimming. And by we, I mean my husband and kids. I don't like getting my face wet. What? Don't look at me like that! You already knew I was weird. I anchor the beach towel and take pictures so that my daughter and husband can have something to post on Facebook.


I also excel in the shopping department. No vendor remains unvisited in my quest for Christmas presents and thank-you gifts. In case you're thinking there will be a hefty overweight bag fee at the airport, fear not, because I travel like a hippie.

I realize that most people, when on vacation, want to do as little in the kitchenette as possible. We're staying in a beautiful condo where everything is brand-new and the kitchen is gorgeous! (Contact information available on request). Knowing this, I menu planned in advance and brought along ingredients like a jar of honey, a baggie of salt, a baggie of yeast, a 5 lb. bag of King Arthur Whole Wheat Flour, and a 6 liter dough rising bucket. Yup. Hippie. I'm on vacation and I'm making my own bread, pizza crust, and hamburger rolls.


You might think that's a bit much for a vacation. Let me tell you about my hippie daughter. She and her husband and their daughter are here, too, but in a different part of the island. She started her packing and menu planning 3 months in advance. She fermented, dehydrated, and prepped food to take along, including a dehydrated scobie so she could make her own kombucha in paradise. She also carefully packed her daughter's cloth diapers (no diaper rash on vacation!), the Sweet Pea Baby and favorite blanket, her daughter's special eating time bowls and food coats, as well as coconut oil, olive oil, and spendy food supplements. Guess what happened.

The morning we were flying out my son-in-law was loading the bags into the back of the car, which was in the driveway, back hatch open. He put in the big suitcase, went in the house for another bag, heard a sound like a car door slamming, went outside with the second bag, and the first bag was gone. Someone had stopped, grabbed the suitcase, hopped into their El Camino, and sped off down the street. Seriously. Who steals a suitcase? What were they hoping for? Whatever they hoped for, I'm sure they were tremendously disappointed.

Every single thing in that suitcase was expensive, either in terms of the time spent to make it, or the cost to replace, but not one thing had street value. My chin quivers when I think of some landfill being gifted with a whole load of lovely organic cotton double-thick diapers.

But, thankfully, my son-in-law is awesome. He shrugged and said, "They didn't take anything that can't be replaced. We'll go shopping in Hawaii." And with the wonderful attitude, the trip went on, it wasn't ruined, and we're all having a grand time.


I don't have pics of the food that I made. We were too busy enjoying it to stop and take pics. Here's the dough recipe, though, in case you travel like a hippie, too, and want to have your own healthy bread on the go. I'll bet you could even enjoy it at home.

100% Whole Wheat Sandwich Bread
adapted from Artisan Bread in Five Minutes a Day

Makes two to three 1.5 lb loaves

1 1/2 c lukewarm water
1 1/2 c lukewarm milk (I used coconut milk)
1 1/2 Tbsp granulated yeast (1 1/2 packets)
1 Tbsp plus 1 tsp salt
1/2 c honey
5 Tbsp neutral-flavored oil (I used coconut oil)
6 2/3 c whole wheat flour


1. Mix the yeast salt, honey, and oil with the lukewarm water and milk in a 5-quart bowl or a lidded, not airtight food container.

2. Using a spoon, food processor with dough attachment, or a stand mixer, mix in the whole wheat flour without kneading the mixture.

3. Cover the mixture, and allow it to rest at room temperature until the dough rises and collapses (or flatten on top); approximately 2 to 3 hours.

4. Although the dough can be used after it has risen and collapsed, the authors state that the mixture is easier to handle when it is cold. Refrigerate it in a lidded, not airtight container and use over the next 5 days. After the five days, put the dough in the freezer for up to 1 month.

5. On baking day, lightly grease a 9x4x3-inch nonstick loaf pan. Using wet hands, scoop out a 1 1/2-pound (cantaloupe-size) handful of dough. With wet hands, quickly shape the dough into a ball by stretching the surface of the dough around to the bottom on all four sides, rotating the ball a quarter-turn as you go.

6. Drop the loaf into the prepared pan filling it slightly more than half-full.

7. Allow the dough to rest for 1 hour and 40 minutes. Flour and slash the top of the loaf using the tip of a serrated bread knife.

8. Preheat the oven to 350 degrees F (180 degrees C) for 5 minutes, if not using a stone; otherwise, preheat the oven 20 minutes before baking time.

9. Place the loaf on a rack near the center of the oven. Pour 1 cup of hot tap water into the broiler tray and quickly close the oven door. Bake the loaf for 50 to 60 minutes or until deeply browned and firm.

10. Allow to cool completely before slicing in order to cut reasonable sandwich slices.

Saturday, August 6, 2011

Cooking Camp - The Sibling Edition


The original invitees to Cooking Camp were Serena, Tall Friend (TF) and Little Friend (LF). The plan was to meet every Friday through the summer and have them learn new kitchen skills and techniques. That plan was derailed when LF had to go out of town for 3 weeks. So the second Cooking Camp was smaller. Which actually was just as well because it involved lots of caffeine. We made coffee ice cream and iced coffee, and the three of them amped up on caffeine might have been more than my kitchen could handle.


This week, to add a little zip to the mixture, we invited the younger siblings. TF's little sister, SF (Short Friend), and Serena's little brother, Samuel, (Samuel) made guest appearances. They were both thrilled to be invited to be part of the cool kid crowd. They were also thrilled that we were making cinnamon rolls. And not just any cinnamon rolls, but monster cinnamon rolls.


We talked about yeast and how to wake it up, we covered gluten and a bit about the different types of flours (why you don't use bread flour for cakes, and vice versa), and they also learned a super cool trick for cutting rolls with dental floss. (Slide a length of floss under the roll, bring the ends of the floss together and cross them to pinch off a perfect circle.)


Also, they learned the importance of not interrupting the teacher when she's counting out loud the number of cups of flour being added to the dough. And the importance of resisting the temptation the chime in with random numbers to "help" the counting. And that "the magic of television" works much better if the dough made the previous day, rising in the refrigerator overnight, gets pulled out an hour ahead of time to come to room temperature. (Oops! Cold dough is really difficult to roll out.)


Then while the rolls baked, they got in a game of Calvin Ball Croquet. So, another successful Cooking Camp in the bag!

Monster Cinnamon Rolls
- makes 24 generous rolls

Dough:
3/4 cup (1-1/2 sticks) unsalted butter
1 cup milk
3/4 cup plus 1 tsp sugar
1-1/4 tsp salt
7-1/2 tsp active dry yeast
1/2 cup warm water
5 large eggs
8-1/2 - 9-1/2 cups all-purpose flour

Filling:
1 cup sugar
1/2 c. butter
3 Tbsp ground cinnamon

Icing:
2 cup powdered sugar
1 tsp vanilla extract
enough milk to make glue-like consistency, about 2 Tbsp.


1- For the dough, heat the butter with the milk, 3/4 cup of the sugar, and the salt in a small saucepan until the butter is melted. Set aside to cool. (If you are using raw milk, heat till small bubbles appear around the edge of the pan. Scalding the milk destroys the enzymes that interfere with the yeast growth.)

2- In the mixing bowl of a stand mixer, sprinkle the yeast over the warm water, add the remaining tsp sugar, stir, and set aside for 10 minutes, until the mixture is bubbly. Add the lukewarm milk mixture and the eggs and beat until well combined.

3- Add the flour a cup at a time, stirring and using enough flour to form a stiff dough. Turn out on a floured board and knead until smooth and satiny, approximately 10 min. (or place in the bowl of an electric mixer and knead with a dough hook until the dough cleans the sides of the bowl, approximately 5 min. I have a 5 quart KitchenAid and the dough burbles up and wraps around the dough hook, so I need to scrape it down frequently).

4- Place the dough in a very large buttered bowl, turn to butter the top, and allow to rise, covered loosely with a kitchen towel, in a warm place until doubled in bulk, approximately 1 hour.

5- When the dough has doubled, punch it down and divide it in half. Roll one half out to a large rectangle, about 12" x 24".

6- Butter two 9 x 13 baking pans. For the filling, melt the butter. Spread 1/2 the butter evenly over the surface of the dough. Combine the sugar and cinnamon and sprinkle 1/2 of it evenly over the melted butter. Roll up the dough lengthwise, pinching the dough together to form a seam when rolled. Cut the dough log in quarters, and then each quarter in thirds. If you are particular about pretty rolls, trim off the ends. Place the rolls in a buttered 9 x 13" baking pan. Repeat with the other half of the dough. Cover the rolls loosely with a kitchen towel and allow to rise until doubled in bulk, about 1 hour.

7- Preheat oven to 350 degrees. Bake the rolls for about 20-30 minutes or until puffed and browned. Mix the icing ingredients and drizzle over the rolls. Allow to cool to room temperature on racks (if you can).

If you prefer a cream cheese frosting:

Combine 1/2 lb. cream cheese, softened with 1/4 cup whipping cream and 1 tsp vanilla extract until smooth. Add 3-4 cups confectioner's sugar, sifted, blending until smooth and soft, not stiff.

Optional:

If you want to "pimp up" your rolls, you can throw raisins, chopped nuts, coconut, or your favorite exotic ingredient into the filling.

Saturday, May 21, 2011

Rethinking Banana Bread


It's easy to see how people get locked into their habits. What starts out as "this is the way I do it" becomes "this is the right way to do it" which ossifies into "this is the only way to do it."

When I was the new mother of an infant, a lot of the advice that my mother and mother-in-law gave me drove me nuts. They thought they knew the best way to parent because they'd been parents. But what did they know about the best way to put the baby in the car seat? They didn't even have car seats when they were new mothers. Or seat belts!

Why would I need advice on how to heat a bottle at night? Or that helpful tip about putting bourbon in the bottle to help the baby sleep at night? Well, since I was nursing, the bottle question didn't apply. And putting bourbon in the mommy would help mommy sleep, but feeding it to a baby? Really???

While babies and their needs stay the same, ideas, technology, and invention change the way some things are done. It wasn't until after my second child was out of the car seat that someone saw that babies fall asleep in the car and invented a car seat that could easily come out of the car, letting the baby stay asleep. Genius!


I try to keep this paradigm of change in mind as I watch my daughter parent. And she is doing things differently than I did. Bucking the standard "wisdom" that you should start a baby on rice cereal at 6 months (you shouldn't), she's doing baby-led weaning. She puts her daughter (now 10 months old) in the Bumpo chair (another brilliant invention) at the dinner table, puts on her eating apron, and sets a variety of food on the tray in front of her. Real food. Stalks of cooked asparagus, sauteed onions, and strawberries are some of her favorites. This method is perfect for someone as strong-willed as my granddaughter. She's in control of what she eats and she gets to pick from a healthy array of choices. She's much happier than if someone tried to shovel pureed ick into her mouth with a spoon.

I know that I get in ruts in the kitchen of doing things the same way because that's the way I've always done it, baking things with the same recipe because that's what I'm familiar and comfortable with. But it's good to try new things because life does change.

Recently King Arthur Flour featured this banana bread recipe on their website, touting it as a customer favorite. I have a banana bread recipe that I love. I've used it about as long as I've been baking. So why try something new? Because you never know what you might be missing. And if you passed on this banana bread, you would be missing indeed. It's got whole grains, but it's so moist you don't feel like you're eating a healthy brick. My son was sad when the last piece was gone and requested it again almost immediately. That's change I can live with!


Heavenly Healthy Banana Bread
- adapted from King Arthur Flour

1/2 cup (8 tablespoons) butter
1/2 cup brown sugar, light or dark, firmly packed
1 teaspoon vanilla extract
1/4 teaspoon banana flavor, optional
3/4 teaspoon baking soda
1/2 teaspoon salt
3 medium to large bananas, cut into chunks
1/4 cup honey
2 large eggs
1 -7/8 cups King Arthur 100% white whole wheat flour
2 Tbsp flax meal
1/2 cup chopped walnuts


1 - Preheat your oven to 350°F with a rack in the center of the oven. Lightly grease an 8 1/2" x 4 1/2" or 9" x 5" loaf pan. The larger pan will give a somewhat flatter loaf.

2 - In a small bowl, mash the bananas.

3 - In a large bowl, beat together the butter and sugar until smooth. Add the vanilla, baking soda, salt, and mashed bananas, beating until well combined.

4 - Beat in the honey and eggs.

5 - Add the flour and flax meal, then the walnuts, stirring until smooth.

6 - Spoon the batter into the prepared pan, smoothing the top. Let it rest at room temperature for 10 minutes. Don't skip the rest period!

7 - Bake the bread for 50 minutes, then gently lay a piece of aluminum foil across the top, to prevent over-browning. Bake for an additional 10 to 15 minutes, then remove the bread from the oven; a long toothpick or cake tester inserted into the center should come out clean.

8 - Allow the loaf to cool for 10 minutes; then remove it from the pan, and set it on a rack to cool completely.

Friday, February 25, 2011

I Heart My Zo


When life is stressful or I'm just feeling blue, I want to go to my happy place. Sometimes my happy place is a hot bubble bath with a glass of wine, sometimes it's in front of my sewing machine, sometimes it's my kitchen, and some days it's the thrift store.

If you're not a member of the thrift store fan club, you might not understand how it can be a calming, uplifting experience to paw through someone else's cast-offs. It's like a treasure hunt. You never know what you might find. It might be a copy of that book you've been wanting to read, a glass soap dish holder that's perfect for the guest bathroom, a comforter to send away to college with your child, a DVD of your favorite movie, a 1,000 piece puzzle that's never been opened, or a sweater from your favorite brand. And you can get it all for under $10!

The truth of the matter is that some people give away ridiculous stuff. Brand new, with tags on, even. I don't find amazing things every visit, but I have found such great deals that I keep coming back.

My all-time, best ever, lucky find happened when I was in the appliance aisle. I was trying to describe to my husband what to look for, a bread machine to replace mine that was old and cranky. In particular, I wanted a Zojirushi, the larger one, that looks just like this one, this.....HOLY COW! It's a Zojirushi! And it looks brand new!! And it's $7! HOLY GRASS-FED ORGANIC COW!!!! I snatched that puppy up and cradled it to my chest throughout the store. No one else could touch this. It was MINE.


I got it home and examined it. It looked almost new, although there were some very light marks inside the loaf pan that indicated it had been used once or twice. What silly person would toss a $200 machine after using it once? Ah, I know what happened. They baked in it. Silly, silly, you never bake in a bread machine. Even a Zo, which has a much better loaf pan. The bread machine is for mixing and rising. Then you take the dough out of the machine, shape it into a loaf, put it into a greased loaf pan and bake it in the oven. It's so easy that I bake all of my family's bread (including hamburger buns) and most of that uses my Zo.

Yes, it is a bit cheaty, to a bread purist, to use a bread machine, but you know what? I don't have time to be snotty about getting food on the table. My life is busy, and it works really well for me to let a machine do the mixing and babysitting of the dough. And it works really well for my family who gets to enjoy fresh bread all the time. Mmmm, warm bread with melting butter. Now that's a happy place for me!

I wish my pictures for this post could be put up in scratch and sniff format. The loaf looks pretty boring. It's just bread, right? Oh, not if you can smell it. There's cinnamon in there and it smells up the kitchen in the most amazing way as it bakes. While it's baking, it wafts an enticing aroma around, drawing hungry, drooling family members to gather around the oven, asking, "When is the bread done?"

WARNING: If you have not been a bread maker, and you get a bread machine, you'll find it's addictive to make bread. And your family will probably gorge themselves on warm, fresh bread. Don't worry, after about 5 lbs, or a month, whichever comes first, they'll figure out that the good bread is here to stay.

Barley Cinnamon Bread
- adapted from Beth Hensperger's The Bread Lover's Bread Machine Cookbook (which I love!)

for a 1-1/2 lb loaf

1 cup plus 3 Tbsp water
2 Tbsp light brown sugar
2 Tbsp vegetable oil
2-1/4 cups bread flour
1/2 cup barley flour
1/4 cup whole wheat flour
3 Tbsp dry butter milk powder
1 Tbsp + 2 tsp gluten
1 tsp ground cinnamon
1-1/2 tsp salt
2-1/4 tsp SAF yeast


1- Place all the ingredients into the pan, according to the manufacturer's instructions. Select "dough" mode. Press start.

2- When the machine is done (1:50 minutes in my machine), remove the dough from the pan. Spray a 9 x 5-inch loaf pan with baking spray. Gently press the dough into a rectangle (I don't use a rolling pin as I want to keep some of the rise), and roll up the dough into a loaf shape, pinching the dough together. Place the dough roll in the greased loaf pan, with the seam on the bottom. Cover the loaf with a towel.

3- Preheat oven to 350 deg. F. When the loaf has risen so that the top of the loaf is at least even with the top of the pan, place the loaf in the oven. Bake for 35 to 40 minutes. If you're unsure whether or not the loaf is done, insert an instant read thermometer in the side. If it reads 190 deg. F or above, the loaf is done. If not, return it to the oven for another 5 minutes.

4- Remove loaf from pan and place on cooling rack. Now comes the really hard part. Let it cool - without cutting it! The structure of the bread is much better if the bread is allowed to cool all the way before you slice it. But if you can't wait, slice away, slathering each piece with lots of good butter. Then start another loaf going right away, since this one's toast. (Little bread joke there.)

Wednesday, December 22, 2010

What To Give?


The last week I've spent lots of time at the computer deleting increasingly hysterical emails from retailers who assure me that they can Deliver By Christmas, They have the Best Deals, and They have The Perfect Gift. Oh, and Time's Running OUT! Just in case I didn't feel the same sense of urgency they did. I don't.

All of my shopping is done. Most of my wrapping is done. And almost all of my mailing is done. (Brother-in-law, you won't get it by Christmas, but that package should get there by Groundhog's Day.) So what's left to do? Why, bake, of course!

I'm enjoying these last days before Christmas spending time in the kitchen with my kids, making stuff to give away to the neighbors. Because no matter what my frantic e-mails say, what people like is food. And not just food that was made in a factory 5 months ago, something homemade with love that's delicious.

This recipe came from our very favorite neighbor. She used to have baking dates with my daughter and after an afternoon of baking, my daughter would come home with a treat for us. When she brought home this loaf, we all loved it so much I asked for the recipe. And this year our neighbor's getting a loaf from us. What goes around comes around!

Cranberry Orange Bread
- from Fabulous Neighbor Karen
Makes 1 loaf or 2 mini loaves

2 cups flour
1 cup sugar
1/2 tsp baking powder
1/2 tsp salt
1/2 tsp baking soda
2 Tbsp vegetable oil
zest of 1 orange
Juice of 1 orange + enough water to = 3/4 cup liquid
1 beaten egg
1-1/2 cups raw cranberries, cut in half
1 cup coarsely chopped walnuts (optional)


1- Preheat oven to 350 deg. Grease loaf pan(s).

2- Sift or sieve together the flour, sugar, baking powder, salt, and baking soda into a mixing bowl.

2- In a separate bowl, mix together the oil, zest, liquid, and egg. Add this mixture all at once to the dry mixture and stir until the flour is almost all incorporated. You don't want to overmix.

3- Fold in the cranberries and nuts. Any bits of flour should disappear as you do this.

4- Pour the batter into the prepared loaf pan or mini loaf pans. Bake for 1 hour for a large loaf, or 45 minutes for 2 small loaf pans. Remove to a wire rack to cool to room temperature before wrapping to give, or slicing to eat.

Note: Because you don't want to overmix the batter, it's a bit tricky to double this recipe. I made two batches, side by side, to double it and make 4 mini loaves. If you make just one big double batch, you have to overwork the batter to incorporate everything and end up with a tough loaf.

Monday, September 20, 2010

Going Flat Out


My first ever blog crush was David Lebovitz. I love his writing and his passion for food. What a bonus that his recipes are easy to follow and give amazing results.

When I got to attend his ice cream class promoting The Perfect Scoop, I was just about incoherent, stuttering and blushing like a jr. high girl meeting Zac Efron. Actually, I'd probably do that meeting Zac, too. I think he's pretty cute.

But crushing aside, I think David's blog is the bomb. It's a goldmine of information, entertainment, and recipes. And he usually makes me laugh. Not just quietly chuckle, but snort milk through the nose laugh.

Recently I'd taken on a personal challenge to bake Peter Reinhart's bagels. I was not fastidious in following directions, taking a somewhat careless approach to things like rising times and shaping directions. Having made bagels before, I was pretty sure that this batch wasn't going well. The dough never felt as stiff as what I was used to. After the shaped bagels rose, they felt slack and sticky, and when I attempted to remove them from the pan to boil them, they…. well, they went flat. I hoped they'd revive in the oven and puff up. No such luck. They came out looking like sports equipment - a discus minus a center. But they tasted good. I consoled myself with that as I toasted them, smeared them with cream cheese, and made sandwiches from them. They did taste good.

But then I read a post of David L's wondering why store-bought bagels had gotten so puffy, like a celebutant's collagen-filled lips. He said that some of the best bagels he'd ever tasted were flat.


"Ha ha!" I yelled, leaping up from the computer and fist-pumping the air. "According to David, my bagels weren't failures!" There was no one else around to appreciate my moment of triumph, but I definitely exulted.

See why I crush on him? Who else can take a kitchen fail and turn it into a high five?

Speaking of which, I'm awarding myself a High Five for finally getting around to trying this recipe. I've had this cookbook for over a year, and this is the first recipe I've been brave enough to try.


Note: Read through the recipe all the way before starting, noting the rising times and making sure you have all the ingredients and equipment. The bagels are mixed and shaped the day before baking and rest overnight in the refrigerator, so make sure you have space in the refrigerator for two baking sheets.

Deliciously Flat Bagels
- adapted from Bread Baker's Apprentice
by Peter Reinhart


Sponge:
1 tsp instant yeast
4 cups (18 oz) unbleached bread flour
2-1/2 cups (20 oz) water, at room temperature

Dough:
1/2 tsp instant yeast
3-3/4 cups (17 oz) unbleached bread flour
2-3/4 tsp salt
2 tsp malt powder OR
1 Tbsp dark or light malt syrup, honey, or brown sugar

To Finish:
1 Tbsp baking soda
Cornmeal or semolina flour for dusting
Sesame seeds, poppy seeds, kosher salt, rehydrated dried minced garlic or onions

1- Sponge: In a 4-quart mixing bowl, stir the yeast into the flour. Add the water, stirring only until it forms a smooth, sticky batter (think pancake batter). Cover the bowl with plastic wrap and leave at room temperature for approximately 2 hours, or until the mixture becomes very foamy and bubbly. It should nearly double in size and collapse when the bowl is tapped on the countertop.

2- In the same mixing bowl, add the additional yeast to the sponge and stir. Then add 3 cups of the flour, the salt and the malt. Stir (or use low speed on an electric mixer with a dough hook) until the ingredients form a ball, slowly working in the remaining 3/4 cup flour to stiffen the dough.

3- Turn the dough out onto a lightly floured counter and knead for at least 10 minutes (or 6 minutes by machine). The dough should be firm, but still pliable and smooth. There should be no spots of raw flour and the dough should be 77 to 81 deg. F (use an instant read thermometer). If the dough is too dry, add a few drops of water and knead it in. If the dough seems sticky, add more flour a bit at a time till it feels sufficiently firm. The kneaded dough should feel satiny and pliable, but not tacky.

4- Immediately divide the dough into 12 pieces of 4-1/2 oz each. Shape each piece into a ball.

5- Cover the balls with a damp towel and allow them to rest for 20 minutes.

6- Line 2 baking sheets with parchment paper and lightly mist with cooking spray.

7- Take the dough balls one at a time and shape them by gently pushing your thumb through the center of the ball and working your way around the ring to evenly stretch it till the center hole is about 2-1/2 inches across.

8- Place the dough rings on the pans 2 inches apart. Spray the rings lightly with the cooking spray. Cover each tray loosely with plastic wrap, or slip it inside a large food-grade plastic bag. Let sit at room temperature for about 20 minutes.

9- Check to see if the bagels are ready for their rest in the refrigerator. Fill a small bowl with cool water. Take one bagel and drop it into the water. If it floats with 10 seconds, the bagels are ready. Return the bagel to the pan, pat it dry, cover the pan with plastic, and place in the refrigerator overnight (or as long as 2 days).

If the bagel does not float, return it to the pan and continue to proof the dough at room temperature, checking back every 10 to 20 minutes or so until a tester floats. The time needed to accomplish the float will vary, depending on the room temperature and the stiffness of the dough.

10- The next day (or when you are ready to bake the bagels), preheat the oven to 500 deg. F with two racks in the middle of the oven. Bring a large pot of water to a boil (the wider the pot, the better), and add the baking soda. Have a slotted soon handy. Sprinkle the parchment-lined baking sheets with cornmeal or semolina flour

11- Remove the bagels from the refrigerator and gently drop them into the water, boiling only as many as comfortably fit (they should float within 10 seconds). After 1 minute flip them over and boil for another minute. For very chewy bagels, you and make it 2 minutes per side. Using the slotted spoon, scoop out the bagels, one at a time, let drip briefly and then transfer to the baking sheet.

12- If you want to top the bagels, do so as soon as they come out of the water. You can use any of the suggestions in the ingredients list or a combination.

13- When all the bagels have been boiled, place the pans in the oven. Bake for about 5 minutes, then rotate the pans, switching shelves and turning back to front. After the rotation, lower the oven temperature to 450 deg. F and bake for about 5 minutes more, until the bagels turn light golden brown. If you prefer darker bagels, leave them in a few minutes longer.

14 - Remove the pans from the oven and remove the bagels to a wire rack to cool for 15 minutes before serving.

Wednesday, June 16, 2010

No Korni Jokes

The Bread Baking Babes are back and this month I've really let them down. Our bread for the month was a Korni loaf and I'm sure big things were expected from me in the way of Korni jokes, but I just couldn't get there. I was too busy making a simple loaf waaaaay harder than it needed to be.

When Lien, our host kitchen of the month, announced her choice was the Korni bread from The Village Baker, I promptly got the book from the library. I could have just printed out the recipe, but I wanted the book in case there was extra information I needed. Mistake. I was unaware that there are THREE Korni bread recipes in the book.


I opened the book to the (I thought) correct recipe and groaned. A starter. Pooh. That has to percolate for days. Double Pooh. Oh well, better to get started, so I mixed whole wheat flour, a bit of milk, some cumin, and some water to make a firm dough and let it sit in a bowl, covered, for 2 days. I fed it some more flour and water, covered it up and let it sit again. It wasn't until the third day that it dawned on me (yes, I really am that slow), that I was making a sourdough starter for the sourdough version of the Korni. Arggghhhh!

I can't tell you how the assigned recipe turned out. To find that out, you'll have to check the other Babe's sites (listed in the sidebar). I can tell you that the sourdough version is nice. Very moist, subtle flavor, speckled with crunchy bits. I'm not going to give you the recipe as it's too long, involved, and frustratingly vague. Check out the book if you want the sourdough version or make it the assigned way.


If you make and post the bread by the 29th, send the URL to Lien and she'll send you a handsome Bread Baking Buddy badge to proudly display on your site.

(The changes that I made were: I used soy nuts in place of the whole soy soak, roast process and I only used 1 tsp ground caraway seeds. Oh, and I made the sourdough version, but added 1 tsp instant yeast because I really didn't trust that sourdough to do much heavy lifting.)

Korni
(makes 1 round 3 1/2 pound loaf)
- adapted from Joe Ortiz' The Village Baker

Korni means corn or grain. It is made from a combination of grains that go well together for flavor, crunchiness, and good nutrition.

Soy bean mixture
1/2 cup organic (dried) soy beans (85 g)
1 cup boiling water (235 g)

Poolish
1 package (2 1/2 teaspoons; 1/4 oz) active dry yeast (1 1/2 tsp)
2 1/2 cups warm water (2 1/4 cup = 533 g)
1 cup organic rye flour (100 g)
1 cup organic whole wheat flour (130 g)
1 1/2 cups organic unbleached white (or all-purpose) flour (180 g)

Dough
1 teaspoon active dry yeast
1/4 cup warm water (60 g)
All of the starter from the previous step
3 cups organic, unbleached white (or all-purpose) flour (420 g)
1 tablespoon sea salt (2 tsp)
1 tablespoon ground caraway seeds* (1 tsp)
1/4 cup organic fax seeds (37 g)
1/2 cup organic millet (100 g)
All of the soy mixture

Glaze: 1 whole egg whisked with 1 tablespoon milk

Prepare the soy beans:
Place them in a small bowl, cover them with the boiling water, and let them soak for 10 minutes. Drain the beans and let them cool. Process the beans in a food processor fitted with the metal blade until they roughly chopped.

Place the beans on a cookie sheet and roast them in a preheated 350°F oven between 15 and 20 minutes, until they are completely dried out. Set them aside.

*(to make your own, grind a few tablespoons of whole caraway seed in a mortar with a pestle until you have a fine powder. If your powder still contains large chunks of seed, sift the mixture and use 1 tablespoon of the sifted powder)

Prepare the sponge/poolish:
First proof the yeast, in a large bowl, in 1 cup of the warm water. When it is creamy, mix in 1 1/4 cups warm water and slowly add the rye flour, whole wheat flour, and 1½ cups of white flour by handfuls while stirring the mixture with a wooden spoon.
Set the batter aside, in a large bowl, covered with a dish towel, for between 8 and 10 hours or overnight.

Make the dough:
Proof the yeast in the warm water, add it to the risen sponge, and mix the two together. Start adding the flour, handful by handful, stirring vigorously with a wooden spoon. After all but 1 cup of the flour has been added (this will take about 10 minutes), turn the dough out onto your worktable, sprinkle the salt and the ground caraway over the dough, and incorporate them by kneading the dough for about 5 minutes while adding the last of the flour. The dough should be very moist.

Add the fax seeds, millet, and roasted soy beans and knead the dough to incorporate them.
Set the dough aside, covered, to rise for 1 hour, until it has doubled in size.

Flatten out the dough again and then shape it into a round loaf. This loaf is best proofed in a canvas-lined basket (I used a large bowl sprayed with baking spray) and then baked on a baking stone in the oven. It can also be placed on a parchment-lined baking sheet. Let the loaf rise for about 1 1/2 hours.

Glaze the loaf with the egg and milk mixture and bake it in a preheated 425°F oven for between 30 and 35 minutes.

Let the loaf cool on a wire rack.

Monday, June 14, 2010

Gluten-Free Glory


One of my favorite people to feed, my chiropractor, recently was put on a gluten-free diet by his doctor. He enjoyed how he felt, but he missed the baked goods. And because I missed how happy he got when I brought him treats, I began dabbling in gluten-free baking.

One of the premier gluten-free bakeries in the country, The Flying Apron, happens to be in my neck of the woods and they also happen to have just released a cookbook. Of course, when I saw it at Costco I snagged a copy. It features a cornucopia of beautiful baked goods, all of them vegan as well as gluten-free.


My first trial bake from the book hit a home run. The Pumpkin Glory Loaf is a cross between a sweet quick bread and a cake. Dense, moist, very crumbly, and utterly delicious. The grateful recipient of this loaf bit into it and moaned. Ah, sweet success!

Pumpkin Glory Loaf
- adapted from Flying Apron's Gluten-Free & Vegan Baking Book

makes two 8-1/2 by 4-1/2-inch loaves

1 cup buckwheat flour
2 cups brown rice flour
1-3/4 tsp baking soda
1/4 tsp salt
1 tsp ground cinnamon
1 tsp ground cloves
1 cup safflower oil
1 cup molasses
1 cup maple syrup
15 oz can pumpkin puree (about 1-3/4 cups cooked squash, sweet potato, or pumpkin)
1 tsp vanilla extract
1/2 cup walnuts
1/2 cup raisins


1- Heat oven to 350 deg. F. Line the bottom of two 8-1/2 by 4-1/2-inch loaf pans with parchment paper. Lightly spray the pan with baking oil and dust with brown rice flour.

2- If your raisins are not fresh, plump, and moist, put them in a bowl, cover them with hot water, and soak them till you are ready to use them.

3- Spread the walnuts on a baking sheet. Toast them for 10 minutes, until they they smell toasted and are lightly browned. Remove the nuts and set aside to cool. Turn the oven temp to 375 deg. F.

4- While the nuts are toasting, combine the dry ingredients (buckwheat flour through cloves) in a large bowl.

5- In the bowl of an electric mixer fitted with the paddle attachment, combine the oil, molasses, maple syrup, pumpkin, and vanilla until well mixed. With the mixer on low speed, add the dry ingredient mixture until well mixed, about 3 minutes.

6- If you soaked your raisins, drain them well and pat them dry with a paper towel. Fold the raisins and walnuts into the batter. Pour the batter into the prepared pans.

7- Bake until the loaf springs back when you press the center with your finger, about 50 minutes. Cool for about an hour before slicing.

Thursday, May 27, 2010

Overnight Bread


I love making bread, but most of my bread is just sandwich and toast loaves. I get a bit intimidated by fancy loaves or artisan bread, but I am always willing to increase my bread baking repertoire. Recently I checked out from the library Peter Reinhart's Artisan Breads Every Day. His approach to bread is so scientific I felt like I was back in college reading through the cookbook. In fact, I got a little bogged down just reading through the information and almost didn't get around to baking anything from the book before it was due back at the library. I was determined that wasn't going to happen, so I buckled down, and made some bread, the day before I had to turn the book back in.

What bread, you ask? Oh, what bread - wild rice and onion. I love onions. The recipe was really simple. Make the dough the night before. Put it into a greased bowl, cover with plastic wrap and pop it into the fridge. In the morning I was greeted by an amazing sight - dough eagerly pressing against it's plastic containment field. I halved the dough and shaped one half into a boule and one half into a baguette.


Then, I had to go run an errand. Oops. My rising loaves got simply enormous! As soon as I got home I popped them into the oven. The smell of those baking loaves made me swoon! My bread tasters were quite cross that I wouldn't allow them to tear hunks form the bread as soon as it got out of the oven.

Verdict? Wonderfully good bread. Easy recipe to follow. This book is now on my Amazon wishlist. Try this recipe and I think you'll be sold, too.

Wild Rice and Onion Bread
-adapted from Peter Reinhart’s Artisan Breads Every Day

6 cups (765 g) unbleached bread flour
2-1/4 tsp salt, or 3-1/2 tsp coarse kosher salt
2 Tbsp instant yeast
1 cup (170 g) cooked wild rice (about 1/3 cup dry rice, cooked)*
1/4 cup (56.6 g) brown sugar
1-1/2 cups (340 g) lukewarm water (about 95 deg. F)
1/2 cup (113 g) lukewarm buttermilk, or any other milk (about 95 deg. F)
1/4 cup (28.5 g) minced or chopped dried onions, or 2 cups (227 g) diced fresh onion (about 1 large onion)**
1 egg white for egg wash (optional)
1 Tbsp water, for egg wash (optional)


* Since cooking the wild rice takes a long time, double the amount you cook and put 1/2 of the cooled rice into a ziploc bag and store it in the freezer for the next time you make the bread.

** If you use dried onions, you may have to add an extra 2 to 4 Tbsp of water while mixing.

Do ahead:

1- Combine all of the ingredients, except the egg wash, in a mixing bowl. With the paddle attachment at lowest speed mix for 1 minute. The dough should be sticky, coarse, and shaggy. Let the dough rest for 5 minutes.

2- Switch to the dough hook and mix on medium-low speed for 4 minutes, adding flour or water as needed to keep the dough ball together. The dough should be soft, supple, and slightly sticky.

3- Transfer the dough to a lightly floured work surface. Knead the dough for 2 to 3 minutes, adding more flour as needed to prevent sticking. The dough will still be soft and slightly sticky but will hold together to form a soft, supple, ball. Place the dough in a clean, lightly oiled bowl, cover the bowl tightly with plastic wrap, and immediately refrigerate overnight or for up to 4 days. (If you plan to bake the dough in batches over different days, you can portion the dough and place it into two or more oiled bowls at this stage)


On Baking Day:

1- Remove the dough from the refrigerator about 2 hours before you plan to bake. Shape it into sandwich loaves (using 28 oz of dough for 4-1/2 by 8-inch pans, and 36 oz of dough for 5 by 9-inch pans) or baguettes or boules or rolls. Proof the dough in the greased loaf pans, or on a baking sheet lined with parchment paper or a silicone mat.

2- Mist the top of the dough with spray oil and cover loosely with plastic wrap. Let the dough rise at room temperature for 1-1/2 to 2 hours, until it’s about 1-1/2 times its original size. Optional, brush the top with egg wash just before they’re ready to bake.

3- Preheat the oven to 350 deg. F. Bake the loaves for 10 to 15 minutes, then rotate the pan; rotate rolls after 8 minutes. The total baking time is 45 to 55 minutes for loaves and 20 to 25 minutes for rolls. The bread is done when it has a rich golden color, the loaf sounds hollow when thumped on the bottom, and the internal temperature is about 185 deg. F in the center.

Cool on a wire rack for at least 20 minutes for rolls or 1 hour for loaves before slicing.

Monday, May 17, 2010

Inspired Baking


I know that authors at book signings dread the inevitable question, "Where do you get your ideas from?" The question is dreaded not just because it ends a sentence with a preposition, but because everyone asks it and the answer is always the same - "From all around me."

As a baker I feel the same way (not about the press of fans demanding my signature), that inspiration is all around me. I have endless inspiration in my cookbooks, magazines, and the food blogs I visit. So why is it King Arthur feels they need to send me food porn in the mail? I visit their website, I get their emails, why do I need a catalog? Because the sneaky marketing geniuses know that the catalog will follow me from kitchen to bathroom to bedroom, that I'll mark items and dog ear pages, and I'll end up ordering.


This time around the thing that grabbed my attention was a gorgeous seeded boule. Skimming through the ingredients I saw that I had everything to make it except the harvest grains blend. Well, I didn't want to have to wait for grains to be shipped clear across the country so I went on a grain buying binge at Whole Foods' bulk section. (Take that, sneaky marketing geniuses!)

The bread was easy to make and so tasty! We had it with grilled salmon for dinner, then used it to make panini sandwiches the next night (the chicken sausage, gruyere, and carmelized onion sandwiches from this month's Fine Cooking).

I'll give you the recipe with the grain substitutions I made, but you can go the easy way and order the blend from King Arthur. And the sneaky marketing geniuses? Don't feel badly for them; their job is secure. I put in an order. Didn't order the grains, but I did need a few things....


Multi-Grain Boule
- adapted from King Arthur Flour

1 cup (8 oz) boiling water
1 cup ( 5 oz) mixed grains*
2 cups (16 oz) sourdough starter, fed and ready to use
1-3/4 cups (7 oz) white whole wheat flour
1-3/4 cups (7-1/2 oz) King Arthur Unbleached all-purposed flour
2-1/2 tsp salt
1-1/2 tsp instant yeast
2 Tbsp vegetable oil


Topping:
1 Tbsp of mixed sesame, flax, and poppy seeds

* I used a mixture of millet, sunflower seeds, poppy seeds, amaranth, flax seeds, sesame seeds, and flakes from Raisin Bran

1- Place the mixed grains in the large bowl of an electric mixer. Pour the boiling water over it. Let it cool to lukewarm.

2- Add the fed sourdough starter and the remaining dough ingredients. Mix until it is a soft dough, adding additional water or flour as needed.

3- Cover the dough in the bowl, and let it rise until it's almost doubled, about 1 to 1-1/2 hours.

4- Turn the dough out onto a lightly greased work surface and gently fold it over a few times to deflate it. Shape it into a large round. Spray a large, round baking dish with non-stick baking spray and sprinkle it with cornmeal. Place the dough round into the baking dish, cover it with plastic wrap, and let it rise until it's very puffy, about 1 to 1-1/2 hours.

5- While the dough is rising preheat the oven to 425 deg. F.

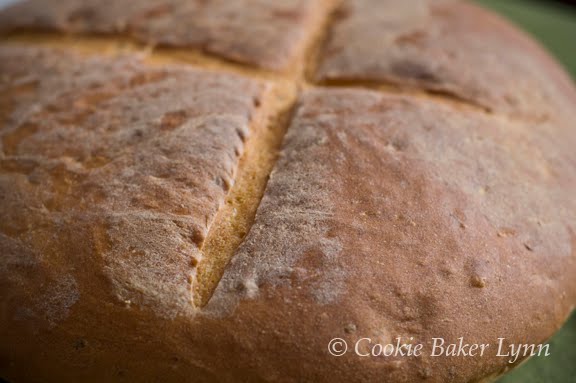
6- Just before baking, brush the dough round with water and sprinkle with the topping seeds. Use a lame or a very sharp knife to make four slashes across the top of the loaf, in a cross hatch pattern.

7- Bake the bread covered for 40 minutes. Uncover the loaf and continue to bake 10 to 15 minutes, until the loaf is golden brown and an instant-read thermometer inserted in the center registers 190 deg. F.

8- Remove the bread from the oven. Let it rest for 5 minutes, then remove it from the baking dish and cool it on a cooling rack.

Saturday, April 24, 2010

Potatoes Al Dente

For some reason I procrastinate. Every month when the new Bread Baking Babes bread is posted I dutifully print out the recipe and then spend a month looking at it. I think about what ingredients I might need to buy, I think about the timing of the recipe and when I can fit it in, and then, at the last possible moment, I bake.

This month I was true to form. A lovely, easy, herbed potato bread. I had potatoes. I had chives. It didn't require an overnight starter or days of babysitting. I just needed to make it. Especially since my husband loves mashed potatoes; I knew he'd love this bread.

So what did I do? I started it yesterday, the day before the posting was due. Also, coincidentally, the same day my husband had a dentist appointment to get fitted for a replacement crown. Our previous dentist biffed his crown and left a pocket where decay was forming. (If you live in my neck of the woods, save yourself lots of time, money, and pain and never go to a dentist named Cooley.)


Hub's appointment was at 10:30, so I thought I might be able to get the bread done in time for him to have some for lunch. At 11:00 he called to say that he would be longer than predicted. The decay was so bad, that they were going to have to pull the tooth.

At 1:30 he called to say that the attempts to pull the tooth were not successful, as the tooth root was fused to the bone, so he was being sent for an emergency visit to an oral surgeon.

At 4:00 he got home, cheeks swollen, in pain. And to add to his torture, the house smelled wonderfully of potato bread with chives. Alas, he got pudding and a smoothie for dinner. Also, there's mashed potatoes....


I'll definitely have to make this bread again so he can enjoy it. The dough is delightful to work with and it gives a loaf (or two) with a beautiful, even, soft crumb and a nice crust. Thanks, Sara, for picking this fun recipe!

To see what the rest of the Babes did this month, visit their blogs (addresses in the sidebar), and if you'd like to be a Baking Buddy and get a badge to proudly display on your blog, you have a week to bake up a loaf, post, and send the URL to Sara.


Potato Bread with Chives
from Vegan Planet by Robin Robertson

"The addition of mashed potatos gives this bread a moist, dense texture and delicate flavor that is accented by that of the chives. This bread is best eaten slightly warm from the oven on the day it is made. It is also good toasted."

2 1/4 tsp (1 packet) active dry yeast
1 cup warm water
1 tsp sugar or pure maple syrup
2 Tb corn oil
2 tsp salt
1 cup cold mashed potatos
1 cup soy milk or other dairy free milk
5 cups unbleached all purpose flour, plus more for kneading
2 Tb minced fresh chives


In a large bowl, combine the yeast and 1/4 cup of the water. Add the sugar and stir to dissolve. Let the mixture stand for 10 minutes, then stir in the remaining 3/4 cup of water, the corn oil and the salt. Mix in the potatos, then stir in the soy milk. Add about half the flour, stirring to combine, then work in the remaining flour to form a stiff dough. Transfer to a lightly floured board.

Lightly flour your hands and work surface. Knead the dough well until it is smooth and elastic, 8 to 10 minutes, using more flour as necessary so the dough does not stick. Place in a large lightly oiled bowl and turn over once to coat with oil. Cover with a clean kitchen towel or lightly oiled piece of plastic wrap. Let rise in a warm place until doubled in bulk, 1 to 2 hours.

Meanwhile, lightly oil a large baking sheet and set aside. Punch the dough down and knead lightly. Turn out onto a lightly floured work surface, sprinkle with the chives, and knead until the dough is elastic and the chives are well distributed, 3 to 5 minutes. Shape the dough into one large or two small round loaves and place on the prepared baking sheet. Flatten slightly and cover with a clean damp towel or lightly oiled plastic wrap. Set aside in a warm place and let rise again until doubled in bulk, about 45 minutes.

Preheat the oven to 400'F. Use a sharp knife to cut an X into the top of the loaf or loaves. Bake on the center oven rack until golden brown, 35 to 45 minutes, depending on size. Tap on the bottom of the loaf or loaves - if they sound hollow, the bread is done. Remove from the sheet and let cool slightly on a wire rack before slicing.

Thursday, April 1, 2010

Easter Bread


If you're still in the planning stages for your Easter menu, head over to Simple Bites and check out my post on making an easy and delicious braided bread ring for Easter brunch. And check back tomorrow for something amazing you won't want to miss!

Sunday, March 21, 2010

The Bread Baking Babes Go Gluten-Free!


When I started blogging I'd never heard of gluten-intolerance. It wasn't until I found Gluten Free Girl that I learned that gluten, the protein in flour that gives bread its structure, made some people sick. And after I learned that, people with gluten issues started popping up all around me.

My sister baked gluten-free treats for her knitting group, my daughter has a gluten-intolerant friend in her Bible study group, and my chiropractor, one of my favorite people to bake for, informed me that he was trying out the gluten-free lifestyle, too.

How timely, then, for Mary, this month's host kitchen, to choose a gluten-free bread for the Babes' challenge. And a no knead bread, at that!


Gluten-free loaves are specially suited for no knead because the kneading is there to develop the gluten strands. No gluten means no need to knead! It just lots of long, slow, cool rising.

Once I'd gotten all the special flours, it was quite easy to put this loaf together. The only time I ran into trouble was on the second rise. The directions say to let the loaf rise for 2-1/2 to 4 hours, until the dough is 1/8-inch above the pan rim. Well, I walked by my rising loaf after an hour and freaked - it was already there! I quickly turned on my oven, but by the time it had preheated, the dough was woofling down the sides of the pan.


I baked the loaf pan on top of a cookie sheet. Good thing - it caught all the dough dribbles that would otherwise be now encrusted on the bottom of my oven. After chiseling off the burnt dribbles, the bread released easily from the pan. The dribbles were actually my husband's favorite part. He said they made great crackers. He recommended that if I made the dough again to just spread a thin layer on a pan and make it all into crackers.

Did we all love it? Meh. But then we're spoiled by lots of good bread here. For someone forbidden to eat most breads, I'd imagine this would be a huge treat. I'll find out when I take some to my chiropractor.

Thanks, Mary, for picking this fun and really different recipe! Please check out what the other Babes came up with (Blogs on the sidebar). And if you'd like to bake along and get a Bread Baking Buddy badge, you have till March 31st to bake your bread, post it, and send a link to Mary.


Gluten Free No Knead Hearty Seeded Sandwich Bread
from Nancy Baggett's Kneadlessly Simple

1 2/3 cup white rice flour, divided (may need more depending on your dough)
1/2 cup cornmeal or brown rice flour
1/2 cup cornstarch
1/3 cup tapioca flour
1/3 cup flax seed or golden flax seed meal
1 1/4 tsp salt
1 tsp instant yeast
1 1/3 cup ice water
1/3 cup corn or canola oil
1/4 cup molasses (not black strap)
1 large egg, room temperature
1/4 cup plain yogurt, drained of excess liquid
2 1/2 tsp baking powder
3 Tablespoon of mixed seeds (millet, poppy seeds, sesame seeds, flax seeds, etc)


First Rise:
In large bowl, stir together 1 1/3 cups of white rice flour, cornmeal or brown rice flour, tapioca flour, flax seed meal, salt, yeast, and 2 Tbsp seed mixture. In another bowl, whisk together water, oil, molasses and mix thoroughly with flour mixture. If too stiff to blend, add more water to form a barely firm dough. (This confused me. It's not at all a dough, it's a very thick batter.) Tightly cover the bowl with plastic wrap. For best flavor, refrigerate dough for 3 - 10 hrs then let stand at cool room temperature for 12 - 18hrs. Dough will stiffen as it stands and it is alright if it doesn't rise very much.

Second Rise:
Whisk egg and set aside 1 Tbsp to brush top of loaf. Stir the yogurt, baking powder, and 1/3 cup white rice flour into the remaining egg. Vigorously stir the yogurt mixture into the First Rise dough until completely mixed. If it is too soft, you can add more of the rice flour (white or brown, doesn't matter which). Turn dough into a well greased 9" x 5" loaf pan and brush a little oil on top of loaf. Brush the reserved egg and seeds over the surface. Using a well oiled serrated knife, make a 1/2" deep cut lengthwise down the loaf. Cover the pan with a lightly greased piece of plastic wrap.

Let dough stand for 2 1/2 - 4 hrs in a warm room until dough extends 1/8" above the pan rim (mine reached this point in an hour under a warming light). Loosen plastic wrap as dough nears top of pan to prevent dough from smooshing down.

Baking:
15 minutes before baking, place a rack in the lower third of the oven and pre-heat the oven to 375 degrees. Bake bread on the lower rack for 55-60 minutes, until the top is nicely browned. If the top starts to over brown, cover with a piece of foil. Continue baking until a skewer inserted comes out with few crumbs or the internal temperature of the bread reaches 206-208 degrees. Bake for 5 minutes more. Remove bread from oven, and leaving bread in pan, let cool on wire rack for 15 minutes. Remove loaf from pan and let cool completely before slicing.