Showing posts with label breakfast. Show all posts

Sunday, January 5, 2014

Traveling with high maintenance eating


I recently got back from a 2 week vacation to Maui. The adjustment has been a little rough. We drove to the airport in 85 degree weather and landed at SeaTac in 45 degree clouds. Ugh.

To console myself, I spend an inordinant amount of time scrolling through the pictures on my phone, remembering the sights, sounds, and smells of Maui. Aaaaah. What better way to hang onto a piece of the vacation? Well, maybe to share some tips in case you, too, want to go there. It’s going to be a long post so go get your cup of coffee now. Ready? OK, here we got.

The biggest challenge to traveling on GAPS is, of course, food.* This was a major stressor for me in the month leading up to our trip.  How on earth can you go on vacation and eat clean for 2 weeks? Well, it takes a lot of planning. And since I’m not that good at planning, I had my daughter help me. 

Tip #1 – Menu Plan for the entire trip, including breakfast, lunch, dinner, and travel snacks.

I kept a master notebook with pages for what to pack from the bathroom, the kitchen, and the bedroom, as well as extra odd things. In that same notebook, I wrote out a menu plan for the whole trip. Each day had 4 lines – breakfast, lunch, dinner, and snacks. Next to the day, I would also write what plans were for the day. The activities dictated what I would fix. If we needed to get out the door quickly (to get to the 7 am farmer’s market, for example), I’d do fried eggs. If there was more time, I planned smoothies or pancakes (recipe at the end of the post).

Now the important thing about the notebook was that it was flexible. It was not holy writ. Things could be shuffled from one day to another, depending on the weather, our energy level, and what we felt like.

As I menu planned, I kept running lists going on three separate notebook pages. They were shopping lists for Costco, Whole Foods, and the health Food store. Then I kept another page for the “Must buy or make before we go” items.


Tip #2 – Make Shopping lists for as soon as you leave the airport

Just outside the airport on Maui is a Costco. Must have items from Costco:
            Coconut oil
            Salad greens (organic)
            Sea Salt
            Bananas (they had local apple bananas there!)
            Wine (if you’re into it. Most other places don’t have a brisk turnover of stock and it’s not reliably good. Plus Costco’s prices are good.)
            Frozen fish
            2 pack of frozen organic chickens
            Frozen organic chicken breasts
            Cheese ( we got Dubliner and Gouda. Yes, we ate it all. Don’t judge.)
            Chicken Sausages (http://www.aidells.com/products)
            Onion
            Garlic
            Lemons
            Limes
            Avocadoes
           
(dragon fruit)
Whole Foods:
            Almond butter
            Organic Valley Pastured Butter
            Fresh veggies
            Organic canned Salsa
            Eggs
            Olive Oil
            Organic Apple Cider vinegar
            Tomatoes


Health Food Store:
            Coconut milk (the only place that carried coconut milk without guar gum. Be forewarned, it’s $3.86 a can)
            Additional fresh fruits and veggies
            Kombucha. At about $5 a bottle, this was a huge splurge

Farmer’s Market:
            Farm eggs (they cost $6/dozen. Get over it. That’s still a cheap protein source. )
            Raw Honey
            Coconut water kefir
            Local fruits and veggies

Things we packed:
            Wild, troll caught tuna from Costco. The Costco in Hawaii doesn’t carry it. Worth taking as it makes a great quick lunch or a snack.
            Frozen grass-fed beef in our checked-through luggage, double bagged in Ziploc bags
            Spices in zip bags, labeled. I included spice blends for specific recipes.
            Gelatin. WARNING – Place into a different container, like a jar with a lid. The change in air pressure made our tube of gelatin sneeze all over everything inside the suitcase, which made for several sticky messes)
            Epic bars. Greatest travel meal replacements ever. 
            2 lb bag of soaked, dried walnuts
            Dried apple slices
            Beef jerky (made from flank steak and beef heart – fabulous to sneak in organ meats.)
            Tea bags
            Fermented cod liver oil, nestled next to the frozen meat
            Coconut flakes (for This recipe. It’s tremendous)
            Coconut flour
            Raw Cocoa powder
            Water filter pitcher
            Coffee French press


Our condo was fairly well stocked, but unfortunately, all of the pans were non-stick. Boo! We even went to the thrift store to see if we could score a cast-iron skillet, but were out of luck there. All they had was non-stick cookware that was no longer non-stick and would shed large chunks of Teflon into your scrambled eggs. Double boo.

Other than that, we ate like kings! We feasted on lots of salads, quick meals like hamburger patties, tuna salad (over salad), chicken salad, and lots of grilled meat.


Even on the go, we ate well. I put together Paleo Packs in sandwich size plastic bags. The mix should be protein, fats, and carbs, so I put in jerky, nuts, coconut flakes, and dried fruit.

A couple of times I wanted DESSERT! So I made it. Cocoa powder, coconut oil, shredded unsweetened coconut, and a bit of honey. Awesome.

One of the favorite breakfasts for my family was a recipe that I cobbled together, adapting an online recipe with what I had on hand. We served it with sausage and it made for happy days with full tummies and even blood sugar levels.
Almond Butter Pancakes
(makes 12-16 4” pancakes, using about an 1/8 cup batter per pancake)

3 large eggs
1/4 cup coconut milk
1 tsp honey
2 Tbsp coconut flour
1/2 cup almond butter
1/2 tsp baking soda
1/4 tsp salt
1 overly ripe banana, medium sized, mushed
1 Tbsp gelatin

Combine all ingredients in a mixing bowl. Let sit for 10 minutes. The batter will thicken a bit as it sits. While the batter is resting, heat a large skillet (not non-stick!) over medium heat. Use coconut oil to grease the pan and scoop the batter into the heated pan. Let the pancakes cook till bubbles have formed throughout and then turn, cooking briefly on the other side.

Serve the pancakes with plenty of good butter. You can top with unsweetened applesauce, if you need a bit of sweetener on it.


*Technically, we weren’t on GAPS for the vacation. We couldn’t pack bone broth. But we did eat as clean as possible. And the rest we shrugged and said, “It’s vacation!”

Tuesday, September 3, 2013

So Much To Do At The Zoo


I went to the zoo this week with my kids and granddaughter. I am blessed to live a short drive from the fabulous Woodland Park Zoo. I've taken my kids there since they were tiny tots and they've loved seeing all the changes that have happened at the zoo.

Since we started going to the zoo, they've made a beautiful African savanna exhibit where the giraffes can wander and nibble on the trees, hippos can wallow in pools, and zebras can strike a pose for the cameras.

The penguin pool has been revamped so that you can see the penguins climb the rocks, dive into the water, swim underwater, and receive their ration of something that smells suspiciously like fish. Actually, I'm pretty sure it's fish. If not, they might want to get their refrigerator checked, because something definitely smells fishy there.

A Northwest trail has been built to showcase wolves, eagles, and other critters from around my neck of the woods. Gorillas now have a large area where they can swing, rolls, play, cuddle, and hang out to groom each other, French braiding their back hair. Otters have their own slip and slide stream. And there is an awesome space for little kids to get in touch with farm animals, seeing how chickens lay eggs, pretend milking a cow, and petting goats and sheep.

The animal exhibits aren't the only thing that's changed at the zoo, though. My daughter pointed out something fascinating. Kids at the zoo have changed.


When my kids were vey little I'd bring along an umbrella stroller (the kind that's lightweight and folds easily), just for them to rest in. But as soon as they were walking, they didn't spend much time in the stroller. They were too eager to run and explore. There were places to climb, things to touch, and, oh yes, animals to see. Why sit still in a stroller when there was all that to experience?

What we saw a ton of at the zoo this week was kids in strollers as big as an SUV. And these kids were strapped in. And they always had snacks in front of them. Once it was pointed out to me, I was shocked. Kids are ALWAYS EATING. Even when they are too big to put in a stroller, they walk with food in their hands.

What are we teaching our children if we take them to the zoo, strapped into what's basically a couch, and put food in front of them? Honestly, you might as well stay at home, put the kids on a real couch, turn on the Discovery channel, let them eat cereal and candy, and save on the gas.


Doing the zoo this way does two things:

1- The kids never engage with the environment. Sure, it's a pain to constantly make sure your kids aren't getting into trouble, but the seemingly easy trade-off for not training your children to obey you is that you get passive, couch potato children. They are not going to be curious, eager learners.

2- They will get fat. No exercise plus food they're not hungry for is a recipe for obese kids. Didn't I hear somewhere that kids these days are getting fatter? Yeah. There might be a reason for that. Parent's are strapping their kids into mobile restraining devices and feeding them unneeded junk. (In my book, even "healthy" whole wheat Cheerios are junk.)

So stroller + snacks = passive and massive. Ugh.

"But," I hear those mothers saying, "my cherub gets so hungry! If I don't bring snacks she whines the whole trip."

Easy solution. Feed that child a nourishing, satisfying, nutrient dense breakfast. Then let them run and play at the zoo. They'll be too busy to even notice that they don't have their snacks in front of them!

Most mornings at my house breakfast is either eggs (fried or scrambled, sometimes with cheese and salsa on top), or smoothies made with bananas, farm eggs (raw), spirulina powder, cacao powder, grass-fed gelatin, homemade raw yogurt and homemade raw milk kefir. On Saturdays, though, I tend to put a little more effort into it.

This is a wonderful coffee cake that I made with freshly picked strawberries. My husband and daughter both asked for scrambled eggs to go with it, as they feared the carb crash that usually follows a coffee cake. Not to worry! Since it has coconut flour and a ton of eggs, it's hearty and satisfying and won't leave you feeling lethargic in a carb coma. Try it and see how much more energy you have for the day!


Strawberry Breakfast Cake

6 eggs
1/4 cup coconut oil or butter, melted
2 Tbsp raw honey (or maple syrup, if you're not on GAPS)
1 Tbsp pure vanilla extract
1/2 cup milk of choice (coconut, almond, raw dairy)
1/2 cup coconut flour
1 tsp baking soda
1/4 tsp sea salt
1-1/2 cups strawberries, diced and divided

Topping:

1 cup nuts/seeds of choice (I used soaked and dehydrated almonds, walnuts, sunflower seeds)
1/2 cup shredded unsweetened coconut flakes
2 Tbsp raw honey
2 Tbsp butter or coconut oil
1 Tbsp cinnamon
pinch of sea salt

1- Preheat oven to 350 deg. F. Lightly grease an 8x8-inch baking pan with coconut oil.

2- In a large bowl mix together the eggs, oil or butter, honey, milk, and vanilla.

3- Add the coconut flour, baking soda, and salt. Stir until combined.

4- Fold in 1 cup of the diced strawberries. Pour the batter into the prepared pan.

5- Combine all of the topping ingredients in a small bowl.

6- Spoon the mixture over the top of the batter. Sprinkle the remaining 1/2 cup strawberries over the top.

7- Bake for 45 minutes, or until the a cake tester poked in the center of the cake comes out clean. If you need to bake longer than 45 minutes and the top is looking browned, cover it with a piece of foil so that the topping doesn't burn.


Monday, March 25, 2013

You Think I'm Nuts? You Might Be Right


Insomnia sucks. I've been battling it for over two years. In that time I've had maybe a handful of nights when I slept through the night. I have no trouble getting to sleep (because I'm so exhausted), but at 2 or 3 am my brain goes into hyper-drive and the weirdest thoughts come out to play, pinging around in my brain like quarks in a particle accelerator.

This morning what I woke to was my brain having a conversation with itself. "What if, " it postulated, "you did a mash-up of The Hunger Games and The Dating Game?" "Yes," it answered, " you could have a group of teenagers fighting to the death for a chance to go out with..... Justin Bieber!"

So while weary me is just wanting to go back to sleep, my brain is planning out what The Hungry Dating Game would look like.

The volunteers (I'm unsure on the number - one from each state? an even dozen? ) would stand on their platforms around the cornucopia, eyeing the loot and eyeing each other. Would it be smarter to run, or should they dash in to get the goodies. And which to choose? The hair dryer? The eyeshadow palette? The curling iron (a lethal weapon, if you can find an outlet)? A safe bet would be the Prada backpack. It's bound to have some mascara that can be used to stab someone in the eye.

I'm unsure how the actual games would play out. There would doubtless be some horrific scenes of broken nails and hair pulling. But when the final cannon sounded, there would be one victor. And poor Justin Bieber would have to go out with a mass murderer. But, that's why his bodyguards make the big bucks, right?

Eventually I fell back to sleep, waking groggy and disoriented several hours later. At which point I'm bored with bed and get up to go do the Sudoku on the computer. And think about breakfast.

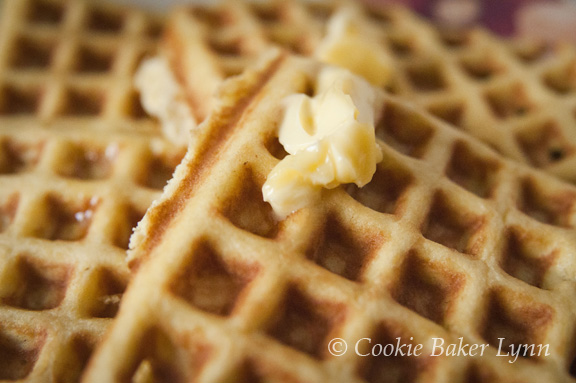
All week long we have eggs for breakfast. If you're a fat-o-phobe, it might give you heart palpitations to learn that I have 2-3 eggs fried in coconut oil every day, topped with butter. My son, when he's hungry will have 4, sometimes making them into an omelette with cheese. But he gets bored with eggs. So on the weekends I try to do something different. Today I'm going to make waffles. Lovely waffles with coconut flour and lots of eggs, so they're high in protein and won't give a blood sugar spike, followed by a carb coma. I'm going to make an extra big batch so that we can have leftovers (hopefully). Left-overs in waffle land mean (gasp!) sandwiches for lunch! My husband, the sandwich-o-phile, will be so happy.


Coconut Flour Waffles
 - adapted from Health, Home, and Happiness

1/2 cup melted coconut oil, butter, or ghee
1/2 cup coconut flour, sifted or sieved
12 eggs
1 Tbsp pure vanilla extract (read the label to make sure there's no added sugar)
1/2 salt
1 Tbsp gelatin

1- Preheat waffle iron. Grease it generously with coconut oil.

2- Mix all the ingredients in a large bowl. Allow the batter to rest for 10 minutes. It will thicken as it rests.

3- Pour batter onto the iron, using a spoon or small cup appropriate to the size of your waffle iron. Cook for 3-4 minutes, or until golden brown.

4- Serve with lots of butter and whatever else you choose. If you want to save some for lunchtime sandwiches, allow them to cool draped over the handle of a wooden spoon so they don't get soggy.

Sunday, April 22, 2012

It's Not Easy Living With Someone Who's Green


A friend recently sent me this in an email and I had to laugh because it describes my father so well. He was green way before there was such a thing as an Earth Day. Back then we called it being cheap, or on kinder days, "thrifty."

It's amazing how much thrifty and being green have in common.

We had one car. But my parents didn't fight over who got to drive it. My dad walked, jogged, or rode his bike to work. My mother walked to her volunteer job at the hospital. The car was for grocery shopping and car trips.

We made our own lunches and took them to school, bringing back the lunch box, thermos, and plastic sandwich bags to be washed and reused.

Our home's thermostat was never set above 55 deg. F. When the winter winds blew, rattling the old windows, we'd pile on extra sweaters and my dad would put up his homemade double windows (plastic sheeting over a frame, inserted into the window frame - very classy). We'd get in trouble for huddling next to a heating vent, hogging up all the heat, but on the days when our breath was visible, it was worth it!

We had a push mower. Not one that's gas powered. One that's human powered. I know from lots of personal experience that it takes a lot of work to mow a lawn with a push mower. Pushing the mower was only part of the effort. There were also the frequent stops to empty the grass catcher onto the compost pile. Yes, we composted way before it was cool. It only makes sense to compost when you have a garden where you grow a lot of your own vegetables and have fruit trees that inundate you with apricots, cherries, and plums.

Since I was raised this way, I am still fairly thrifty. Thus, one of my favorite places to shop is the thrift store. It's like a treasure hunt, sifting through other people's cast-offs to find that one thing you've been looking for.

One of the things on my wish list was a cast-iron pan. I am weaning myself away from non-stick (toxic fumes and nastiness leaching into my food is not a bonus for me) and was delighted to acquire a rugged cast-iron pan at the thrift store for only $7. Usually something is discarded because there's something wrong with it. Such was the case here. The pan was wearing a rust coat. It looked like it had been someone's camping skillet and was left out in the rain.


Fortunately, I have a super fabulous husband who's handy with tools he sanded it with power tools, creating a silky smooth surface. Then I seasoned it with flaxseed oil, a time-consuming process, but one that gave it a nice start to being non-stick. Now it is our go-to pan for all things breakfast. Eggs, sausage, and even grain-free pancakes cook up beautifully in it. Grain-free?? Yes, you read correctly. Pancakes without grains are possible.

This lovely pancake was made with shredded apples, topped with yogurt and blueberries. Breakfast bliss! And the bonus with cast-iron is that you get extra iron in your food. And if you buy your pan from the thrift store or a garage sale, you're recycling! You can't get much greener (or healthier) than that.


Apple Pancakes
 - adapted from Gluten-Free Gourmet
makes 3-4 servings

2 apple, peeled, cored, and coarsely grated
4 eggs
2 tsp ground cinnamon
Butter or coconut oil

1 - Using your hands, squeeze the grated to get most of the juice out. (Save the apple juice in the refrigerator for a tasty beverage.)

2- In a large mixing bowl, beat the eggs. Add the apple and cinnamon and stir to combine.

3- Place your skillet (cast iron rocks!) over medium heat. Grease it generously with either butter or coconut oil.

4- Pour about 2/3 cup of the mixture into the heated pan. Using a wooden spoon or heat-proof spatula, gently smooth the batter to the sides.

5- When the pancake is nicely browned on the bottom, but still wet on the top, flip it over to cook the other side. To flip, slide the pancake onto a plate with the wet side up. Place the plate over the skillet and quickly invert it.

6- Cook the second side until done and slide it onto a serving plate.

7- Top with your favorite toppings. I used yogurt and blueberries. Other choices include: warmed honey, jam, peanut butter, caramel sauce, or, for the purists, butter and maple syrup.

Saturday, April 30, 2011

Rules of Engagement


My daughter met her special someone when she was 15. They married when she was 22, and the whole time they were together it was a long distance relationship. They didn't go to the same school so they only saw each other at church or when one of them could make the 45 minute drive to the other's house. Then when they graduated from high school, he went across the state to college. What had been seeing each other once or twice a week became once or twice a quarter. Thank heavens for email, texting, and cell phones!

My daughter will be the first to admit that it was really tough, but also that it was invaluable for their relationship. Because they didn't have a lot of time to be together physically, they spend a lot of time talking and working through issues together.

One of the most important things they hammered out were the ground rules for fighting.

#1 - No violence. Ever.

#2 - Leave the past in the past. Don't drag it into present conflicts.

#3 - Leave out absolutes like "you always" or "you never"

#4 - Remember that words are as hurtful as knives. Choose the words you speak carefully as they can't be unspoken.

#5 - Don't let the sun set on your anger. Or if it sets and you're still angry, stay up all night working it out. Don't go to bed mad.

#6- Don't walk away in anger. Stay and work it out.

#7 - No withholding. The marriage bed is not a bargaining tool.


I must confess that recently I broke one of those rules. Sort of. You see, my Cuisinart broke. It just stopped working one day. I wasn't shocked as I'd bought that food processor at a yard sale 20 years ago for $10 (yes, I know, I have amazing yard sale blessings).

A food processor isn't an absolute necessity. Lots of people get by without them. It's just that for certain tasks it's really, really nice to have one. So when my husband asked about some apple scones I'd talked about making, I ....(hangs head in shame)....withheld. No, not the marriage bed, the scones.

"I can't make them without a food processor," I said, trying to convince myself it was only a teensy, weensy lie, knowing full well that I was certainly capable of making scones without a food processor. I just didn't want to. And if the scones were dangled out there as bait, maybe hubbie would be motivated to buy me a new one.

Hubbie is no fool. He, too, knows that scones can be made without an appliance (well, an oven is a necessity), but he's a big sweetie and likes to spoil me. So he went ahead and ordered me a new one. It was just like Christmas when that big box arrived on the doorstep! And the very first thing I made to break in my new baby was the apple scones. So, I'm not totally evil, am I?

These are so easy to make in the food processor, and they're "rustic," which means zero fuss. Let the food processor do the work, knead in the apple bits, lump it onto a baking sheet, score, and bake. You're half an hour away from delicious, warm scones!


If you've had a fight and need to do penance, try making the scones. All will be forgiven, I'm sure. And if you don't have a food processor, they are terrific incentive for getting one.

Apple Buttermilk Scones
- adapted from Muffins and Other Morning Bakes by Linda Collister
Makes 8 scones

1 large crisp tart apple (about 1/2 lb)
1-1/2 cups all-purpose flour*
1 cup whole wheat flour
1 tsp baking soda
1/2 cup raw sugar, plus extra for sprinkling
6-1/2 Tbs unsalted butter, chilled and diced
about 2/3 cup buttermilk, plus extra for brushing


1- Preheat the oven to 425 deg. F. Line a baking sheet with parchment paper.

2- Peel, core, and coarsely chip the apple into 1/2-inch chunks.

3- In the food processor combine the flours, baking soda, and sugar. Pulse briefly to mix. Add the butter and process until the mixture looks like fine crumbs. With the machine running, add the buttermilk through the feed tube to make a soft but not sticky dough.

4- Turn the dough out onto a floured surface and knead in the apple chunks to form a coarse, bumpy dough. Don't worry is they're not totally incorporated.

5- Shape the dough into a ball and put in onto the prepared baking sheet. Pat the dough into a 9-inch round. Brush lightly with buttermilk, then sprinkle with a little raw sugar to give a crunchy surface. Using a sharp knife, score the round into 8 wedges, but don't separate them.

6- Bake for 20 to 25 minutes until golden and firm to the touch.

7- Cool on a wire rack. You can eat them immediately, warm, or they are also good split and toasted. If you really want to go crazy, slather them with good butter and your favorite jam or honey. But I find them irresistible plain.

*I use a blend of 1/2 all-purpose flour, 1/2 white whole wheat

Monday, February 14, 2011

Love, Love, Love


English is an imprecise language. When you say, "I know," does that mean you know it in your heart, you have it memorized, or you've heard it vaguely somewhere sometime? When you say "Run," are you referring to a marathon, an errand, a nasty snag in your stocking, or a political campaign? And if you "shot" someone, it had better be with a camera or a bottle of tequila.

The word "love" is another imprecise word. We can love a car, a pet, a pair of shoes, a spouse, an ice cream flavor, a class, a grandmother, or just about anything (except okra, but that's a post for another day). But we don't mean the same thing each time. You don't love your grandmother the same way you love Ben & Jerry's Cherry Garcia (I hope, for your gramma's sake!).

In the original language of the New Testament, there are three different words for love. There is philios, which is brotherly love, eros, which is sensual, romantic, or erotic love, and agape, which is selfless love.

The kind of love that gets the most attention in our culture is eros love. It sells cars, it earns ratings on television, and makes people buy overpriced lingerie. But the kind to look for is agape love. That's the quiet love that does things for another, expecting nothing in return. It's the new mother who gets up 5 times in the night to nurse the crying baby. It's the son who takes out the yard waste bin when it's full, without even being asked to do so. It's the daughter who cleans up the kitchen after dinner as a special surprise. And it's the husband who sets his alarm and gets up at oh-dark-thirty every morning to go to a job he hates but is grateful to have, so that he can pay the bills for his family.

There's nothing sexy or flashy about agape love, but it's the kind of love that's most worth celebrating on Valentine's Day. So do something selfless for those you love. Make waffles. Pumpkin waffles. With amazing butter. It's a love letter on a plate. And even though it wasn't your motivation for doing it, you'll probably get a hug for making them.

I Love You Pumpkin-pecan waffles with maple-cranberry butter
- adapted from Williams Sonoma Breakfast


For the butter:
1/2 cup (2 oz) fresh or thawed frozen cranberries
1/4 Cup (2-3/4 oz) pure maple syrup
1 cup (2 sticks) unsalted butter, at room temperature

for waffles:
1 cup ( 5 oz) all-purpose flour,
1 Tbsp firmly packed dark brown sugar,
1 tsp baking powder
1/4 tsp fine sea salt
1-1/4 cups (10 fl oz) whole milk
1 large egg, lightly beaten
1-1/2 Tbsp unsalted butter, melted
2/3 cup pumpkin puree
1/3 cup coarsely chopped pecans
Warmed maple syrup for serving

1- The night before make the maple-cranberry butter. In a small saucepan over low heat, combine the cranberries and maple syrup and cook, stirring frequently, until the cranberries have softened and popped, about 5 minutes. Let cool, then place in a large bowl and add the butter. Beat with a wooden spoon until just combined. Cover the maple-cranberry butter and refrigerate until ready to serve.

2- Preheat the waffle iron. In a large bowl, sieve together the flour, brown sugar, baking powder, and salt, and whisk until well mixed.

3- In a large bowl or measuring pitcher, whisk together the milk, egg, and butter. Stir the milk mixture and the pumpkin puree into the dry ingredients until just blended. The batter may be slightly lumpy; do not overmix. Stir in the pecans and transfer the batter back to the pitcher.

4- When the waffle iron is hot, pour batter evenly over the center of the grid, easing it towards, but not into the corners and edges with a wooden spoon. Close the iron and cook according to the manufacturer's instructions until the waffle is golden brown and slmost crusty on the outside and the inside is soft, light, and springy, about 4 minutes.

5- Either serve each waffle as it is finished, or keep them warm on an uncovered platter in a low (200 deg. F) oven while you cook the rest of the waffles.

6- Serve the waffles on warmed plates. Using a small ice cream scoop, place a ball of cranberry butter on top of each waffle and serve at once with warm maple syrup, if desired.

Monday, November 22, 2010

Random Thoughts Before Breakfast


Sometimes my brain goes on sabbatical. Instead of focusing on the tasks at hand, it wanders far afield, contemplating the origins of the word "obfuscate", pondering what Pride and Prejudice would be like if it were set in Miami, and internally debating the merits of combining gingerbread with lemon vs. white chocolate (watch for the fruit of this debate in a future post).

One of my frequent random thought rabbit trails is "why are things the way they are?" Why, for instance, is it the norm in the United States to plant a front yard full of grass? Why not an herb garden that needs less maintenance and yields something useful?

Why is light red the only color group that gets its own name? We have light blue and light green and pink. Maybe we should have blunk and greenk as well.


Why do waiters at swanky restaurants wield pepper grinders that could double as renaissance weapons? Do they fear an uprising of the patrons when the bills arrive?

And why is our entire food culture based on wheat? There are a bunch of other grains out there, many of them higher in nutrition than wheat. So why is wheat the normal flour, rye is borderline normal, and all others are funky, weirdo hippie grains?

Whatever the reason, the rebel inside me likes to occasionally buck the trend and bake with different flours.

These were fun, easy pancakes to make. The spelt gave them a sweeter flavor than regular wheat pancakes, and they texture was nice and light, not the brickishness usually associated with whole grains.

Simple Spelt Pancakes
- adapted from King Arthur Flour Whole Grain Baking

2 cups ( 7 oz) whole spelt flour
2 Tbsp (7/8 oz) sugar
1 Tbsp baking powder
3/4 tsp salt
1-3/4 cup (14 oz) milk
2 Tbsp (1 oz) unsalted butter, melted
2 tsp vanilla (optional)


1- In a medium bowl, whisk together the spelt flour, sugar, baking powder and salt. In a separate bowl, combine the milk, melted butter, and vanilla, if you're using it.

2- Form a well in the center of the dry ingredients and pour the wet ingredients into the dry. Stir the batter just until the dry ingredients are thoroughly moistened; it will seem very thin and soupy. Let the batter sit for 15 minutes; the spelt will absorb the excess liquid and the batter will be much thicker.

3- Heat a nonstick griddle or heavy cast-iron skillet. Brush lightly with vegetable oil (or my new favorite, coconut oil). When the surface is hot enough to make a drop of water skip and hiss in the pan, spoon the batter onto the pan, 1/4-cupful at a time.

4- Cook until bubbles begin to form around the edges of the pancakes, 2 to 3 minutes. When they are just beginning to set, flip them and cook the second side about a minute more.

Depending on the how the first round of pancakes turned out, you might need to adjust your heat up or down.

Serve with good butter and your favorite syrup. Be prepared to be adored by those you share these with!


* One last question - milk comes from mammals, so how to you make milk from a grain? Does one have teeny tiny hands to milk the rice grains? Probably not. Can you make milk from spelt? If so, I'm sure there's no use crying over it.

Monday, April 12, 2010

Waffly Good Breakfast


One of the surest ways to produce a smile on my son's faces is to make waffles. I rarely do it, though, because of the time involved. Somedays, though, like rainy weekend days, it's worth it just to see the sunshine in his smiles.

I made these waffles and topped them with homemade plum jam. I had to talk my son into trying that. Anything new or different is viewed with suspicion. We finally compromised; one waffle with jam, one his standard way - every hole filled in with maple syrup (that boy loves his syrup!). He agreed that both were good, although I suspect he'll still reach for the syrup next time I make them. I'll bet if I wrapped them around a sausage, he'd love them even more - Pigs in a Quilt!

If you like variety, try adding some chopped toasted nuts to the batter, or if you like savory, some chopped fresh chives. Whatever you do, though, don't skip the beaten egg white step! That's the secret to the lofty tenderness of these treats.


Happy Day Buttermilk Waffles
- adapted from The Bread Bible by Beth Henspberger

1 cup unbleached all-purpose flour
1 cup white whole wheat flour
1 tsp baking soda
1/2 tsp baking powder
1/4 tsp salt
4 eggs separated
1/4 cup vegetable oil
2 cups buttermilk


1- Preheat a waffle iron to medium-high.

2- In a large bowl combine the flours, baking soda, baking powder, and salt. In another bowl, whisk together the egg yolks, oil, and buttermilk until foamy.

3- In a small bowl using an electric mixer, beat the egg whites until soft peaks form (when you pull the beater out of the whites, a peak should form which gently slouches over).

4- Pour the buttermilk mixture into the dry ingredients, stirring just until moistened. Fold in the whites until no streaks are visible.

5- Brush the waffle iron with oil or melted butter. For each waffle, pour about 1 cup of the batter on to the grid. Close the lid and bake until the waffle is crisp and golden brown, about 4 to 5 minutes. (My waffle iron has a marvelous tweedling noise it makes to let me know when it's done.) Remove waffle from iron with a fork and repeat with the remaining batter.

Any leftover waffles can be cooled and stored in a freezer zip-loc bag in the freezer for up to 2 months. Reheat in the toaster.

Sunday, January 31, 2010

Healthy Changes


January was the month for starting fresh, making good choices, and committing to taking care of yourself. I'm all for that. But it's always easier to make the resolution than to keep it up. February is the month of follow-through for the resolutions, and that can be a lot tougher.

I have many healthy habits already in place (exercising, cutting back on diet Coke, eating more veggies), but I know I have room for improvement. Certainly, when Mr. White Flour and Mrs. White Sugar are your best friends, there is room for improvement.

Now, don't get alarmed! I'm not swearing off my best friends. We've shared so much quality time together, I know we won't be strangers. But I can make better choices when I'm reaching for a quick something on my way out the door. Something that won't spike my blood sugar level and leave me lethargic in an hour. Something that doesn't contain enough preservatives to keep it "shelf fresh" for two years. And something that gives my body the nutrients it needs to be healthy.

Meet my new friend, the Power Bar. No, not the kind you buy at the store in a package. These are homemade, customized, and need to be refrigerated because they have no preservatives (but I'd feel OK keeping them out for the same length of time that you'd have a peanut butter sandwich unrefrigerated.) With all the antioxidant berries in them, I think I'll call them Berry Powerful Bars. Crammed full of healthy nuts, nut oils, seeds, rolled oats, and dried fruit, these bars will give you the power to cruise through your day. Plus they're super easy to make. You could even have your kids help you. But if you do that, you know they'll want some, and then there's less for you. Oh well, I guess if you want your kids to have healthy snacks, too....

Berry Powerful Bars
- adapted from Eating Well

1 cup old-fashioned rolled oats
1/4 cup slivered almonds
1/4 cup sunflower seeds
1 tablespoon flaxseeds, preferably golden
1 tablespoon sesame seeds
1 cup unsweetened whole-grain puffed cereal (see Note)
1 cup assorted dried fruits (blueberries, cranberries, cherries, golden raisins)
1/4 cup creamy almond butter
1/4 cup turbinado sugar
1/4 cup honey
1/2 teaspoon vanilla extract
1/8 teaspoon salt


1- Preheat oven to 350°F. Coat an 8-inch-square pan with cooking spray.

2- Spread oats, almonds, sunflower seeds, flaxseeds and sesame seeds on a large, rimmed baking sheet. Bake until the oats are lightly toasted and the nuts are fragrant, shaking the pan halfway through, about 10 minutes. Transfer to a large bowl. Add cereal and dried fruit; toss to combine.

3-Combine almond butter, sugar, honey, vanilla and salt in a small saucepan. Heat over medium-low, stirring frequently, until the mixture bubbles lightly, 2 to 5 minutes.

4- Immediately pour the almond butter mixture over the dry ingredients and mix with a spoon or spatula until no dry spots remain. Transfer to the prepared pan. Using a silicone spatula, press the mixture down firmly to make an even layer (wait until the mixture cools slightly if necessary). Refrigerate until firm, about 30 minutes; cut into 8 bars.

Note: I used Kashi Go Lean, which says on the front that it has "crunchy fiber twigs." Really? What marketing genius thought that was a selling point for a cereal? Have you ever gone to the store, hoping to find some crunchy fiber twigs for breakfast? I hope not.

Another note: All of the ingredients for this I purchased at Trader Joe's. Not that I'm paid to tell you that, I just thought you might want to know that it's not that tough to get all of those items you might not have in your pantry.

Just one more note: If you work for Trader Joe's corporate office and want to pay me to tell people things like I just did, please feel free to contact me any time!

Monday, November 23, 2009

Leftover Conundrum


The week of Thanksgiving is always a bit hectic with shopping for, prepping for, and cooking the big meal. This week is shaping up to be no exception. So I'm going to use that as an excuse to be super, über lazy. I'll tell you what I did with my leftovers. Not my Thanksgiving leftovers; I don't have those yet. No, the leftovers from when Peabody came to bake with me.

After making the pumpkin brioche and measuring off two 1-lb hunks, I still had a big blop of dough left. I stuck it back in the refrigerator to wait for inspiration.

When I was typing out the ingredients for the streusel, I figured out (something I wasn't able to do when company was here) that the recipe calls for 5 cups of ingredients and then only uses 1-1/2 cups of streusel. Hellooooo, of course you're going to end up with a bunch of leftover streusel.

So, after I cleaned up the kitchen I had a) leftover pumpkin brioche, and b) leftover streusel. What to do? Cinnamon rolls. Definitely cinnamon rolls.

I rolled out the dough into a rectangle, sprinkled the rest of the streusel over the dough, sprinkled extra cinnamon on top and then rolled it up into a log. 12 equal slices were nestled into a greased 9 x 13-inch pan and baked at 350 for 25-30 minutes. Then I drizzled a glaze over the top made from some powdered sugar, a glup of vanilla, and a shlug of milk.

Isn't that the most unrecipe recipe you've ever read? If that stresses you, you can go ahead and make it and write down all the weights, measurements, and directions. Me, I was just really happy to get rid of two leftovers in one go, plus have it turn out to be super tasty!

Happy Thanksgiving, to all who are celebrating this week!

Sunday, November 15, 2009

I Puffy Heart Puffy Pancakes

As the temperatures drop lower and lower, and the house gets chillier and chillier, a warm breakfast is something my family appreciates. Most morning that would be oatmeal, but on the weekends, I sometimes splurge and make something special. Recently a good friend gifted me with something delightful that I'd had on my wish list for a long time - an ebelskiver pan.

If you are uninitiated in the joys of ebelskivers, let me fill you in. They're a Danish treat - pancakes cooked in a unique pan that allows them to be turned over to form little puffy pillows that can be filled with whatever tickles your tastebuds, sweet or savory.

To break in my new pan, I naturally opted for sweet (that's just me). I found a recipe for Cinnamon Bun Ebelskivers and figured I couldn't go wrong with that. A pancake with a cinnamon bun inside? Oh, yeah, that's my kind of breakfast!


The batter is easy to throw together. Getting the right amount of batter in each well quickly is a bit of a challenge. A pre-measured batter dispenser would be helpful, but I don't have one, so I just scooped up batter with a measuring cup. It works.

Turning the pancakes takes a bit of practice. I've been told there is a handy wooden tool that's shaped just right for flipping them over. Again, I don't have that, so I used wood skewers. It works.


It's not challenging to make these, just a time commitment to be standing at the stove, pouring, filling, turning, waiting, and serving. If you've got a large family, you could be on your feet for quite a while. Or, you could be more clever than me and have your family take turns making their own. Either way, it's a treat breakfast that will be enjoyed and appreciated.


Cinnamon Bun Ebelskivers
- adapted from Williams Sonoma (who also sell the pans)

For the cinnamon filling:
1/2 cup granulated sugar
2 Tbs. all-purpose flour
1 1/2 Tbs. ground cinnamon
1/4 tsp. salt
4 Tbs. (1/2 stick) unsalted butter, cut into 1/2-inch cubes,
at room temperature

For the pancakes:
2 cups all-purpose flour
1 tsp. baking powder
1/2 tsp. salt
1 Tbs. granulated sugar
4 eggs, separated
2 cups milk
4 Tbs. (1/2 stick) unsalted butter, melted, plus more for cooking
Powdered sugar for dusting

1-To make the cinnamon filling, in a bowl, still together the granulated sugar, flour, cinnamon and salt. Add the butter and, using the back of a spoon, mash the butter into the flour mixture until all of it is absorbed into the butter, forming a paste. Set the cinnamon filling aside.

2- To make the pancakes, in a bowl, whisk together the flour, baking powder, salt and granulated sugar. In another bowl, lightly whisk the egg yolks, then whisk in the milk and the 4 Tbs. melted butter. Whisk the egg yolk mixture into the flour mixture until well combined; the batter will be lumpy. Using an electric mixer fitted with the whisk attachment, beat the egg whites on high speed until stiff but not dry peaks form, 2 to 3 minutes. Using a rubber spatula, gently fold the whites into the batter in two additions.

Put 1/8 tsp. melted butter in each well of a filled-pancake pan. Set over medium heat and heat until the butter begins to bubble. Pour 1 Tbs. batter into each well. Spoon 1/2 tsp. of the cinnamon filling into the center of each pancake and top with 1 Tbs. batter. Cook until the bottoms are golden brown and crispy, about 3 minutes. Using 2 skewers, flip the pancakes over and cook until golden and crispy, about 3 minutes more. Transfer the pancakes to a plate. Repeat with the remaining batter and filling.

Dust the pancakes with the powdered sugar and serve immediately. Makes 35 to 40.