Showing posts with label Candy. Show all posts

Thursday, February 2, 2012

Going Against The Grain


I've been getting some interesting feedback about our decision to go grain and sugar-free. The most often asked question is, "What do you eat??"

I understand that question. I've always been a carbaterian. A year ago I wouldn't have dreamed that it was possible to live without grains. I was one of the original Bread Baking Babes! Bread was a source of delight, comfort, and joy. So how am I doing without sandwiches, toast, pancakes, or bagels? Pretty well, actually.

In the 80's I jumped on the low-fat bandwagon. Thinking that 30% or less of the daily calories should come from fat, I attempted to shoehorn my favorite recipes into that magic formula. The results for the most part were….well, for lack of a better word, gross. My family really deserved better. Taking out the butter left cookies gummy and flavorless. Removing oil from salad dressings made them overly sweet. In fact, the secret to manipulating the magic formula was just to add more sugar. That made the carb calories a greater percentage than the fat calories, so it was good for you. Right? Actually, no, the pay off for all that nasty food was that I got fatter.

With the current weird eating plan that we're doing we are eating quite well. I often wish that I was an awesome photographer who could grab my camera and get off several mouthwatering shots before we sit down to a meal. Then I'd have something to blog. But, alas, my family devours the meals before there's a chance to even get out the camera, let alone set up a nice backdrop and pretty props. But just so you know that we're not starving, here's a sample of things that have been on the menu in the past couple of weeks.

~ Eggplant Parmesan (surprisingly delicious. I was dubious about using eggplant, but it turned out wonderfully, packed with flavor.)

~ Crepes with Ham and cheese sauce  (yes, you can make grain-free crepes)

~ Bacon, Avocado, and Tomato Salad.  (my family loves this so much they fight over the leftovers the next day.)

~ Garlic Chicken with Artichoke Hearts ( quick, easy, and tasty)

~ Pizza with Cauliflower Crust ( smelled heavenly in the oven and tasted just as good)

~ Chicken Piccata  (an adaptation of one of my favorite chicken recipes)


As you can see, we're not starving. And, in case you were wondering, we're not all getting fat. But weight loss wasn't the motivation for doing this different way of eating. Mainly, my motivation is my son. He's been a hard-core sugar addict and I want to get his blood sugar levels evened out and see if that can help his behavior and cognitive abilities. He's a bright boy, but some days I wonder what the weather is like on the planet he inhabits, because it certainly isn't the same one I'm on.

So while I'll make occasional grain and/or sugar treats for the husband and other child, I don't allow them for my son. And I don't want him to be sad or resentful that everyone else gets treats. So I make these. Chocolate, nuts, cacao nibs, coconut oil, and cranberries make it a healthy treat. They're a wonderful small indulgence that doesn't break the rules (much) and it's totally worth it to have a happy boy who still gets to have dessert. 

As you read through the recipe and look at the pictures, you might be thinking that they don't match. Well spotted. The pictures I took from my first time making the bark, just as the recipe directed. Then I tinkered with the recipe and got it just the way we like it.

Chocolate Freezer Bark

3-1/2 oz. dark chocolate (70% cacao or above), coarsely chopped
1 cup coconut oil
handful of slivered almonds
handful of cacao nibs
handful of dried cranberries

1- Set a heatproof bowl over, not in, a pan of simmering water. Place the chocolate in the bowl and stir occasionally until the chocolate is melted and smooth.

2- Remove the bowl from the heat and place it on a towel. Scoop the coconut oil into the bowl and stir until the coconut oil is dissolved. Stir in the rest of the ingredients.

3- Using a small cookie scoop, divide the melted chocolate between 24 mini muffin wells. Make sure there's an equitable distribution of the goodies. Place the filled tin into the freezer. Let it chill until the chocolates are solid, about 2 hours. When chilled, remove the chocolates to a zip-loc bag and store in the freezer.  (I use a non-stick mini-muffin pan and the chilled chocolate pops out super easily.)


* If you'd like a recipe for any of the menu items I listed above, leave a comment to that effect. I will post the recipe that is most requested, possibly even with pictures! But no promises.  

Thursday, December 22, 2011

Christmas Crack


It's been 4 years now since I shared on my blog the perilous substance known as Killer Crack Peanut Butter Fudge. I've been strong and resisted the temptation to make it for quite a while now, but I've gotten some terrific comments from readers who have. My favorite was this:

This is the fudge my husband rebukes, the way any good evangelical man rebukes sin, fearing and secretly lusting after it. He literally carries plates of this stuff to the neighbors so that it will not dwell under his roof, or on his waist. And yet I keep making it. The making AND the rebuking; a weird holiday tradition now.

Yes, I am all about holiday traditions and keeping it festive for my readers. With that goal in mind, I present to you my latest concoction, Chocolate Caramel Pretzel Crack. This is the evil cousin of the Killer Crack Peanut Butter Fudge. It's pretty simple to make, and yet it's irresistible. And once you've tried it, you are helpless; you simply must go back for more. And more. And....well, you get the picture.


What is it, you ask? A layer of pretzels, a layer of caramel, a layer of chocolate, and then a sprinkling of Crack. And by crack I mean sea salt. Either chunks or flakes will do, just so long as you get a nice hit of salt with every sweet, sticky, gooey, chocolatey, crunchy bite. It's seriously amazing.

 I've made it three times now. The first time was just playing around with the idea, the second time was refining it and the third time was because the second pan went so fast I didn't take any pictures! And the third pan has been cut up and put into containers to be given away because I don't want my family to be in such a carb coma that they can't open presents on Christmas. But I'd better get those containers out the door quickly, or else certain unnamed family members might "accidentally" happen to pry open a container (even if it's already in a sealed box ready to be mailed) and "accidentally" fall face first into it. Not pointing fingers or naming names. I don't want to spoil Christmas. I'm just saying it's a possibility.

 
If you're looking for the ultimate last minute gift, the perfect hostess present, or just a decadent treat for your co-workers or yourself, this is it. Go buy some pretzels, cream, and chocolate and in a couple of hours (you can wait for the chocolate to set up, can't you?) you can be in serious salty-sweet heaven.


Chocolate Caramel Pretzel Crack


8 oz. pretzels
1 cup heavy cream
5 Tbsp unsalted butter
1 tsp sea salt
1/4 cup water
1-1/2 cup sugar
1/4 cup light corn syrup
1 lb. good milk chocolate, chopped
Sea salt (Fleur de Sel or Maldon Sea Salt are good choices)


1- Line a jelly roll pan (10-1/2 x 15-1/2-inches) with parchment paper and butter the paper. (Mine is a seasoned stoneware pan, so I skipped the parchment paper.)

2- Spread the pretzels in an even layer in the pan. Break up a few pretzels to fill in gaps as needed.

3- In a small saucepan combine the cream, butter, and salt. Bring to a boil over medium heat and remove from the heat. Set it aside.

4- In a large saucepan combine the water, sugar, and corn syrup. Stir gently just to combine. Be careful to not splash the sugar crystals up onto the sides of the pan. Cover the pan and bring to a simmer over medium-high heat. The steam from the simmering will help to wash any errant sugar crystals from the sides of the pan.

5- When the sugar is dissolved, remove the lid from the pan. Continue simmering until the liquid turns a golden caramel color. If your liquid is getting dark in one area and not in another, DO NOT STIR. You can pick up the pan and gently shake it side to side the even out the color.

6- When the liquid is golden caramel color, add the cream mixture and stir. The mixture will bubble up, so be careful. Simmer and stir with a clean wooden spoon until a candy thermometer in the mixture reaches 248 deg. F, approximately 15 min.

7- Pour the caramel over the pretzels evenly.

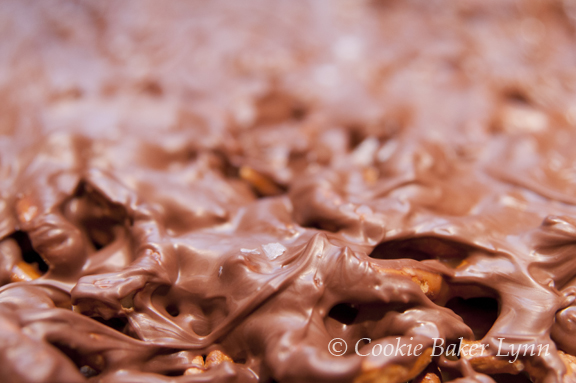
8- After the caramel has set, melt the chocolate in the top of a double boiler. For a prettier presentation, you can temper the chocolate. (I was attempting to temper the chocolate, but got distracted, so it didn't go well, hence the artistic swirliness of the chocolate. If that happens to you, don't worry. People will think you went to an extra effort to get those swirls, so if they compliment you, just say thank you.)

9 - Spread the melted chocolate evenly over the caramel layer.

10- Sprinkle sea salt sparsely over the top of the chocolate layer.

11- When the chocolate has set up but not hardened, use a pizza cutter or a knife to cut it into squares.


Wednesday, August 17, 2011

Cool and Creamy, Sweet and Dreamy


Although the general purpose of Cooking Camp is to have fun, I do try to incorporate some specific skills into each week's lesson. This week my band of happy little campers were to learn about working with chocolate. I'm not any kind of an expert, but since I have done tempering and dipping a few times without disastrous results, that's enough of a knowledge base to be able to pass along. The key to being a teacher is being at least one step farther along than the student, right?


To showcase our tempering skills, I picked peppermint patties, those delightful confections with a cool peppermint center surrounded by the snap of dark chocolate. Mmmmmmm.

The campers were excited to try them, but it was a bit difficult to get them to focus on the task at hand. I don't have many photos of them doing actual cooking tasks as they were constantly distracted by iPods, conversations, Words With Friends, and general goofiness. Trying to get three teenagers who are best friends to focus on a task is kind of like herding cats or juggling jello. I'm so glad I don't work in a high school!

I tried a new recipe for the patties because this one didn't require the overnight air drying of my previous recipe. The peppermint filling was a bit stickier than I was anticipating, but once dipped, it was the creamiest, most delicious I'd ever had.

The tempering process ended up being a bust as far as a learning moment. Because it was a fairly warm day, the chocolate took a long time to cool and the campers cut short their kitchen time to go to the ice skating rink. Hey, I understand. Summer's short and you have to pack in as much as you can. So while they skated, I dipped, and they got to take home a bag of the most amazing peppermint patties you can imagine. Not the most beautiful (I've previously discussed my dipping skills), but what they lacked in glamour, they more than made up for in taste.

If you love peppermint patties, you've got to try these! They are wonderful on their own, but would also be amazing if you put them in brownies or ice cream; however, there are no guarantees you'd be able to keep them from just being eaten the day they're made.

Best Ever Peppermint Patties

2 1/4 cups confectioners sugar
1 1/2 tablespoons light corn syrup
1 1/2 tablespoons water
1/2 teaspoon pure peppermint extract
1 T butter
1/4 cup confectioner's sugar, for kneading and rolling
10 ounces 70%-cacao bittersweet chocolate, coarsely chopped


Beat 2 1/4 cups confectioners sugar with corn syrup, water, peppermint extract, butter, and a pinch of salt using an electric mixer (with paddle attachment if using a stand mixer) at medium speed until just combined. Knead on a work surface dusted with remaining 1/4 cup confectioners sugar until smooth. Roll out between sheets of parchment paper on a large baking sheet into a 7- to 8-inch round (about 1/4 inch thick). Freeze until firm, about 15 minutes. Remove top sheet of paper and sprinkle round with confectioners sugar. Replace top sheet, then flip round over and repeat sprinkling on other side.

Cut out as many rounds as possible with cutter, transferring to a parchment-lined baking sheet. Freeze until firm, at least 10 minutes. Meanwhile, gather scraps, reroll, and freeze, then cut out more rounds, freezing them.

To make chocolate coating:

Melt three fourths of chocolate in a metal bowl set over a saucepan of barely simmering water. Don't let the temp get over 120 deg. F. Remove bowl from pan and add remaining chocolate, stirring until smooth. Cool until thermometer inserted at least 1/2 inch into chocolate registers 80°F.

Return water in pan to a boil and remove from heat. Set bowl with cooled chocolate over pan and reheat, stirring, until thermometer registers 88 to 91°F. Remove bowl from pan.

Balance 1 peppermint round on a fork and submerge in melted chocolate, letting excess drip off and scraping back of fork against rim of bowl if necessary, then return patty to sheet. Coat remaining rounds, rewarming chocolate to 88 to 91°F as necessary. Be sure to work in small batches. You need to keep the chocolate in the right temperature zone and the filling as close to frozen as possible. Once the filling warms up it goes all limp and is difficult to keep on your dipping fork. Let patties stand until chocolate is set, about 1 hour.

In warm weather, store in the refrigerator.

Makes about 2 dozen

Note: In warm weather, the longest part of this process is waiting for the chocolate to cool down to 80 degrees. You can plan your work around this. Perhaps start with the melting of the chocolate, then making the peppermint filling as the chocolate cools.

Monday, August 1, 2011

Deliciously Repurposed


Leftovers are the bane of my existence. I hate having bits and bobs, odds and ends from cooking projects cluttering up my counters, cupboards, and refrigerator. A half a bag of teff flour, 3/4 cup of alphabet pasta, and an amazing amount of egg whites interred in their tiny plastic coffins in the refrigerator are just a few of the things that make it hard to put away groceries. I have so many leftovers, that it's hard to find a place for actual food.

Cooking camp, although it was a lot of fun, did have the aggravating side effect of producing more leftovers - a whole pan of marshmallows. I didn't want my kids to just hork down the whole pan as I'm not tall enough to be able to reach the ceiling to peel them off of it, were they to consume that much sugar. So, what to do with a pan of marshmallows?


Recently on Pinterest I saw a delicious idea - s'more truffles. Leftover marshmallows seemed like a great excuse to make truffles. I played around and came up with my own recipe and they were delicious! I put little mini-muffin papers into an egg carton and sent some to work with my husband, some to youth group with my daughter, and gave some to visitors that stopped by. And the few that were leftover? Well, I'm not crazy enough to complain about leftover truffles!


S'more Truffles


1 lb. bittersweet chocolate, chopped
2 cups heavy cream
1 tsp espresso powder
Homemade marshmallows
powdered sugar
1 packet of graham crackers, crushed into fine crumbs
1 lb. milk chocolate


1- Place chopped chocolate in medium heatproof bowl.

2- Combine whipping cream and espresso powder in medium saucepan. Bring cream mixture to simmer over medium-high heat, whisking occasionally. Pour cream mixture over chopped chocolate; let stand 1 minute, then whisk until chocolate is melted and mixture is smooth.

3- Place the chocolate mixture into the refrigerator to cool and thicken, about 2 hours.

4- Using kitchen shears, cut the marshmallows into the size of mini marshmallows. Dip the shears in powdered sugar frequently to keep them from gumming up. Rolls the mini marshmallows in the powdered sugar to keep them from sticking to each other, then shake off the excess sugar.

5- Place the graham cracker crumbs into a shallow bowl. Line two baking sheets with parchment paper.

6- Remove the thickened chocolate from the refrigerator. Using a small scoop (about Tbsp size), scoop up a ball of chocolate, smoosh a little marshmallow into the center, cover it over with chocolate, and drop the chocolate ball into the graham cracker crumbs, rolling it to coat it completely. Place the ball onto the prepared tray.

7- Repeat with the remaining chocolate and marshmallows. As soon as a tray is full, place it into the refrigerator. If you're working in a hot kitchen, you might need to work with only a portion of the chocolate at a time, keeping the rest in the refrigerator to stay firm.

8- Allow the chocolate balls to firm up in the refrigerator, from 1 hour to overnight.

9- Use the milk chocolate to dip the chocolate, following the tempering instructions in this post.

Store the truffles in the refrigerator.

Monday, July 25, 2011

Cooking Camp

This spring I saw a brochure for a kitchen store that does cooking classes. They listed a summer cooking camp for teens that ran for a week. My daughter and I loved the sound of that, but not the price tag. $385. Seriously?? I can cook. I can teach. So I decided to have Cooking Camp in my kitchen for my daughter and a couple of her friends.

Since we have multiple schedules to juggle, we're shooting for once a week, and since I do desserts, the theme of the camp is "Desserts!" Each week we cover a different skill and make a treat that the kids can take home.


The first week we handed out binders for the recipes, went over kitchen rules (I think I broke all but one the first day), and made marshmallows. Teens and marshmallows. What was I thinking?


I walked them through making a sugar syrup, using a candy thermometer, using gelatin, whipping marshmallows, and then, through the magic of television (I made a batch the day before so I could pull out the finished product like they do on cooking shows), I cut a pan of cooled, dried marshmallows for the kids to cut and roll and powdered sugar.


Then, to insure that they were fully sugared up, we roasted marshmallows over the gas stove (note to self: shake the powdered sugar off before putting the marshmallow over the burner), and made s'mores.

First cooking class - I'm not sure how much they learned, but I give it an A+ for fun!

Wednesday, January 19, 2011

I Am Well-Tempered


It was a tradition in my family for our Christmas stockings to always have a mandarin orange in the toe of the stocking. Why? I'm not really sure. You'd have to ask my parents that question. But to me it was normal. So when I got married, our first Christmas together, I put a mandarin orange in the toe of my husband's hand-knit stocking. "What are you trying to do? Stretch it all out?" he exclaimed (which really was kind of foolish as his mother, when knitting it for him, had doubled the pattern to make it extra long. The Santa has a very droopy face.)

The next year, I knew better. I put the mandatory orange in the toe of the stocking, but carefully supported the stocking's weight on a stool, so it wouldn't stretch out (more).

When I first saw a chocolate orange, that chocolate treat that is shaped like an orange and cleverly break apart into segments, I was intrigued. I was excited to buy one as my husband loves the combination of dark chocolate and bitter orange together. He loved it and it became a Christmas tradition for the toe of his stocking. He didn't complain nearly as much about the stretchage (that's a word, right?) when it involved chocolate.

This past year, though, I skipped the orange and instead I made these chocolate covered marshmallows. I was in the mood to make marshmallows and the idea of orange marshmallows was intriguing. I put three kinds of orange flavor into the marshmallows, and dipped them in my darkest chocolate (72% cacao). My husband pronounced them heavenly and had an anxiety attack when I tried to give some away. Luckily, I have the secret recipe and can make them again. It could be that the stocking will be a little less stretched next Christmas morning, but we'll have amazing hot cocoa with marshmallows!

Decadent Dipped Orange Marshmallows

3 packages unflavored gelatin
1 cup cold, fresh-squeezed, sieved orange juice, divided
1 1/2 cups granulated sugar
1 cup light corn syrup*
1/4 tsp salt
1 Tbsp orange liquer (Grand Marnier)
1/4 tsp orange extract
Confectioner's sugar, for dusting


1- With a sieve, generously dust and 9 x 13 inch baking dish with confectioner's sugar.

2-Combine the gelatin and 1/2 cup of cold orange juice in the bowl of an electric mixer fitted with the whisk attachment and allow to sit while you make the syrup.

3-Meanwhile, combine the sugar, corn syrup, salt, and 1/2 cup orange juice in a small saucepan and cook over medium heat until the sugar dissolves. Raise the heat to high and cook until the syrup reaches 240 degrees on a candy thermometer. Remove from the heat.

4- With the mixer on low speed, slowly pour the sugar syrup into the dissolved gelatin. Put the mixer on high speed and whip until the mixture is very thick, about 15 minutes. Add the orange liquer and orange extract and mix thoroughly.

5- Pour the marshmallow mixture into the pan, smooth the top, and dust with more confectioners' sugar. Allow to stand uncovered overnight until it dries out.

6- Run a knife around the edge of the pan to loosen the marshmallows. Turn the marshmallows onto a board and cut them in squares. Roll them in confectioners' sugar and store in an airtight container.

* If you wish to avoid using corn syrup, try this recipe here, replacing the water with orange juice and adding the orange flavorings at the end.


For tempering the chocolate, I used the instructions in Field Guide to Candy, by Anita Chou.

To dip the marshmallows, you'll need about 1-1/2 to 2 lbs of dark chocolate, even if you don't plan on using it all on this project. Using smaller amounts makes it difficult to control the temperature.

1- Finely chop the chocolate. Place 2/3 of the chocolate in a metal bowl set over a pan of simmering water. Make sure the bottom of the bowl doesn't touch the water. Place an instant read thermometer in the chocolate and stir frequently with a rubber spatula.

2- For dark chocolate you want to keep the temperature under 120 deg. F. When the chocolate has fully melted, remove the bowl from heat and wipe the bottom of the bowl to get rid of condensation. Be careful not to allow any steam or water to get into the melted chocolate, as this can cause the chocolate to seize up.

3- Stir in the remaining third of the chocolate, a little at a time. Let it melt before adding more.

4- Let the chocolate cool to about 82 deg. F, stirring occasionally till it reaches that temperature.

5- Once the chocolate reaches 82 deg F, place it back over the simmering water. Reheat it to 88 - 91 deg. F. (This is for dark chocolate. Milk or white have different temperature requirements.)

6- Spread a small spoonful of chocolate on a piece of wax paper. If it dries quickly with a glossy finish and no streaks, the chocolate is in temper. If it looks dull or streaky, re-temper the chocolate, starting with step 1.

7- Brush excess powdered sugar off a marshmallow. Using two forks, dip the marshmallow into the chocolate, covering it completely. Scrape excess chocolate off and set the marshmallow on a piece of parchment or wax paper to cool and dry thoroughly. Do not disturb until the chocolate is fully cooled and hardened. Repeat with remaining marshmallows.

If the temperature starts to dip, put the bowl back over the simmering water to bring it to the appropriate temperature.

If you have just a bit of chocolate left over, scrounge the pantry for dippable items. Graham crackers, dried fruit, and fresh strawberries are all good.

Monday, January 3, 2011

I Resolve To Be Well-Tempered


The beginning of the new year tends to be when people post their resolutions. I don't do resolutions. I'm not big on resolutions. I've made enough resolutions that I know resolutions like "get a job" or "get a boyfriend" or "lose 10 lbs" aren't worth the paper they're written on, unless you wrote them on toilet paper, when, at least, they are good for one purpose.

Instead of resolutions, I made cookies. And cakes. And pies. And, well, you get the point, I make lots of desserts. And what springs out of that are my goals for the year.

1- Find a home for my cookbooks. Keep the cookbooks there when not in use. And get rid of cookbooks I don't use.

and

2- Exercise 5 to 6 times per week.


Pretty simple, right? You might think the exercise will be the tough one for me. Those who know me are laughing, though, at the idea that I can keep my counters free of cookbooks. You can check back with me at the end of the year to see how I did. See the secret to success is setting the bar so low you can step over it. Of course, it's always possible to trip over it, but still, you're getting over it. Right?

Also simple is this gorgeous treat. I know, I know, you're all on diets (I put diets in the same category as resolutions), and you can't bear the thought of something sweet. Bookmark it for next December. You will amaze your friends if you give them a gift box of these.

I started with a gift I received. My amazing and talented sister gave me a tub of homemade, organic, candied citrus peel for Christmas. It was a sparkling array of jewels from lemons, oranges, and grapefruits that my family eagerly tucked into. But me, being me, viewed it as a springboard for something else. As my husband's hand hovered over the tub, selecting his next nugget of deliciousness, I thought out loud, "I wonder how those would be dipped in dark chocolate." Slam went the lid on the tub. "Yes, please!" he said.

I've been working on my chocolate dipping skills lately and I'm getting better. I'll post all about my adventures in tempering some other time. For today you just get pictures and a "recipe" because I've got to go work out.


Chocolate Dipped Citrus Peel

Candied organic citrus peel (you can make this yourself, but it's preferable if someone else gives it to you. It saves lots of time)
Dark chocolate, melted and tempered

1- Hold a piece of citrus peel by one end. Dip the other end in the tempered chocolate. Gently wipe excess off with a fork or spoon. Lay the dipped peel on a piece of parchment or Silpat. Let cool and harden before removing.

Monday, May 10, 2010

Marshmallows, New & Improved!


The very first thing I ever posted on my blog was marshmallows. I'd wanted to try making them for years and starting my blog was the excuse I needed to take the plunge. Since then I've made them hundreds, dozens, well, lots of times. I love watching the alchemy which transforms gelatin and sugar syrup into billowy pillows of sweetness. I've made them vanilla, peppermint, and fruit flavored, so you might wonder why I'm giving myself a High Five award on yet more marshmallows.

I know candy is not anyone's definition of health food, so it might seem foolish to try and make it healthier, but I am concerned about using corn syrup. Since High Fructose Corn Syrup hit my radar several years ago, I've been trying to keep it out of my house. How disheartening is was to learn that the dreaded HFCS had snuck into my regular corn syrup! I still have it in my pantry, but try to use it only sparingly. (David Lebovitz wrote a terrific post about when and why to use corn syrup here.)


So it was with delight that this marshmallow-making fan found a book called Marshmallows, which has a method for making your own syrup to replace corn syrup. The result? Not a settle for marshmallow. Not an "it's OK, but I'm wistfully thinking of the other kind" marshmallow. This made better marshmallows. Softer, fluffier, not as gummy. My family loved them and all gave them two sticky thumbs up. Woo hoo!

Because you have to make the syrup before you can make the marshmallows, this works out well as a multi-day project.

"Healthier" Marshmallows
- adapted from Marshmallows, Homemade Gourmet Treats

Marshmallow Syrup
- makes about 1 quart

2 cups water
5-1/3 cups granulated cane sugar
1 tsp cream of tartar
Pinch of salt


1- In a heavy 4-quart pan, combine all the ingredients, stirring until the sugar is moistened. Place over medium-high heat and bring to a boil. Cover the pan for 2 minutes so the steam will wash any sugar crystals from the sides of the pan.

2- Uncover the pan, place a candy thermometer in the sugar mixture, and increase the heat to high. From this point on, do not stir! Continue cooking until the thermometer reads 240 deg. F.

3- Remove the pan from the heat and let the syrup cool for 15 minutes. Ladle* it into clean jars and attach lids.

Store the syrup at room temperature for up to 2 months. If the syrup begins to form crystals at the bottom of the jar, pour out the amount of syrup you need when you use it, without scraping the jar. Discard any crystallized part that is left in the jar.

* Ladle is important. I poured and the syrup picked up sugar crystals from the side of the pan and began crystallizing in the jar.

Note: The syrup will be very thick once it cools. To use it, microwave uncovered for 2 minutes on high power, or place the jar in a pan of hot water over low heat until it can be poured easily. Do not stir the syrup.

Marshmallows

1/2 cup + 2 Tbsp cold water
1-1/2 tbsp pure vanilla extract
3 Tbsp unflavored gelatin
3/4 cup water
1-1/4 cups Marshmallow Syrup (above)
Pinch salt
1-1/2 cups granulated sugar
Coating mixture (step 7)


1- Spray the bottom and sides of a 9 x 13 pan with cooking spray and wipe it lightly with a paper towel, leaving only a thin film of oil. Set up a stand mixer with whisk attachment in place.

2- Measure the cold water into a measuring cup and add the vanilla. Place the gelatin into a small bowl and pour the water mixture over it, stirring until there are no lumps. Set the bowl near the stove.

3- Place the 3/4 cup water, the Marshmallow Syrup, salt, and sugar, in that order, into a 4-quart pan. Bring the mixture to a boil over medium-high heat. Cover the pan with a lid and allow it to boil for 2 minutes to wash down the sugar crystals on the sides.

4- Remove the lid, place a candy thermometer in the pan, and continue boiling until the syrup is 250 deg. F. Once the lid is removed, do not stir the mixture! Remove the thermometer and gently stir in the bloomed gelatin.

5- Pour the batter into the bowl of the stand mixer. Beat it on high for 10 to 12 minutes. At first the batter will look very watery, but as it beats, it will become thick, white and glossy and will increase in volume by two- or threefold.

6- Remove the bowl from the mixer stand and spread the batter into the prepared pan. Smooth the top with a spatula. Let the pan sit uncovered at room temperature for at least 4 hours or overnight.

7- Sift together 3/4 cups confectioners' sugar and 1/4 cup cornstarch. Lightly sprinkle a work surface with the mixture. Ease the marshmallows away from the sides of the pan and flip the pan over, releasing the marshmallows onto the cutting surface. Cut the marshmallows into squares, or use cookie cutters to cut fancy shapes. Toss the cut marshmallows in the powdered sugar mixture, shaking off any excess.

Place the coated marshmallows in an airtight container, with wax paper between the layers, and leave a corner of the lid slightly ajar. They will keep at room temperature for up to 2 weeks.

Thursday, April 15, 2010

Preserving Spring

My very first High Five post! Go me! Since my first post bearing the prestigious High Five badge is in April, I'm going to have to hustle to get ten up by years' end and earn the mega cool High Ten badge.

(If you're wondering what a High Five is, and how you, too, can have this cool badge of honor on your blog, read this post.)


I have wanted to try crystallizing flowers for a long time. I love the dainty beauty of sugar-dusted blossoms and, because my cake decorating skills are so atrocious, they are the perfect cake or cupcake topper for me. But buying them in stores is holy moley expensive. I wanted something to dress up the wedding cake, so I thought now would be a good time to try my hand at crystallizing violets.


If they're that expensive, they must be tough to do, right? Not so. They are actually quite easy. All you need is fresh flowers, which were grown without pesticides or other nasty chemicals, a fine paintbrush, an egg white or egg white powder, super-fine sugar, and waxed paper on which to dry the flowers. Optional is tweezers to hold the flowers, if they're quite small or delicate.

Make sure the flowers you're using are edible. Good choices include violets, pansies, rose petals (no systemic insecticides, please), lilac florets, scented geraniums, and apple or plum blossoms. They should be picked first thing in the morning and have the dew thoroughly dried off.


I don't keep super-fine sugar on hand, so while my daughter was outside picking violets from the abundance trying to take over my yard, I threw some in my food processor and whirled it around till it was very fine. Then it went into a small dish with a small spoon (still haven't gotten rid of the baby cutlery).

Next I whisked an egg white with 1 Tbsp of water in another small bowl just till it started to appear frothy (a few bubbles). You can use up to 2 Tbsp of water to get the desired consistency. You want it thin enough that you can paint a very thin layer on the flower. If it's too gloopy, add a bit more water.

If you are wary of using raw egg whites, substitute egg white powder (also called meringue powder) for this step and reconstitute it to the appropriate thickness.

Holding the flower gently in one hand (with tweezers, if the blossom is dainty), dip the paintbrush in the egg white solution and gently brush the petals with it, making sure to cover every part of the flower, both front and back.


Then, holding the flower over the sugar bowl, take a small spoonful of the super fine sugar and gently shake it over the flower, turning the flower so the sugar dusts every surface.


Carefully arrange your flower on the sheet of waxed paper, using the tweezers to rearrange petals, if necessary. If you find you missed a small spot, dust a little more sugar over it, or paint more egg white, then dust.

The flowers should be left undisturbed to dry for up to 48 hours, depending on your humidity. When they are thoroughly dried, place them in an airtight container, with waxed paper separating the layers.

For a baker friend, a small box or tin of handmade crystallized flowers is a wonderful gift!

Friday, February 12, 2010

Pass The Love


When I was a little girl I loved Valentine's Day. In elementary school we were assigned the project of making a valentine holder, either a shoe box with a slot in top, or a large paper pocket. These were decorated with tissue paper, paper doilies, and stickers, transforming them into works of art worthy of a home in the Louvre.

On Valentine's Day we brought our decorated valentine holders to school, along with a stack of valentine's to give. The teachers required that you give one to every student. That way Little Miss Popularity wouldn't receive a truckload and the unfortunate social outcast wouldn't go home with a broken heart and an empty box. This rule was also a way to insure that the boys gave valentines. Left to their own devices, the boys would punch each other on the arm and maybe daringly give a card to their favorite girl with a romantic theme of boogers and spiders.

One of the most popular decorating motifs for the valentine cards was the conversation heart. Those little candy hearts with printed sayings that taste like ant-acids were glued onto the paper doilies (Elmer's glue is edible, right?). I'm sure Mrs. Armstrong stood over little Bobby the night before, forcing him to make the valentine cards, and zero thought went into who got what card. But, oh what speculation there was the next day when a girl got a card with a heart bearing the message "QT PIE" or "MAYBE TONIGHT." "Wow, he must really like me!" her heart fluttered!


This year for Valentine's Day I got an early present from the nice people at POM Wonderful. (Thank you!) They sent me some of their heart-healthy POM Wonderful Pomegranate juice. I know they've spent oodles of money on researching proving the health benefits of their juice, but I just like it because it's delicious. And being sent some gave me an opportunity to play with my food. I've had marshmallows on my mind for a while and the thought of pomegranate marshmallows made me giddy with glee. But then I thought about using them to make rice crispy treats. And then cut them into hearts. And, of course, the idea of giant rice crispy conversation hearts wasn't far behind.

I adjusted the rice crispy treat recipe for the marshmallow recipe, and stirred in the butter and cereal as soon as the marshmallows were done. I'm not sure this is the best way to make them. On reflection, and lots of sampling, my husband and I decided the cereal wasn't as crisp as it should be. Perhaps the drying out period for the marshmallows was important to keep the cereal crisp. Either way, I'll give you the recipe as I made it, then you can decide to go with the traditional method, or the done-in-one way.

Happy Valentine's Day! Oh, and I don't recommend gluing these to anything. Just wrap in plastic wrap and hand them to your friends. And, please, don't leave out the dumpy girl in the corner; she'd be sad.

POMarshmallow Rice Crispy Treats

3 packages unflavored gelatin
1 cup POM Wonderful Pomegranate juice, divided
1 1/2 cups granulated sugar
1 cup light corn syrup
1/4 tsp salt
1 tsp vanilla extract
6-1/2 Tbsp butter, melted
10 cups Crispy Rice Cereal
Small amount of buttercream frosting, tinted pink


1- Generously butter a cookie sheet.

2 - Combine the gelatin with 1/2 cup of the POM Wonderful juice in the bowl of an electric mixer fitted with a whisk attachment. Allow this to sit and dissolve while you make the syrup.

3- In a small saucepan combine the sugar, corn syrup, salt, and 1/2 cup of the POM Wonderful juice. Cook over medium heat until the sugar dissolves. Raise the heat to high and cook until the syrup reaches 240 degrees on a candy thermometer. Remove from the heat.

4 - Withe the mixer on low speed, slowly pour the sugar syrup into the dissolved gelatin. Put the mixer on high speed and whip until the mixture is very thick, about 15 minutes. Add the vanilla and mix thoroughly.

5- Stir in the melted butter. When it's incorporated, stir in the cereal by hand, using a spatula or wooden spoon. When all of the cereal is coated by the marshmallow, turn the mixture out onto the cookie sheet. Using a buttered spatula or buttered hands, press the mixture down firmly to make an even layer. Let it cool and set for several hours or overnight.

6- Using a heart-shaped cookie cutter, cut out the treats, spacing as closely together as possible. Set the hearts aside. Find a willing helper to clean up the leftover bits.

7- Using a pastry bag fitted with a very small tip, pipe the frosting around the hearts and then pipe messages onto the hearts. Allow to dry and then wrap in plastic wrap and put a pretty ribbon around it.

Wednesday, December 23, 2009

Getting In Touch With Your Inner Grinch


So you've made it through your nice list, picking out delightful gifts for your best friends and the perfect presents for your loved ones, but what about the real goobers out there? The weasel who cut in line at the post office? The cretin who stole your parking spot? The jerk who lets his dog poop on your lawn every day?

Do you really think they deserve ho ho ho's and candy canes? No! They deserve coal in their stockings! Now, you're really not going to follow Mr. Bagless and his pooch home to put coal in his stocking, but you can have fun putting faux coal in your family's stockings. And since you love your family (don't you?), you can make it naughty, but nice. It's coal, but it's candy, too.

Wrap up a few chunks in cellophane bags and garnish with a fancy bow. What better stocking stuffer? And if you do track down Mr. Bagless, you could leave him a "gift" on his doorstep. Along with a few bags.

Candy Coal
- adapted from Martha Stewart

3-1/2 cups sugar
3/4 cup light corn syrup
1 Tbsp black gel-paste food coloring
5 tsp peppermint, cinnamon, or anise extract (or whatever flavor you choose)
1 tsp baking soda


1- Line an 8-inch square baking pan with a piece of aluminum foil large enough to overhang the sides by about 2 inches. Set aside.

2- Bring sugar, corn syrup and 3/4 cup water to a boil in a medium saucepan over medium-high heat. Stir to dissolve sugar, and wash down sides of pan with a pastry brush dipped in water to prevent crystals from forming.

3- Once mixture comes to a boil and all the sugar has dissolved, clip a candy thermometer to pan and raise heat to high. Continue cooking without stirring until mixture registers 300 F (hard crack stage). Remove from heat.

4- Carefully add food coloring, extract and baking soda; stir slowly with a clean wooden spoon until thoroughly combined and mixture no longer bubbles, about 2 minutes.

5- Pour into prepared pan, and let cool completely. It will fill the pan completely, but will deflate as it cools.

6- Lift foil to remove candy from pan and transfer candy to a large plastic bag. Use a kitchen mallet or hammer to crush candy into pieces. Store in airtight container.

- makes about two pounds

Monday, December 7, 2009

The White Stuff


When my sister was in junior high the thing to do at sleepovers was to make fudge. Why? I don't know other than a bunch of 13 year old girls plus a big pan of chocolate was a pretty good mix. I couldn't wait to be that cool, so when one of my friends invited me to spend the night, I volunteered to bring a fudge recipe. What I hadn't thought through was that her father was an orthodontist and sugar was frowned upon in her household. It was well-kown that on Halloween, theirs was the house that handed out toothbrushes and travel-sized tubes of toothpaste. Poor deprived girl!

I just don't relate to that "no sugar" mindset. What would your sweetie give you for Valentine's Day? A box of tofu crisps? And what about when you're stressed and really need to bake? Do unsweetened rutabaga bars with carrot crumble truly hit the spot? And how about girlfriend time - how's that supposed to work without sugar?


Well, fortunately for my girlfriends, they don't have to find out. We're having our annual cookie exchange soon and these beauties just might make it onto the plate (if my family doesn't devour it all first).

This is a new technique for me. I've made fudge here and here, and someday I'll post my positively fabulous creamy fudge, but today's involved a hot syrup, waiting for an hour, and then a handheld mixer. A slightly different approach, but still rich, creamy, and wonderfully chocolatey. Adding crushed peppermint makes it perfect for Christmas time. Treat yourself or hand out bags to friends, family, and random strangers. Share the love. And the sugar.


May your days be merry and bright, and may all your baking sugar be white. (Except for the brown and dark brown, of course)

Perfect Peppermint Fudge
- adapted from Fine Cooking

3 Tbs. cold unsalted butter; more at room temperature for buttering the thermometer and pan
3-3/4 cups granulated sugar
1-1/2 cups heavy cream
3/4 cup crushed peppermint candy
4 oz. unsweetened chocolate, coarsely chopped
3 Tbs. light corn syrup
1 generous tsp kosher salt


1- Lightly butter the face of a candy thermometer and set aside.

2- n a large (4-quart) heavy-duty saucepan combine the sugar, cream, chocolate, corn syrup, and salt, stirring with a wooden spoon or heatproof spatula until the ingredients are moistened and combined. Stirring gently and constantly, bring the mixture to a boil over medium heat, 7 to 12 minutes. Cover the saucepan and let the steam clean the sides of the pan for 2 minutes. This prevents the formation of sugar crystals in the fudge.

3 -Clip the candy thermometer to the pot, being careful not to let the tip of the thermometer touch the bottom of the pot, or you might get a false reading. Let the mixture boil without stirring until it reaches 236°F to 238°F, 2 to 5 minutes. Take the pan off the heat and add the butter, but do not stir it into the mixture. Set the pan on a rack in a cool part of the kitchen. Don’t disturb the pan in any way until the mixture has cooled to 110°F, 1 to 1-1/2 hours.

4- While the mixture is cooling, line the bottom and sides of an 8x8-inch baking pan with foil, leaving a 2-inch overhang on two opposite sides of the pan. Butter the foil. Set the pan aside.

5- Remove the thermometer from the fudge mixture. Using a hand mixer, beat the mixture on high speed until it is a few shades lighter in color and thickens enough that the beaters form trails that briefly expose the bottom of the pan as they pass through, 10 to 20 minutes. (Mine had kind of a caramelly consistency when I began beating it. I might have beat mine too long, but it wasn't nearly 10 to 20 minutes. It started clumping. That wasn't a problem, though, as I just pressed it into the pan.)

6- After beating the fudge, stir in 1/2 cup crushed peppermint candy. Pour the thickened fudge into the prepared pan, using a rubber spatula to help nudge it out of the pot. You can scrape the bottom of the pot but not the sides; any crystals that stick to the pot stay in the pot. Smooth the top of the fudge with the spatula. Sprinkle 1/4 cup crushed candy over the fudge. Set the pan on a rack and let the fudge cool completely, about 2 hours. The fudge will be slightly soft the day it’s made but will firm up overnight.

Turn the fudge out onto a clean cutting board and peel off the foil. Turn the slab of fudge right side up and cut it into 25 equal pieces.

The fudge will keep for a week to 10 days stored in an airtight container at room temperature.

Wednesday, December 2, 2009

Gift-Giving Stress


As soon as the calendar flips over to December, I start to feel gift pressure. I know some people just grab any old thing and toss it into a gift bag. I really try to find just the right gift and that ratchets up the pressure.

The worst case of gift pressure I ever had was in high school with my first boyfriend. We'd only been going out two months and Christmas was bearing down on my like a sleigh full of "holy cow, what am I supposed to get for him?" At the two month mark, the relationship was still in a "I really like you, but I'm not sure how serious this is" state. It was a fine line to tread in gift-giving. Too mushy and I'd feel foolish. Too extravagant and I'd feel foolish. But not enough and I'd feel chintzy and possibly jeopardize the relationship.

It would help a lot, I thought, if I knew what he was planning on giving me. I tried to pry it out of his friends. No dice. One of his girl acquaintances said she knew but refused to tell, leaving me on tenderhooks with the cryptic comment, "It's reeeallly nice. You'll like it!"

Oh, poop! What were we talking about here? Favorite book nice? Pretty sweater nice? Or, gulp, jewelry nice?

To get an idea of his general gift-giving habits, I asked him what he was giving to his family. Sweater to his sister (check), book to his other sister (OK), and necklace to his oldest sister (fine). And to his mother he was giving a trash compacter.

What?? He was giving a trash compactor? A freaking major kitchen appliance? This was gift giving waaaaay out of my league. I certainly hoped he wasn't planning on dropping that kind of cash on me! Holy steaming mounds of poop!

I got him some joke gifts, things he could take any way he chose. And he gave me a coat. A popular (and expensive) brand of ski jacket. Yikes. Gift inequality, big time.


What I should have done was give him food. Food is always appreciated (especially by guys). And if you go by price tags, homemade marshmallows are a great value for the time invested in the kitchen. It takes little money and time to produce show stopping results. And if you deck them out in peppermint, they're perfect for the holiday season.

So, word to the wise, when you're stumped for a gift, wrap up some of these beauties in cellophane with a fancy ribbon. They'll look like a million bucks and you'll never feel you've been outgifted. Unless diamonds are involved.

Peppermint Marshmallows
- adapted from Ina Garten's Barefoot Contessa Family Style

3 packages unflavored gelatin
1 1/2 cups granulated sugar
1 cup light corn syrup
1/4 tsp salt
1/2 tsp peppermint extract
2 oz. finely crushed peppermint candies
Confectioner's sugar, for dusting

1- With a sieve, generously dust and 9 x 13 inch baking dish with confectioner's sugar.

2-Combine the gelatin and 1/2 cup of cold water in the bowl of an electric mixer fitted with the whisk attachment and allow to sit while you make the syrup.

3-Meanwhile, combine the sugar, corn syrup, salt, and 1/2 cup water in a small saucepan and cook over medium heat until the sugar dissolves. Raise the heat to high and cook until the syrup reaches 240 degrees on a candy thermometer. Remove from the heat.

4- With the mixer on low speed, slowly pour the sugar syrup into the dissolved gelatin. Put the mixer on high speed and whip until the mixture is very thick, about 15 minutes. Add the peppermint extract and mix thoroughly.

5- Pour the marshmallow mixture into the pan, smooth the top, and sprinkle the crushed peppermint candies over the top. Then dust with more confectioners' sugar. Allow to stand uncovered overnight until it dries out.

6- Run a knife around the edge of the pan to loosen the marshmallows. Turn the marshmallows onto a board and cut them in squares. Roll them in confectioners' sugar and store in an airtight container.

Saturday, August 16, 2008

Back Into Rehab


I've been clean and off the stuff for almost 9 months now. It's not that I haven't felt the urge, it's just that when I do, I appeal to a higher power. When I even think about making the Killer Crack Peanut Butter Fudge, I ask my husband and he says, "Don't do it. You know you'll just eat it." Well, yes, he has a point. I would.

But slip ups come when you least expect them. I can be merrily baking along and something as innocent as leftovers can trip me up. For example, I was making a recipe that called for a tiny amount of evaporated milk. Which left me with almost a whole can of evaporated milk and the only thing I know that uses less than a can of evaporated milk is... uh oh.

Yes, I was flirting with danger to even have that thought in my head. It's said that the only way to get rid of a though is to replace it with another thought. So I thought of chocolate. Which lead me to chocolate fudge. Which I rationalized by saying that I could try the chocolate version of the KCPB Fudge and see if it was just as dangerous. Was I fooling anyone? I don't think so, but the higher power gave a green light, so I went ahead and made it.

Verdict: It's not as evil as the Killer Crack Peanut Butter Fudge. Even though it was smooth and creamy, with the occasional hit of walnut crunch, I could take just one piece and walk away. OK, so I walked back and took another piece, but that's it. Just two. Really. For now. It's not like I have to hoover the whole pan right away. So I think this could fall under the classification of "gateway fudge." You think you're safe to try just one piece. Maybe, maybe not. Do you really want to risk it?


Killer Crack Fudge's Less Evil Chocolate Cousin

3 cups sugar
1 cup evaporated milk
1/2 cup butter
2 cups semisweet chocolate chips
1-7 oz jar marshmallow creme
1 cup coarsely chopped walnuts
1 tsp vanilla extract


1- Butter a 9 x 13 inch pan. In a heavy 3-quart saucepan combine the sugar, evaporated milk and butter. Bring it to a boil over medium-high heat, stirring constantly.

2- Reduce heat to medium and boil 5 minutes, stirring constantly.

3- Remove from heat and stir in the chocolate chips, marshmallow creme, nuts, and vanilla, stirring till well combined. Pour the mixture into the buttered pan and let it cool to room temperature. Chill in the refrigerator till firm. Cut into 1-inch pieces.