Monday, December 28, 2009
The Sweetness of Christmas
I love the soft exhalation of stress that follows Christmas. All of the to-do's are either done or are no longer relevant. The family playing with toys, reading books or instruction manuals amid drifts of torn wrapping paper, illuminated by twinkling Christmas tree lights, are a lovely tableau of peace and contentment.
Normally on Christmas Day I choose to stay out of the kitchen, preparing only the easiest of heat and eat meals. I don't want to lose that easy, comfy feeling of having nothing that needs doing. This year, though, I choose to do one thing, just for fun. This recipe was featured in December's Bon Appetite and I thought it would be a lovely way to round out our Christmas dinner.
Because I didn't have the right size pan, I chose to make 6 individual tarts and see how that worked. No biggie if it didn't work, because I was just playing. I won't say it was a Christmas miracle, but it was certainly a gift, that everything about this tart worked out. Dividing the dough into 6 pans - just great. Dividing the filling - perfect. Making the caramel (not my forte) - easy, peasy, lemon squeezy. The only downside was that the tarts are sooooo rich that unless you have superhuman capacity, you can only eat a half of one. So if you have 6 couples eating, or 12 close friends, make the 6 tarts and have them share. Or make it per the Bon Appetite specs and cut slices. Either way, you'll wow the crowd.
Chocolate Caramel Macadamia Nut Tart
- adapted from Bon Appetit
CRUST
1 cup all purpose flour
1/3 cup powdered sugar
3/4 teaspoon salt
1/2 cup (1 stick) chilled unsalted butter, cut into 1/2-inch cubes
1 tablespoon (or more) ice water
GANACHE
1/3 cup heavy whipping cream
8 ounces bittersweet chocolate (do not exceed 61% cacao), chopped
1 1/2 cups unsalted macadamia nuts (about 7 1/2 ounces), toasted, coarsely chopped
CARAMEL FILLING
1 1/4 cups sugar
1/3 cup water
1/2 cup heavy whipping cream
1/4 cup (1/2 stick) unsalted butter
1 teaspoon vanilla extract
1/2 teaspoon salt
1- Blend flour, powdered sugar, and salt in processor. Add butter and pulse until mixture resembles coarse meal. Add 1 tablespoon ice water and blend just until moist clumps form, adding more ice water by teaspoonfuls if mixture is dry.
2- Divide dough into 6 equal lumps and gently press a lump into each of six 4-1/2-inch tart pans, patting it with your fingers up the sides of the pan and evenly across the bottom. Chill the dough in the pans for 1 hour.
3- Position rack in center of oven and preheat to 375°F.
4- Line each crust with foil; fill with dried beans, rice, or pie weights. Bake crust until pale golden around edges and sides are set, about 15 minutes. Remove foil and beans; bake until crust is golden and cooked through, about 11 minutes. Transfer to rack and cool crust completely in pan.
5- Bring cream for the ganache to simmer in heavy small saucepan. Remove from heat. Add chocolate; stir until smooth.
6- Spoon 3 tablespoons ganache into 1 corner of small resealable plastic bag and seal; set aside at room temperature for piping. Spread remaining ganache evenly over bottom of the crusts. Sprinkle chopped macadamia nuts evenly over ganache layer in crust. Freeze crust while preparing caramel filling.
7- Combine sugar and 1/3 cup water in heavy medium saucepan. Stir over medium-low heat until sugar dissolves. Increase heat and boil without stirring until syrup is golden amber, occasionally brushing down sides of pan with wet pastry brush and swirling pan, about 8 minutes. (I was concerned at this point because it appeared that sugar crystals were forming on top of the boiling mixture, but it wasn't a problem. I kept brushing and swirling and the sugar crystals went away.)
8- Remove pan from heat. Add cream and butter; stir until any caramel bits dissolve and mixture is smooth. Attach candy thermometer to side of pan and bring mixture to boil over medium-high heat. Boil without stirring until thermometer registers 240°F, about 2 1/2 minutes longer. Remove from heat. Whisk in vanilla and salt.
9- Remove crusts from freezer. (It's helpful if you can have someone else fetch them for you while you're whisking in the vanilla.) Working quickly, pour caramel filling into crusts. Gently shake tart pans to allow filling to settle evenly in crusts. Cool completely at room temperature, about 3 hours.
10- Place reserved resealable plastic bag with chocolate ganache in microwave and heat in 5-second intervals just until smooth and pourable. Using scissors, cut off very small tip from corner of bag with ganache. Pipe ganache decoratively over caramel filling in crosshatch pattern. Chill until chocolate is set, about 20 minutes. The tarts can be made 2 days ahead. Cover and keep chilled. Bring tarts to room temperature before serving.
11- To serve, remove the sides from the tart pans and place on pretty plates. If you feel you haven't reached your holiday quota of fats, you can garnish with a blop of whipped cream or vanilla ice cream.
Friday, December 25, 2009
Merry Christmas
Wednesday, December 23, 2009
Getting In Touch With Your Inner Grinch
So you've made it through your nice list, picking out delightful gifts for your best friends and the perfect presents for your loved ones, but what about the real goobers out there? The weasel who cut in line at the post office? The cretin who stole your parking spot? The jerk who lets his dog poop on your lawn every day?
Do you really think they deserve ho ho ho's and candy canes? No! They deserve coal in their stockings! Now, you're really not going to follow Mr. Bagless and his pooch home to put coal in his stocking, but you can have fun putting faux coal in your family's stockings. And since you love your family (don't you?), you can make it naughty, but nice. It's coal, but it's candy, too.
Wrap up a few chunks in cellophane bags and garnish with a fancy bow. What better stocking stuffer? And if you do track down Mr. Bagless, you could leave him a "gift" on his doorstep. Along with a few bags.
Candy Coal
- adapted from Martha Stewart
3-1/2 cups sugar
3/4 cup light corn syrup
1 Tbsp black gel-paste food coloring
5 tsp peppermint, cinnamon, or anise extract (or whatever flavor you choose)
1 tsp baking soda
1- Line an 8-inch square baking pan with a piece of aluminum foil large enough to overhang the sides by about 2 inches. Set aside.
2- Bring sugar, corn syrup and 3/4 cup water to a boil in a medium saucepan over medium-high heat. Stir to dissolve sugar, and wash down sides of pan with a pastry brush dipped in water to prevent crystals from forming.
3- Once mixture comes to a boil and all the sugar has dissolved, clip a candy thermometer to pan and raise heat to high. Continue cooking without stirring until mixture registers 300 F (hard crack stage). Remove from heat.
4- Carefully add food coloring, extract and baking soda; stir slowly with a clean wooden spoon until thoroughly combined and mixture no longer bubbles, about 2 minutes.
5- Pour into prepared pan, and let cool completely. It will fill the pan completely, but will deflate as it cools.
6- Lift foil to remove candy from pan and transfer candy to a large plastic bag. Use a kitchen mallet or hammer to crush candy into pieces. Store in airtight container.
- makes about two pounds
Monday, December 21, 2009
Cookies Espressly For You
I've been having some technical difficulties here, so I'm a bit tardy in posting my cookies from my annual cookie exchange. But I'm still leaving you time to make them in case you need a last minute gift for a very special neighbor, co-worker, hairdresser, UPS guy, piano teacher, or whoever is deserving in your life. Put a few of these in a cellophane bag with a fancy bow and you'll have the rest of your last-minute gift list taken care of.
These are definitely grown up cookies. Give the Rice Krispie treats to the kids and save these for someone who will appreciate the bite of dark chocolate against the heat of chili pepper, and the sandy texture of shortbread. Plus, they're so cute, dressed up as giant chocolate covered espresso beans. I hate to see the cuteness factor go unappreciated.
Since time is short and I've got presents to wrap, I'll leave you with the recipe and warm wishes for happy baking!
Espresso Mole Shortbread
- adapted from Choosy Beggars
Makes 3 dozen cookies
1-1/2 cups + 1 tbsp unsalted butter at room temperature
3/4 cup confectioners sugar
1/2 tsp salt
2 tbsp instant espresso powder
2 tbsp very hot water
1 tbsp vanilla
3 cups sifted all purpose flour
3/4 tsp cayenne pepper
1.5 tsp cinnamon
1/2 tsp allspice
6 oz semisweet chocolate, coarsely chopped
1- In a large mixing bowl, cream together 1-1/2 cups of butter with the confectioners sugar and salt. Beat them until fluffy, with no lumps or clumps remaining.
2- Measure the powdered instant espresso into a small bowl and pour the hot water over it. Stir this until it’s syrupy.
3- Add the espresso and vanilla to the creamed sugar and butter and mix it until combined.
4- Add the pepper, cinnamon, and allspice. Mix well and scrape down the sides of the bowl as needed.
5- Add the flour and continue mixing until the dough looks uniform. Scrape the bottom of the sides one more time with a spatula, urging it into a bit of a ball.
6- Turn the dough onto a large piece of plastic wrap and make sure that it has a nice tight seal. Chill the dough for at least two hours or overnight.
7- When you're ready to bake the dough, preheat the oven to 325 deg. F. Line two baking sheets with parchment paper. Remove the dough from the refrigerator.
8- After the chilling period the dough will be very firm. As you bring the dough to room temperature, it will soften enough so that it’s workable. As soon as it’s just soft enough that you can cut it fairly easily, do so. Divide the dough into 4 equal pieces and cut each quarter into 9 equal pieces.
9- Roll each piece into an oval egg shape, and then gently press a wooden skewer down the center to give them that distinctive coffee bean shape. Lay the molded cookies on the prepared sheets.
10- Bake the cookies for 30 – 35 minutes in the center of your oven, rotating the racks halfway through. The cookies will be done when they’re slightly firm to the touch and the bottoms are just starting to get golden. Let the cookies sit on the baking sheets for two minutes before removing to cooling racks to cool completely.
11- Once the cookies are completely cooled, put the semi-sweet chocolate into a heatproof bowl and set it over top of a pot with 1 – 2 inches of water inside. Make sure that there is at least an inch of empty space between the water and the bottom of your bowl. Set that over medium heat and let the chocolate slowly melt.
12- Stir the chocolate occasionally as it melts, and when it is almost all melted add in the reserved 1 tbsp of butter and stir until it’s melted and combined.
13- Using a pastry brush (silicone brushes are wonderful for this) brush the top and sides of each cookie with chocolate, and lay them back onto parchment paper to let the chocolate set up.
Store at room temperature in a tightly sealed container.
Saturday, December 19, 2009
Baking Grace
One of the great things about Christmas time is that most people understand that time is short and stress is rampant and they try to extend a bit of grace to their fellow man. Some of the most cheerful people are the ones on the front lines.
Here's a shout out to Carlos at Target for checking out with a smile, a joke, and a wink. He asked the lady in front of me in line, who was around my age, for her ID since she was buying a bottle of wine. He studied it a moment and said, "I'm sorry, miss, you'll have to come back when you're 21 to buy this." I don't know if she was amused, but I gave him full marks for trying for a smile.
Next up, the amazing lady at the post office who turned my dreaded trek with 6 boxes, one of them international, into a quick and easy stop. She was fast and efficient, as well as polite and cheerful. Don't underestimate those postal workers!
Finally, the wonderful women who make up the Bread Baking Babes. They give me way more grace than I deserve (well, that's kind of the point of grace, isn't it?). I totally fluffed on the posting day for this month's bread and didn't get it baked till two days later. Oops. But I did get it done. And it would have been a shame to have missed this one. It's festive, beautiful, and makes my husband and son very happy. So, better late than never, right?
And if you've not yet mailed cards, wrapped gifts, or done whatever you think HAS to be by Christmas, just remember, it will come whether you're ready or not. Even if your to-do list is not all checked off, just make sure your heart is ready. And if you've got some spare time, you can join me in being a Bread Baking Buddy for this beautiful Viennese Striesel. And if you don't have time for that, you can just check out the lovely loaves from the other Babes and ooh and aah. Thanks, Katie, for this perfect Christmas bread!
Viennese Striesel
1 package active dry yeast
1/4 cup very warm water
1/2 cup milk
1/4 cup sugar
1 tsp salt
2 tbs butter, melted
2 3/4 - 3 cups flour
1 egg, lightly whisked
1/4 cup seedless raisins
1/4 cup candied cherries, chopped
2 tbs candied orange peel, chopped
1/8 tsp mace
1/2 cup confectioner's sugar
1 tbs milk
almonds or walnuts for sprinkling
1- Dissolve yeast in warm water.
2- Scald milk. Put milk, sugar, butter, and salt in bowl of mixer. Cool until just warm. Stir in 1 cup of flour. Mix in dissolved yeast and egg. Add 1 cup flour and stir to incorporate.
3- Add fruit and mace to the dough, then stir in 3/4 cups of flour. If the dough is still sticky, add up to 1/4 cup more flour, 1 Tbsp at a time, kneading till the dough is smooth.
4 -Shape into a ball, place in lightly greased bowl, cover and let rise until doubled, about 2 1/4 hours.
5- Punch down. Divide into 9 pieces, shape each into a ball and let rest 5 minutes.
6- Roll each piece into a rope about 15" long. Lay 4 strands on a lightly greased baking sheet, overlapping at the center. Braid from the center toward each end. With the side of your hand make a trench down the center. Now braid 3 strands, also from the center to each end, and place in the 'trench'. Twist the 2 remaining strands loosely together and place on top, bringing the ends over the end of the loaf and tucking in.
7- Cover loosely with plastic wrap sprayed with cooking spray, and let rise until doubled, about 1 1/2 hours. (I did this rise overnight in my refrigerator).
8- Bake, 350F (175C) for 40 - 45 minutes. Check after 30 minutes and if bread is browning too rapidly, tent foil over it. Remove and cool on a wire rack.
9- When bread is cool, mix milk and sugar -drizzle frosting over the top of the cooled loaf. Sprinkle with nuts.
Tuesday, December 15, 2009
In a Baking Frenzy
What is it about the holidays that morphs ordinary women into Martha wanna-be's? Normally sane, calm women find themselves doing crazed things like spraying twigs and pinecones with gold spray paint, writing two page Christmas letters that read like great works of fiction (take that either of the two ways), and going nuts in the kitchen. When there are only 24 pre-Christmas days in December, why should the baking list be longer than the list for Santa?
I steadfastly refuse to gilt my garden, or send a chatty newsletter. I figure with all the time I save there, I can bake even more cookies! I know I'm not posting much this month. I'm spending all my time poring over cookbooks, mixing dough, and baking treats. That would theoretically mean that I'd have tons to post in January, except the table where I take pictures has been taken over by boxes waiting to be mailed, packages waiting to be wrapped, and cards waiting to be addressed and mailed. Yes, all that is taking a back seat to the mad baking fever that has gripped me.
Who could possibly eat all these cookies? Don't know. Don't care. I just have to go with the fever and roll, shape, drop, and glaze as many of the items on my list as possible before Christmas. On Christmas day we'll roll out of bed in a sugar stupor, gaze listlessly at the presents, then waddle back to bed. So be it. Small price to pay for having such fun with cookies.
Any volunteers to come take some off my hands?
Peanut Butter & Chocolate Shortbread Bars
- adapted from Fine Cooking Cookies
Shortbread Crust:
7 oz (14 Tbsp) unsalted butter, melted and cooled to just warm
1/2 cup granulated sugar
Generous 1/2 tsp kosher salt
9-1/2 oz. ( 2 cups plus 2 Tbsp) unbleached all-purpose flour
1/2 cup unsalted peanuts, finely chopped
Filling:
1 cup creamy peanut butter (like Jif)
3 oz (6 Tbsp) unsalted butter at room temperature
6 oz (1-1/2 cups) confectioners' sugar
1 tsp pure vanilla extract
Ganache:
5 oz good-quality bittersweet chocolate, chopped ( about 1 heaping cup)
1/2 cup plus 2 Tbsp heavy cream
1- Line a straight-sided 13x9-inch metal baking pan with foil, letting the ends create an overhanging edge for easy removal.
2- In a medium bowl, stir together the butter, sugar, and salt. Stir in the flour and peanuts to make a stiff dough. Press the mixture evenly into the bottom of the prepared pan. Prick the dough all over with a fork. Refrigerate the pan for 30 minutes (or freeze for 5 to 7 minutes), until the dough is firm.
3- Meanwhile, position a rack near the center of the oven and heat the oven to 325°F.
4- Bake the dough for 20 minutes, then decrease the oven temperature to 300°F and bake until the crust is golden-brown all over and completely set, 20 to 25 more minutes. Let the crust cool completely before topping.
5- In the bowl of a stand mixer fitted with the paddle attachment put the peanut butter and butter and beat on medium speed until smooth, about 1 minute. Add about half of the confectioners’ sugar to the mixer along with the vanilla extract and 1 Tbs. hot water. Beat on low speed until combined, then on medium speed until smooth and fluffy, about 1 more minute. Beat in the remaining sugar and mix, about 1 more minute, until the mixture is smooth and thick, like frosting. If the filling seems too stiff, add another 1 Tbs. hot water and beat for another minute.
6- With a knife or metal offset spatula, spread the filling over the fully cooled crust. The filling may not spread smoothly and evenly, but don’t worry; the ganache will cover it.
7- Put the chocolate in a small heat proof bowl. In a small saucepan, bring the heavy cream to a boil. Remove from the heat and pour over the chocolate. Let sit for 3 minutes. Stir gently with a rubber spatula until combined and smooth.
8- Spread the ganache over the peanut-butter filling with a metal offset spatula to coat evenly. Let the bars sit at least 3 hours to allow the ganache to set before cutting (or refrigerate for 1 hour).
9- Carefully lift the bars from the pan using the foil sides and transfer them to a cutting board. Separate the foil from the bars by sliding a spatula between them. Cut the bars into 1-1/2-inch squares.
The bars will keep at room temperature for 1 week.
Friday, December 11, 2009
Snow Time
Snow is in the forecast and my children are all excited about it. For a child, snow is a magical thing. It comes from the sky, softly coating the scenery, blurring the rough edges, giving a beautiful sparkle to the horizon. And if enough comes, it also magically closes school! Plus, you can play in it for hours. Sledding, snowmen, snow forts, snowball fights and snow angels can keep children outside until their noses are red and their toes are numb.
For an adult, snow is something else altogether. Snow in the forecast means things like pipes freezing, commuting hassles, and shoveling sidewalks. Somehow with all of the grownup responsibilities, the magic leaks away, and that's a sad thing.
For everyone who passionately hates snow, I wish I could send you three things.
1) Someone to come shovel your walk and driveway for you.
2) My son, for whom snow and Christmas are inextricably tied (even though a white Christmas around here is as common as snake's eyebrows). He almost bursts with excitement when he sees the first flakes falling because that means it must be Christmas.
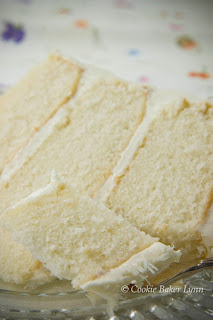
3) This beautiful cake. It's an ode to snow - white, pristine, beautiful. But it's also delicious. Vanilla and white chocolate combine for a fragrant, sweet flavor in every bite. Have a piece and you might not feel quite so cranky about that hose that you forgot to disconnect.
Snowdrift Vanilla Bean Cake
- adapted from Sky High, Irresistible Triple-Layer Cakes
3 cups cake flour
2 cups sugar
4-1/2 tsp baking powder
1/2 tsp salt
1 whole vanilla bean, split in half lengthwise
2 sticks plus 2 Tbsp (9 oz) unsalted butter, at room temperature
1-1/3 cups milk
5 egg whites
1 Tbsp vanilla extract
White Chocolate Buttercream (recipe follows)
White chocolate curls, for garnish
2 cups sugar
4-1/2 tsp baking powder
1/2 tsp salt
1 whole vanilla bean, split in half lengthwise
2 sticks plus 2 Tbsp (9 oz) unsalted butter, at room temperature
1-1/3 cups milk
5 egg whites
1 Tbsp vanilla extract
White Chocolate Buttercream (recipe follows)
White chocolate curls, for garnish
1- Preheat the oven to 350 deg. F. Butter the bottoms of three 8-inch round cake pans. Line each with a round of parchment and butter the parchment.
2- In a large mixer bowl place the flour, sugar, baking powder, and salt. With the mixer on low, combine well.
3- With the tip of a small knife, scrape the seeds from inside the vanilla bean into the bowl. Reserve the outer pod to make vanilla sugar*. Add the butter and 1 cup of the milk and mix to blend. Raise the mixer speed to medium and beat until the batter is light and fluffy, about 2 minutes.
4- In a separate bowl, whisk the egg whites with the vanilla extract and the remaining 1/3 cup milk. Add this to the batter in 2 to 3 additions, scraping down the bowl well and mixing only to incorporate. Divide the batter among the 3 prepared pans.
5- Bake for about 30 minutes, or until a cake tester or wooden toothpick inserted in the center comes out clean. Place the pans on wire racks to cool for 10 minutes, then invert the pans on the racks, remove the pans and the parchment paper, and cool completely, about 1 hour.
6- To assemble the cake, place one layer, flat side up, on a cake stand or serving plate. Spread 2/3 cup of the White Chocolate Buttercream evenly over the layer. Repeat with the second layer, then top with the final layer. Using the remaining buttercream, frost the sides and top of the cake. Garnish with white chocolate curls.
White Chocolate Buttercream (makes about 5 cups)
3 egg whites at room temperature
4 oz. good-quality white chocolate
1 cup sugar
1/4 cup water
3 sticks (12 oz) unsalted butter, at room temperature, cut into 2-3 Tbsp chunks
1- Put the egg whites in the bowl of an electric mixer and set the mixer up for use with a whisk attachment. Melt the white chocolate about halfway in a double boiler over simmering water. Remove from the heat, stir until smooth, and set aside to cool.
2- In a small heavy saucepan combine the sugar and water. Set it over medium heat and stir to dissolve the sugar. Bring to a boil and cook, without stirring, until the syrup reaches the soft-ball stage, 238 deg. F on a candy thermometer.
3- Immediately start beating the egg whites on medium-low speed. Slowly add the syrup in a thin stream, taking care not to hit the beaters. Continue to whip until the mixture is body temperature and a stiff meringue has formed.
4- Reduce the speed to low and add the butter 2 to 3 Tbsp at a time. When all of the butter is incorporated, beat on medium speed until the frosting appears to curdle. Continue to whip, and it will suddenly come together. At this point, add the melted white chocolate and mix well.
* To make vanilla sugar, place the scraped vanilla bean pod in a jar and cover it with sugar. Let it sit a week, and the sugar will become wonderfully fragrant. Use it for baking or as an indulgence in your tea or coffee.
Monday, December 7, 2009
The White Stuff
When my sister was in junior high the thing to do at sleepovers was to make fudge. Why? I don't know other than a bunch of 13 year old girls plus a big pan of chocolate was a pretty good mix. I couldn't wait to be that cool, so when one of my friends invited me to spend the night, I volunteered to bring a fudge recipe. What I hadn't thought through was that her father was an orthodontist and sugar was frowned upon in her household. It was well-kown that on Halloween, theirs was the house that handed out toothbrushes and travel-sized tubes of toothpaste. Poor deprived girl!
I just don't relate to that "no sugar" mindset. What would your sweetie give you for Valentine's Day? A box of tofu crisps? And what about when you're stressed and really need to bake? Do unsweetened rutabaga bars with carrot crumble truly hit the spot? And how about girlfriend time - how's that supposed to work without sugar?
Well, fortunately for my girlfriends, they don't have to find out. We're having our annual cookie exchange soon and these beauties just might make it onto the plate (if my family doesn't devour it all first).
This is a new technique for me. I've made fudge here and here, and someday I'll post my positively fabulous creamy fudge, but today's involved a hot syrup, waiting for an hour, and then a handheld mixer. A slightly different approach, but still rich, creamy, and wonderfully chocolatey. Adding crushed peppermint makes it perfect for Christmas time. Treat yourself or hand out bags to friends, family, and random strangers. Share the love. And the sugar.
May your days be merry and bright, and may all your baking sugar be white. (Except for the brown and dark brown, of course)
Perfect Peppermint Fudge
- adapted from Fine Cooking
3 Tbs. cold unsalted butter; more at room temperature for buttering the thermometer and pan
3-3/4 cups granulated sugar
1-1/2 cups heavy cream
3/4 cup crushed peppermint candy
4 oz. unsweetened chocolate, coarsely chopped
3 Tbs. light corn syrup
1 generous tsp kosher salt
1- Lightly butter the face of a candy thermometer and set aside.
2- n a large (4-quart) heavy-duty saucepan combine the sugar, cream, chocolate, corn syrup, and salt, stirring with a wooden spoon or heatproof spatula until the ingredients are moistened and combined. Stirring gently and constantly, bring the mixture to a boil over medium heat, 7 to 12 minutes. Cover the saucepan and let the steam clean the sides of the pan for 2 minutes. This prevents the formation of sugar crystals in the fudge.
3 -Clip the candy thermometer to the pot, being careful not to let the tip of the thermometer touch the bottom of the pot, or you might get a false reading. Let the mixture boil without stirring until it reaches 236°F to 238°F, 2 to 5 minutes. Take the pan off the heat and add the butter, but do not stir it into the mixture. Set the pan on a rack in a cool part of the kitchen. Don’t disturb the pan in any way until the mixture has cooled to 110°F, 1 to 1-1/2 hours.
4- While the mixture is cooling, line the bottom and sides of an 8x8-inch baking pan with foil, leaving a 2-inch overhang on two opposite sides of the pan. Butter the foil. Set the pan aside.
5- Remove the thermometer from the fudge mixture. Using a hand mixer, beat the mixture on high speed until it is a few shades lighter in color and thickens enough that the beaters form trails that briefly expose the bottom of the pan as they pass through, 10 to 20 minutes. (Mine had kind of a caramelly consistency when I began beating it. I might have beat mine too long, but it wasn't nearly 10 to 20 minutes. It started clumping. That wasn't a problem, though, as I just pressed it into the pan.)
6- After beating the fudge, stir in 1/2 cup crushed peppermint candy. Pour the thickened fudge into the prepared pan, using a rubber spatula to help nudge it out of the pot. You can scrape the bottom of the pot but not the sides; any crystals that stick to the pot stay in the pot. Smooth the top of the fudge with the spatula. Sprinkle 1/4 cup crushed candy over the fudge. Set the pan on a rack and let the fudge cool completely, about 2 hours. The fudge will be slightly soft the day it’s made but will firm up overnight.
Turn the fudge out onto a clean cutting board and peel off the foil. Turn the slab of fudge right side up and cut it into 25 equal pieces.
The fudge will keep for a week to 10 days stored in an airtight container at room temperature.
Wednesday, December 2, 2009
Gift-Giving Stress
As soon as the calendar flips over to December, I start to feel gift pressure. I know some people just grab any old thing and toss it into a gift bag. I really try to find just the right gift and that ratchets up the pressure.
The worst case of gift pressure I ever had was in high school with my first boyfriend. We'd only been going out two months and Christmas was bearing down on my like a sleigh full of "holy cow, what am I supposed to get for him?" At the two month mark, the relationship was still in a "I really like you, but I'm not sure how serious this is" state. It was a fine line to tread in gift-giving. Too mushy and I'd feel foolish. Too extravagant and I'd feel foolish. But not enough and I'd feel chintzy and possibly jeopardize the relationship.
It would help a lot, I thought, if I knew what he was planning on giving me. I tried to pry it out of his friends. No dice. One of his girl acquaintances said she knew but refused to tell, leaving me on tenderhooks with the cryptic comment, "It's reeeallly nice. You'll like it!"
Oh, poop! What were we talking about here? Favorite book nice? Pretty sweater nice? Or, gulp, jewelry nice?
To get an idea of his general gift-giving habits, I asked him what he was giving to his family. Sweater to his sister (check), book to his other sister (OK), and necklace to his oldest sister (fine). And to his mother he was giving a trash compacter.
What?? He was giving a trash compactor? A freaking major kitchen appliance? This was gift giving waaaaay out of my league. I certainly hoped he wasn't planning on dropping that kind of cash on me! Holy steaming mounds of poop!
I got him some joke gifts, things he could take any way he chose. And he gave me a coat. A popular (and expensive) brand of ski jacket. Yikes. Gift inequality, big time.
What I should have done was give him food. Food is always appreciated (especially by guys). And if you go by price tags, homemade marshmallows are a great value for the time invested in the kitchen. It takes little money and time to produce show stopping results. And if you deck them out in peppermint, they're perfect for the holiday season.
So, word to the wise, when you're stumped for a gift, wrap up some of these beauties in cellophane with a fancy ribbon. They'll look like a million bucks and you'll never feel you've been outgifted. Unless diamonds are involved.
Peppermint Marshmallows
- adapted from Ina Garten's Barefoot Contessa Family Style
3 packages unflavored gelatin
1 1/2 cups granulated sugar
1 cup light corn syrup
1/4 tsp salt
1/2 tsp peppermint extract
2 oz. finely crushed peppermint candies
Confectioner's sugar, for dusting
1 1/2 cups granulated sugar
1 cup light corn syrup
1/4 tsp salt
1/2 tsp peppermint extract
2 oz. finely crushed peppermint candies
Confectioner's sugar, for dusting
1- With a sieve, generously dust and 9 x 13 inch baking dish with confectioner's sugar.
2-Combine the gelatin and 1/2 cup of cold water in the bowl of an electric mixer fitted with the whisk attachment and allow to sit while you make the syrup.
3-Meanwhile, combine the sugar, corn syrup, salt, and 1/2 cup water in a small saucepan and cook over medium heat until the sugar dissolves. Raise the heat to high and cook until the syrup reaches 240 degrees on a candy thermometer. Remove from the heat.
4- With the mixer on low speed, slowly pour the sugar syrup into the dissolved gelatin. Put the mixer on high speed and whip until the mixture is very thick, about 15 minutes. Add the peppermint extract and mix thoroughly.
5- Pour the marshmallow mixture into the pan, smooth the top, and sprinkle the crushed peppermint candies over the top. Then dust with more confectioners' sugar. Allow to stand uncovered overnight until it dries out.
6- Run a knife around the edge of the pan to loosen the marshmallows. Turn the marshmallows onto a board and cut them in squares. Roll them in confectioners' sugar and store in an airtight container.
Subscribe to:
Posts (Atom)