Thursday, May 28, 2009
Coming of Age Dessert
One of the factoids about myself that I like to put into those "how well do you know Lynn" quizzes is that I've worked as a bartender. Now, you might be getting a certain mental image with that. Put that image on hold while I tell you that at the time, I was 16. How did I do that? Where can you work as a bartender at sixteen? Well, in a dry state.
One of my first jobs was working at a dinner theater. I had the job of plating salads and desserts (and by plating, I mean slopping them onto a plate - nothing artistic involved), and then putting together set-ups for the patrons' drink orders. The patrons would then have to go buy mini-bottles of liquor, the kind they sell on airplanes, and pour those into their set-ups to make a fully leaded drink.
So for a long time, although I knew how to make a set-up for a greyhound, a screwdriver, or a strawberry margarita, I had no clue what kind of alcohol went into them.
The strawberry margarita was kind of a house speciality. We had buckets of sliced strawberries in sugar syrup and we'd scoop some into the blender along with some ice, blend it to the consistency of a Slurpee, pour it into a tall glass, and add a slice of lime for a garnish. Ta da! Virgin Margarita.
This pie combines two of my skills from that job - drinks + dessert. Or drinks in dessert. And there's definitely booze involved. If you have kids around, they'll want a slice of this cool, creamy dessert. Have some strawberry ice cream on hand to placate them, because this is definitely a dessert for grown-ups only.
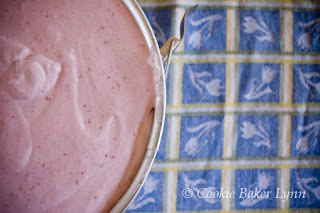
You can tell I didn't let it freeze overnight. The center was a bit on the deliciously oozy side. No one minded a bit.
Strawberry Margarita Pie
2 c. hulled fresh strawberries
10 tbsp. sugar
1 3/4 c. graham cracker crumbs
1/2 c. (1 stick) unsalted butter, room temp.
3/4 c. sweetened condensed milk
7 tbsp. tequila
6 tbsp. Triple Sec
1 tbsp. fresh lime juice
2 c. chilled whipping cream
8 fresh strawberries (opt.)
Butter 9 inch springform pan. You can use a deep pie plate, if a springform pan is unavailable. Toss 2 cups strawberries with 4 tablespoons sugar in small bowl. Blend remaining 6 tablespoons sugar, cracker crumbs and butter in processor. Press crumb mixture into bottom and up sides of pan.
Puree strawberries and sugar with milk, tequila, Triple Sec and lime juice in blender or processor. Transfer to large bowl. In a medium bowl with an electric mixer, whip cream until stiff peaks form. Fold 1/3 of cream into puree. Gently fold in remaining cream. Pour filling into crust. Cover and freeze until firm, preferably overnight.
Run hot sharp knife around pan sides to loosen if necessary. Release pan sides. Cut pie into wedges. Top each wedge with strawberry, if desired.
Monday, May 25, 2009
Au Pear
I find pears tricky. How can you tell when they're ripe? I've bitten into too many crunchy pears to trust my sense of what looks ripe for a pear. And what about when they start to feel soft and maybe have a bruise or two? Then they're over the pear event horizon. Take a bite and it's mealy. Euww. A perfectly ripe, juicy pear is a splendid thing, but a bit of a gamble to find.
When my daughter sent me this recipe and raved about it, I hesitated. Pear soup. Really? Soup seems so...winterish. And pears seem so fallish. So why would I want to make a soup for spring? Well, it's a dessert soup, served cold, and it's really lovely. Lightly sweet, redolent of pear flavor with enough wine flavor to make it interesting. And since the pear is cooked, it doesn't have to be perfect. Zero guesswork involved.
The soup is a snap to put together, so you can make it early in the day and chill it for dinner. For the lazy warm days coming up when you don't want to go to a lot of trouble in the kitchen, grill something easy and then ladle up bowls of this delicious soup for dessert. You'll feel like you hit the jackpot!
Red Wine and Pear Soup
1 cup red wine (use something you like, as you'll taste it)
1/2 cup sugar
1 cup water
1 lemon
4 fully ripe pears (1 1/2 pounds) peeled, cored, and each cut into quarters
Whipping cream
1- In 2 quart saucepan, heat red wine, sugar, and 1 cup water to boiling over high heat, stirring frequently to dissolve sugar.
2- Meanwhile, with vegetable peeler or small sharp knife, remove two 3 inch strips peel from lemon. Juice the lemon and strain it to remove seeds.
3- Add pears and lemon peel to saucepan; heat to boiling. Reduce heat to low and simmer 10 to 15 minutes, until pears are very tender. Remove the pan from the heat and discard lemon peel. Allow mixture to cool for 10 to 20 minutes.
4- In blender at low speed (with center part of lid removed), blend pear mixture in batches until smooth. Transfer to bowl; stir in lemon juice. Cover and refrigerate soup at least four hours, or until very cold.
5- To serve, ladle the soup into bowls and drizzle cream over the top as a garnish.
Wednesday, May 20, 2009
Knotty Math Problems
One of the reasons of being part of a baking group, whether that's you and your best friend, or you and the thousands of Daring Bakers, is that you get stretched, challenged, and learn new things all the time. I find that to be true every month with the Bread Baking Babes.
This month's excursion into yeastland looked to be pretty straightforward. Ilva, our hostess for the month chose Italian Knot Rolls. That seemed fairly easy, the only things that gave me pause were the shaping of the rolls and the flour needed. Yes, it was time for another King Arthur order for Italian flour.
Just a quick note about this flour, which I have never used before. It is amazingly fine and soft. Rubbed between the fingers it is almost like powdered sugar. If you are a flour scoffer and say, "Ha, all flours are alike, I"ll just use all-purpose," you won't get the nice, fine crumb you'd get with this beautiful flour.
So, I've set you up for how easy these rolls are, right? And if you want to see beautiful, perfect rolls, go visit the other Babes pages to see how wonderfully they did with this challenge. As for me, I didn't.
My big stumbling block was trying to convert fresh yeast in grams to dry active yeast in teaspoons for the biga. It didn't help that my engineer husband who was trying his best to figure it out for me didn't know that fresh yeast was not the same as active yeast. After a period of time which involved some raised voices, in frustration I guessed at the yeast, threw it over the flour I had measured out into a a bowl, then dumped the water in on top of that.
Um, that's not how it's supposed to go. At this point, I didn't care. I just stirred it all up. Except it wouldn't come together. So I added more water. And more. And more. Then I left it covered to do whatever it wanted. If I came back and it bubbled, fantastic. If not, I'd start over again.
Well, it was bubbly, so I ploughed ahead with the recipe. But it was awfully slack dough. Really moist and sticky. So when I shaped the knots, they didn't stay in their distinctive knotty shape, but relaxed into a pile of ooze on the baking sheets.
That might have even been OK, but for some reason I grabbed my spray bottle and spritzed in the oven when I put the rolls in. Steam = crust. I didn't know how the rolls were supposed to turn out, but I'm pretty sure it wasn't supposed to be so crusty.
So, I'll have to give it another try. When my brain comes back from holiday. And I have a lot of people hungry for delicious, warm rolls.
Thanks, Ilva, for the recipe and the excuse to stock my pantry with yet more flour.
If you'd like to try your hand at making Italian knot rolls, bake them up, post them by May 30th, and send a link to Ilva and she'll send you a Baking Buddy Badge to proudly display on your blog.
Pane Di Pasta Tenera Condita (Italian Knot Bread)
biga:
500 g / 1.1 lb normal bread flour
5 g / 0.17 oz fresh yeast, 1/4 tsp dry instant yeast, or 1 tsp active dry yeast
240 ml / 1 cup water
- Dissolve the yeast in a little water and quickly work the dough together.
- Put it in a container, cover it with a half closed lid or kitchen towel and leave it for 15-24 hrs.
bread:
1 kg / 2.2 lb. flour (type 00)
60 g / 2.1 oz lard (or shortening)
30 g fresh yeast , or 2 Tbsp active dry yeast
450-550 ml / 1.9-2.3 cups water, handwarm
25 g salt (about 2 Tbsp)
50 g/ 1.7 oz extra-virgin olive oil
25 g / .88 oz honey
500 g / l.l lb. biga
- Put the flour either in a big bowl or on a baking board, add the lard (or shortening) and mix it with your fingers until it has 'crumbled' and is completely mixed with the flour.
- Dissolve the yeast in little tepid water and add it to the flour. Mix as well as you can.
- Mix salt, olive oil and honey with the handwarm water and add it to the flour. Now work it it until it holds together and then add the biga.
- Work the dough until it is smooth and doesn't stick.
- Put it into a big bowl, cover it with plastic film and leave to rise until it has doubled.
- Now take up the dough and divide it into 12 equal parts and roll them it into long strands (about 30-35 cm)
- To make the knots: (Ilva's page has pictures of this)
1- Roll out the dough into snakes and lay them out on a flat surface.
2- Make a semi-circle with the dough strands.
3- Twist the two ends together like in the photo.
4- Bring the two ends towards the upper part of the circle.
5- Lift/fold the top part over the twisted part.
6- Take the two end and join them together under the actual knot, this will make the knot part come out more and it hides the ends.
- Put the knots on baking sheets and leave to rise (covered) until they have doubled in size.
- Bake in a pre-heated oven (200°C/390°F) for 25-35 minutes until golden brown.
Monday, May 18, 2009
Adult Diversions
The word "adult" is a curious word. Logically, it should mean the opposite of childish. Being an adult should mean that you've put away childish things and are ready to buckle down to tackling the weightier issues of life. But put the word "adult" in front of the words "bookstore" or "theater" and you've got a whole different meaning.
Wouldn't you think that an adult bookstore would be one that carries the collected works of Shakespeare, Dostoyevsky, and Thomas Paine? And perhaps volumes of the New York Times crossword puzzles. And an adult theater might specialize in documentaries, retrospectives, and lecture series about the issues facing mankind.
Instead, adult bookstores and theaters are all about porn, smut, and leather. So sad.
The cookbook Deep Dark Chocolate describes these cookies as adult cookies. I think they're going with the ideal definition of adult - sophisticated, for the discerning palate, and not to be wasted on unappreciative children. But if you wanted to put on a French maid costume to serve them to your sweetie, that's your call.
XXX Cookies
- adapted from Deep Dark Chocolate
3 oz premium dark chocolate, chopped
1/4 cup unsalted butter, cut into pieces
1 cup all-purpose flour
3 Tbsp premium unsweetened cocoa powder
1 tsp baking powder
2-1/2 tsp chili powder or your favorite pepper blend, divided
1/2 tsp ground mace
1/4 tsp salt
2 large eggs, at room temperature
1 cup granulated sugar
1 tsp vanilla extract (Mexican is preferable)
3 Tbsp premium cacao nibs, chopped into small bits
1/2 cup sifted powdered sugar
1- Place the chocolate and butter in a medium heatproof bowl and set over a pan of hot water. Set aside for 5 minutes, sitrring 4 or 5 times, and let the chocolate melt completely. Stir occasionally until the mixture is smooth and cools slightly.
2- In another medium bowl, whisk the flour, cocoa, baking powder, 1-1/2 tsp of the chili powder, the mace, and salt until well blended. Set aside.
3- In the bowl of a stand mixer, beat the eggs, sugar, and vanilla on medium speed until pale, 2 to 3 minutes. Alternately blend the dry ingredients and the chocolate mixture into the egg mixture in increments. Stir in the nibs. Cover and refrigerate until firm, about 3 hours.
4- Preheat the oven to 350 deg. F, with racks in the upper and lower third of the oven. Line two baking sheets with parchment paper.
5- Sift the powdered sugar into a shallow bowl and whisk into it the remaining 1 tsp chili powder. Shape the chilled dough into 1-1/2-inch balls and roll in the powdered sugar mixture, forming a thick coat on the ball. Place the cookies about 2 inches apart on the baking sheets. Bake until set, 12 to 14 minutes. Transfer to a wire rack and let cool completely.
Makes about 30 cookies.
Friday, May 15, 2009
Good Boy Sandwiches
When I was newly married I made my husband a brown bag lunch every day. It typically included a sandwich, chips, a beverage, and sometimes a little love note. One day, the honeymoon ended. I don't even remember what the argument was about, but I remember I was steaming mad. Fuming, I packed the lunch.
One of my husband's odd, favorite sandwiches is peanut butter and mayonnaise. I know. Ugh. But, if you put dill pickles in there, it's actually, strangely good. But I digress.
Angry though I was, I made the lunch. Peanut butter and mayonnaise. Heavy on the peanut butter. Whisper light on the mayonnaise. On dry bread. And a half a cup of juice. No chips.
He called me at lunchtime. I expected a repentant apology. No, he hadn't even noticed! So I pointed it out to him. Then he apologized. And now he knows the warning signs of an angry outburst on the horizon - dry bread with lots of peanut butter, little mayonnaise, and 1/2 a cup of juice. No chips.
This sandwich is kind of the antithesis of the "I'm pissed" sandwich. This is a "good boy, you deserve a biscuit sandwich." My daughter and I saw this on Everyday Food and knew we had to make this for our wonderful, deserving husbands. We call it - The Amazing Sandwich. Which it is. By some strange kitchen alchemy it takes 5 ingredients and transforms them into something, well, amazing!
Notes: I couldn't find round, crusty loaves of the right size. Obviously, I could have made them, but I didn't have the time. So I went to Great Harvest and bought two round loaves there. It wasn't till I got them home that I realized they weren't crusty. Plus they're a bit larger than one pounders. Working with smaller, one pound loaves will yield slightly smaller sandwich slices.
The recipe says this serves 8. Ha! We served 6 and had a loaf and a third leftover. You could easily halve this recipe if you don't need to feed a crowd.
Amazing Sandwich
- adapted from Everyday Food
2 round or oval loaves country bread (1 pound each),
1 jar (12 ounces) oil-packed roasted red peppers
12 ounces salami, thinly sliced
12 ounces provolone cheese, thinly sliced
2 bunches arugula, (about 6 ounces each), washed well and thick stems removed (about 10 cups)
1- Slice the tops off the bread, about 1/4 of the way down.
2- Scoop out the bread with your fingers, leaving a rind of about 1 inch of bread inside the crust, including the top. Save the scooped out bread to make bread crumbs.
3- Brush inside the loaves on the bottoms and inside the tops with oil from the roasted red peppers.
4- Dividing evenly, layer bottom bread halves with roasted peppers, salami, cheese, and arugula; top with remaining bread halves. You can alternate layers of the salami and cheese to make it more stripey looking. Really press the layers in firmly. When you put on the arugula, some might fall out. Just tuck it back in.
5- Wrap each loaf completely in plastic wrap securing the top to the bottom.
6- Lay wrapped sandwiches on a baking sheet. Position another baking sheet on top, and weight with heavy canned goods, a large skillet, or workout weights. Let stand for at least one hour, pressing down occasionally with hands. You can put the whole thing in the refrigerator and let it squash down overnight.
7- To serve, cut each sandwich in wedges.
Sunday, May 10, 2009
Hard Earned Cupcakes
As a baker, an important part of my schedule is working out. That way I can still fit through the kitchen door. I prefer to do video workouts at home. I know some people like going to a gym, but it works best for me to workout at home for several reasons:
1- I don't have to be embarrassed about how I look. The workout style bar is set pretty low in my family room - ratty t-shirts and shorts are just fine.
2- I don't have to drive anywhere. I could say this was about saving the planet, but it's really that I hate taking the time to drive to the gym when I can just walk downstairs and work out.
3- I can talk back to the instructors. Which I do. I moan and complain, whine and gripe, and let the instructor know what I think of her "just 4 more."
There is a workout which I'm quite fond of. Although the workout is tough, the instructor is darling, so I don't give her much of a hard time. But there is a point in the video where, after a particularly grueling part, she says, "You deserve this stretch! But not the cake." Every single time. Do I never deserve the cake?
When I checked out a new cookbook from the library, I fell in love with these darling cupcakes. Such pretty pink frosting - how could I resist? So I made them. I may not deserve the cake, but I'm pretty sure I deserve the cupcakes.
Dainty Cupcakes
- adapted from Deep Dark Chocolate by Sarah Perry & Jane Zwinger
1/3 cup premium unsweetened cocoa powder
1 Tbsp premium unsweetened Dutch-process cocoa powder*
1-1/2 tsp espresso powder
1/2 cup very hot water
1 cup all-purpose flour
1/2 tsp. baking soda
Pinch of salt
6 Tbsp (3/4 stick) unsalted butter, at room temperature
2/3 cup granulated sugar
1 large egg, at room temperature
1 large egg yolk, at room temperature
1/2 tsp. vanilla extract
(* - The unsweetened Dutch-process cocoa powder gives the cupcakes a darker, richer color. If you don't have it, you can omit it.)
1- Preheat oven to 350 deg. F with a rack in the center of the oven. Line a standard muffin tin with 12 paper liners.
2- In a small bowl combine the unsweetened cocoa powder, the unsweetened Dutch-process cocoa powder, and the espresso powder. Add the hot water and stir till well blended. Set aside to rest for 5 minutes.
3- In another small bowl whisk together the flour, baking soda, and salt. Set aside.
4- In the bowl of an electric mixer beat the butter and sugar on low speed until light and fluffy. Beat in the whole egg and the egg yolk, one at a time, until fully blended, scraping down the sides and bottom of the bowl as necessary. Beat in the vanilla.
5- Stir in the coffee-cocoa mixture again and add it to the butter mixture in 3 increments, alternating with the dry ingredients. Stir just until blended and smooth. Scrape down the bowl again. Divide the batter equally between the cups, filling each on 3/4 full.
6- Bake until a tester inserted in the middle comes out just clean, 18- 22 minutes. Do not overbake or your cupcakes will be dry. Transfer to a wire rack to cool completely before frosting.
Dainty Pink Frosting
8 oz. cream cheese at room temperature, cut into pieces
1/2 cup (1 stick) unsalted butter, at room temperature, cut into pieces
1/2 tsp pure vanilla extract
Scant 1/4 tsp pure almond extract
2 cups sifted powdered sugar
Red food coloring
Sparkly white sugar
1- Make sure the cream cheese and butter are not too soft, or the frosting will be too soft. In the bowl of a stand mixer, combine the cream cheese, butter, vanilla, and almond extract on low speed. Slowly add the powdered sugar and mix until smooth. Add two drops of red food coloring and blend it in. To finish, increase the mixer speed to medium-high for 30 seconds.
2- Using a pastry bag and a large tip, top each cupcake with a generous amount of frosting. Sprinkle the sparkly sugar across the top of each cupcake. Serve at room temperature.
Thursday, May 7, 2009
It's Pay Day!
I know I have a problem. Sometimes I think it might be time to seek help when I hit the 1-click order button on Amazon for a cookbook. Again. Or when the King Arthur Flour order arrives and I have to find place to store yet more flour. Or when I'm too embarrassed to admit the number of places I have chocolate squirreled away in my home.
But I realized my food blogging problem was over the top when I made some cookies, in order to destroy them. I took the time to even imprint cute little peanut grids on them, all the while knowing their true destiny was to be crushed up to make a base for another cookie.
A freebie magazine came to my door a little while ago, one of those "you know you want it" bits of bait they dangle in order to get you to subscribe. The magazine looked pretty good, but what really caught my eye was the bars on the back cover. Salted-Nut-Roll-Bars. Yum. I love PayDay candy bars. Salty, crunchy nuts and gooey, sweet filling. What's not to love?
In looking at the ingredient list I had most of it, but not the peanut butter sandwich cookies. So I made them. Would a normal person really do that? Probably not. So I'll give you the recipe both as I made it and as suggested, just in case you're a normal person with a life.
The original recipe called for 1 stick of butter for the base. That seemed like an awful lot of butter. I halved it. My base was a bit crumbly, but I preferred that to greasy. Just be sure to press the crumbs down firmly into the pan.
PayDay Bars
- adapted from Cuisine At Home
Makes 28 bars. Takes about 45 minutes + cooling time, much more if you make your own peanut butter sandwich cookies
Base;
1 lb. peanut butter sandwich cookies, or about 16 homemade p.b. sandwich cookies
1/2 stick (1/4 cup) unsalted butter, melted
Topping;
1-2/3 cup peanut butter chips (1 package)
2/3 cup light corn syrup
4 Tbsp unsalted butter
1 tsp. vanilla extract
2 cups miniature marshmallows
2 cups dry-roasted peanuts
2 cups crisp rice cereal (like Rice Krispies)
1- Preheat oven to 350 deg. F. Coat a 13 x 9-inch baking pan with cooking spray.
2- Place the p.b. cookies in a food processor and process until fine crumbs form. Add the melted butter and process until crumbs clump together. Press the crumbs firmly into the prepared pan. Bake 15 minutes, or until golden.
3- In a saucepan over medium-low heat, melt the peanut butter chips, corn syrup, butter, and vanilla in a saucepan over medium-low heat, stirring until smooth, about 5 minutes. Spread 1/2 cup of the peanut butter mixture over crumb base.
4- Sprinkle the marshmallows over the top and return the pan to the oven. Bake until marshmallows puff, about 2 minutes, then remove from the oven. Don't let the marshmallows brown.
5- Toss the peanuts and cereal with the remaining peanut butter mixture. Drop spoonfuls of the topping over the marshmallows, then spread with a spatula or greased fingertips. Cool the bars before cutting. For clean cuts, use a knife coated with cooking spray or butter.
Monday, May 4, 2009
Cinco de My Oh My!
I used to think Cinco de Mayo was Mexican Independence Day or something really major. I looked it up on Wikipedia, and it sounds like it's about a regional battle and is celebrated much more in the United States than in Mexico. I know the reason for this. Around here, Cinco de Mayo is loosely translated as "excuse to go out for Mexican food and drink Tequila." Not a bad little holiday, when you look at it that way.
When I got out to our local Mexican restaurant I always order the same thing. It's a messy plate of beans, rice, tomatoes, lettuce, guacamole, sour cream, and pounds of oozy, melted cheese. Probably not authentic in the least, but amazingly good. And what goes better with all that than a margarita?
Since my life motto is "Eat Dessert First," I thought I'd put dessert into the margarita. Or is it the margarita into the dessert? Either way, it's fabulous. You don't even need an ice cream maker to whip up a batch of this amazing treat. Just stir the ingredients together in a bowl, whip briefly with an electric mixer, then put in the freezer overnight. The alcohol content keeps the ice cream smooth.
Although this presentation of the ice cream was fun, I'd recommend serving scoops in small bowls, then sprinkling the top with your favorite coarse salt. The salt combined with the tequila and the cream is amazing. Really! If you eat dessert first, you might not even want to make it to the main meal.
Margarita Ice Cream
- adapted from Nigella Express
1/2 cup lime juice
3 Tbsp Cointreau or triple sec
2 Tbsp tequila
1-1/2 cups powdered sugar
2 cups heavy cream
Coarse salt for garnishing
1- Pour the lime juice, Cointreau (or triple sec), and tequila into a bowl and sti in the sugar to dissolve.
2- Add the cream and stir to blend. Softly whip with a handheld mixer or whisk until thick and smooth but not stiff.
3- Spoon into an airtight container to freeze overnight. Serve directly from the freezer; the alcohol keeps if from freezing too hard and it will melt quickly.
Makes about 1-1/2 quarts.
Subscribe to:
Posts (Atom)