Sunday, September 28, 2008

The Sweet Loaf


When I'm faced with an onerous task my first instinct is to procrastinate. It's the ostrich in me that says if I ignore the problem, just maybe it will go away. That is why more than one of my term papers were written in the wee hours of the night, or morning, right before they were due.

I use psychology and say I've given over the task to my sub-conscious mind to work on so that when I get to the task, my mind will have already worked out all the kinks. Or that I'll be better able to face the task when I've had more sleep, more caffeine, or more chocolate. Or, the ever popular one, I work better under pressure.

In any case, I had a whole month to make this month's Baking Babes bread assignment but I put it off till zero hour, as per normal. Why? The lovely Monique of Living on Bread and Water picked this month's bread and it set my pulse racing to hear that it would be a sweet bread. Not just a sweet bread, but Sukerbolle or Sugar Loaf. Why would I procrastinate on making anything with a name like Sugar Loaf?

The original recipe we were given to work with was was an old recipe, the kind that's handed down by grandmothers without specific directions, and it was in metric. Metric is not my strong suit. Although I see the value of it, I really am more comfortable with my measuring cups and spoons. Plus the recipe had some ingredients that were a bit challenging to find. So, of course waiting until the weekend before the posting date was the logical course of action.


This beauty is a sweet dough into which is kneaded chunks of sugar with cinnamon baked into an out of this world sweet treat. After I made the bread my family hovered eagerly awaiting a slice. Oh my gosh it was good! I'd misjudged the time and temp so there was an uncooked dough mass in the center. It didn't matter. We wolfed the whole loaf down in an embarrassingly short period of time. As I bit into my moist, sweet piece, flecked with crunchy bits of sugar, dripping with butter, I thought, "Why did I wait so long to make this?" I'll certainly be making it again!

I changed up the recipe a bit, trying to write it down as I made it, trying to give both metric and English measurements. Sorry for those places where I didn't get both.

The sugar chunks I found at Sur La Table, but if you aren't able to locate them, you can partially crush sugar cubes with a rolling pin. You need to have large chunks so that they melt in the dough leaving pockets of sweetness. Delicious!


If you are unable to locate ginger syrup (which I don't think any of us in the US were), use this simple recipe to make your own. As a bonus, you get lots of candied ginger to play with!

Sukerbolle

500 grams or 3-1/2 cups all-purpose flour
10 grams or 2 tsp kosher salt
25 grams fresh yeast or 2 tsp active dried yeast
75 grams or 1/3 cup unsalted butter, melted and cooled
2 eggs
3 Tbsp ginger syrup
Lukewarm milk
150 grams sugar chunks
1 teaspoon cinnamon powder (more or less to taste)

1-In a large bowl stir together the flour, salt and yeast. (If you're using dry yeast, the rise time will be a bit longer.)

2- Pour the ginger syrup into a liquid measure and add enough milk to bring it to 200 ml (about 7/8 cup). Add this along with the melted butter and eggs to the flour. Stir together until the dough cleans the sides of the bowl.

3- Turn dough onto a lightly floured surface and knead till smooth. The dough will be quite soft, but should not be sticky.

4- Put into a lightly greased bowl, cover, and let rise till doubled.

5- Turn the dough out onto the work surface, sprinkle the sugar chunks and cinnamon on it and work it through. Alternately, you can roll the dough into a rectangle, sprinkle with the cinnamon and sugar and roll up the dough like a cinnamon bread loaf.

6- Roll the dough into a loaf shape and place in a well-greased bread pan. Sprinkle a little sugar on top. Cover and let rise for 15 minutes while your oven preheats to 350 deg. F. (I cooked mine for 30 minutes at 400 deg. F. and I think a longer bake at a lower temp would probably work better.)

7 - Bake for 45 minutes until brown and done. Turn out of loaf pan to cool. When you can resist no longer, slice up a piece and smother it with butter. I won't tell if you come back for seconds right away.


Be sure and check out how the other Bread Baking Babes fared with this fun challenge. And if you'd like to bake along and earn a Bread Baking Buddy badge for your blog, (say that three time fast!) you have a week to bake and post, then send the link to Monique.

Thursday, September 25, 2008

A Blondie By Any Other Name


Today's post is a special request. I made this outside of my regular baking schedule because 1) it gave me and excuse to try another dessert, and 2) the special request came from Veggie Girl, and I think she's awesome.

Veggie Girl is one of the happiest faces in food blogging. When I go to my favorite sites to read and comment she's already been there. And she always finds something positive to say, even if the recipe is just a plate full of meat. Veggie Girl is a vegan and is super creative about veganizing baked goods and giving old recipes a vegan twist. So when she put in a request for blondies, how could I say no? This is not a vegan recipe, so she'll have some experimenting to come up with a vegan cousin to it.


I made these for my daughter's Bible study group. When she was living at home I used to provide a dessert for them almost every week. Sarah makes wonderful meals to take, but she says the dessert end of things has been sadly lacking. When I heard that the bachelor men in the group were bringing packaged grocery store cookies for dessert, my heart was smote. How could I leave this wonderful group of people who'd come and weeded our whole yard before the wedding with no decent dessert?

I took the special request in hand and adapted a couple of recipes to fit the occasion. But there was a problem. Here's the script as related by Sarah:

Group: What's this?

Sarah: It's blondies.

Group: What's a blondie?

Sarah: It's a brownie without the chocolate.

Group (pouting): Oh, no chocolate?

Sarah: It's really good. It's just something different. Just try it. You have a piece with the ice cream on top.

Group: (takes a piece, nibbles indifferently)

Sarah: It's meant to have the ice cream on it.

Group: That's ice cream? I thought it was yogurt. (Takes a scoop of ice cream on a different plate)

Sarah:(getting frantically frustrated) It's ice cream and it's meant to go on top. It's a topping for the blondie. Put the scoop on top of the blondie and eat them together!

Group (gets the idea and eats it as prescribed. Eats more. Clutches stomach and moans): Oh, that was so good. I ate too much.

To avoid further such episodes of confusion, I'm renaming these:


Walnut Bars with Maple Walnut Ice Cream
- adapted from Taste of Home

3/4 cup butter, softened
2 cups packed brown sugar
4 eggs
2 tsp vanilla extract
2 cups all-purpose flour
2 tsp baking powder
1 tsp salt
1-1/2 cups toasted walnuts, coarsely chopped

Maple Walnut Ice Cream with Wet Walnuts from The Perfect Scoop
Salted Caramel Sauce from The Perfect Scoop (optional)

1- Preheat oven to 350 deg. F. Grease a 9 x 13-inch pan. If you want to have very tidy squares, line the pan with parchment paper so that it hangs over the edges of the sides. You can use this to lift the bar out of the pan after baking.

2 - In a small bowl, combine the flour, baking powder and salt. Set aside.

3- In a mixing bowl, cream butter and brown sugar. Add eggs, one at a time, beating well after each addition. Beat in vanilla.

4- Gradually add the flour mixture to the creamed mixture. Stir in the toasted walnuts.

5 - Spread the batter into the prepared baking pan. Bake for 25-30 minutes, or until a toothpick inserted near the middle comes out clean. It might look a bit underdone in the middle, but that's OK. Cool on a wire rack.

6 - When cool, cut into 20 squares. If you put parchment in the pan, lift the blondies out, peel off the paper, and place on a cutting board before cutting.

7 - Serve with a generous scoop of ice cream. You can, of course, use a store bought ice cream, but this ice cream is so amazingly good, you'll be missing out. Drizzling with sauce is a delightful option, but not necessary for enjoyment of this treat. Due to the timing of things, mine was served without.


Note: Even though the pictures bear my watermark, they were taken by my super-talented daughter. Isn't she great?

Monday, September 22, 2008

Cooking for Two... or More


When I got married I was pretty woeful in the cooking department. I knew how to make hamburgers, scrambled eggs, and steak. Oh, and cookies, of course. But man cannot live on cookies alone.

Our apartment had a little balcony on which we kept a planter box of flowers and our hibachi grill. I did OK when dinner was grilled (how far wrong can you go with grilling meat?), but disaster loomed when I entered the kitchen. I knew my way around a box of macaroni and cheese, but dinners took a turn for the worse when I got creative. After I made a Tuna Surprise Casserole my husband forbad me from ever cooking with tuna again.

Because she likes my husband, my kind and thoughtful older sister gave me a cookbook specifically designed for cooking for two. It broadened my menu planning beyond what I could grill on the hibachi and helped my husband be excited about coming home for dinner. Some of my favorite recipes came from that book and over the years I've just adapted them to fit my growing family.

Because we peaked a few years back at six family members at the dinner table, it's been a while since I've browsed through a cooking for two book, but with my daughter getting married, I've had my eyes open for them. This recipe is originally for two, but I doubled it for my family and will give it to you as I made it. Obviously, it will halve nicely to make just enough for an intimate evening for two.

I'm taking a wee, bitty break from my family favorites series to bring you this seasonal recipe. We just tried it out at the Cookie Baker house and it's a keeper. Since it calls for nectarines, I wanted to post it while you still can scramble to the market and get a few.

Blush Wine-Marinated Chicken & Nectarine Salad
- adapted from Sunset's Quick Cooking for Two

Blush Wine Dressing (below)
4 small boneless, skinless chicken breast halves ( about 4 oz. each)
4 Tbsp slivered almonds
8 cups lightly packed torn romaine lettuce, rinsed and crisped
2 large nectarines, pitted and sliced
4 Tbsp thinly sliced green onion
Salt and freshly ground pepper

Blush Wine dressing

1/4 cup white Zinfandel
1/4 cup red wine vinegar
1/4 cup vegetable oil
2 cloves garlic, minced or pressed
4 tsp. minced shallot
2 Tbsp honey
4 tsp Dijon mustard
1 tsp crumbled dried rosemary

1- Prepare Blush Wine dressing: In a small bowl whisk together the Zinfandel, vinegar, oil, garlic, shallot, honey, mustard, and rosemary to blend.

2- Rinse chicken, pat dry and place in a heavy duty zip-lock plastic bag. Pour 1/4 cup of the dressing over the chicken; seal the bag and turn it several times to distribute the marinade. Set the bag in a bowl and let it stand for 5 minutes.

3- Meanwhile, pour almonds into a small frying pan. Toast over medium heat, shaking pan often, until almonds are golden (3 to 4 minutes). Pour out of pan and set aside.

4-Lift the chicken from the marinade, drain briefly, and place on a grill 4 to 6 inches above a solid bed of hot coals or over high heat on a gas grill. Close lid on gas grill. Cook chicken for 5 minutes, then turn over and brush with any dressing remaining in bag; close lid on gas grill again. Continue to cook until meat in thickest part is no longer pink; cut to test (about 5 more minutes). Remove from grill and cut diagonally across the grain into 1/2-inch wide strips.

5- Divide lettuce between 4 dinner plates. Arrange chicken and nectarine slices over lettuce; sprinkle with onion. Spoon remaining dressing over salads and sprinkle with almonds. Season to taste with salt and pepper.

Friday, September 19, 2008

Cobbled Together With Love

My husband was one of two boys and my mother-in-law was mighty glad when he got married. She'd been swimming in the testosterone sea long enough and was thrilled to have another woman in the family. When my in-laws crossed the state to visit us, she'd bring over dishes and pans that she found at garage sales (she's the queen of garage sales) to stretch out my meager newlywed kitchen. Then she'd take me to the grocery store and buy treats to stock our cupboards and give me advice and pointers on how to be a homemaker.

One of the best things she shared with me was her recipe for cobbler. This is a wonderfully versatile recipe that you can adapt to fit your tastes, preferences, and whatever fruit is in season. It's not especially elegant, but it's quick to throw together and tastes like the very best of warm, home-made comfort food.

My mother-in-law loves tasting mostly fruit, so she makes this in a 9 x 13-inch pan. I love the dough, so I'll use a 9 x 9-inch pan or double the dough for a 9 x 13-inch pan. You can use a single fruit or pair up fruits. I used peaches and blueberries for this one. I also love apples and blueberries together. You can add extra spices according to your taste. Maybe some cinnamon and nutmeg with apples or some ginger with pears? Play with it and have fun.


Pat's Any Way You Like Cobbler

Your choice of fresh fruit, sliced
Sugar
Tapioca
1 egg, lightly beaten
1 cup sugar
1/3 cup melted butter
1 cup flour
1 tsp baking powder
1/4 tsp salt
1/2 cup milk

- Preheat oven to 350 degrees F.

- Fill a pan (9 x 13-inch for mostly fruit, 9 x 9-inch for more dough) about 2/3 full with fruit.

- Sprinkle the fruit with sugar. Just a bit if it's very sweet fruit. Be more generous for tart fruit.

-Sprinkle the fruit with tapioca. This absorbs the excess juice, so you'll need to add more for very juicy fruits or berries.

- For the dough combine the egg, sugar, and melted butter. Add the flour, baking powder, and salt. Stir till smooth. Stir in the milk. Stir till smooth. Pour the flour mixture over the fruit in the pan.

- Bake for about 1 hour, till the top is browned. The time will vary depending on how much fruit, what size pan, and how much dough you used.

Wednesday, September 17, 2008

Unrighteous Cornbread


Thanks for all your positive comments about the family favorites project. It's nice to know that it's not just my kids who will benefit from these posts. And now the series continues....

Because of an overwhelming number of requests for cornbread, I will do that next. Ok, it really was only Melinda, but how could I refuse such a sweetie? Also, the request dovetails nicely with my plans because I always serve cornbread with chili. Cream goes with peaches, peanut butter goes with chocolate, and cornbread goes with chili.

Now some of you may be laboring under the delusion that cornbread is cornbread. Not so, gentle readers. There are some who say the war between the states was fought over states' rights; there are some who say it was over slavery; and there are some who would say it was over cornbread.

Mark Lowry, a comedian from the South, says that sugar in cornbread is not of God. (You can hear his whole riff on Southern vs. Northern cooking here.) Well, if that's the case then put my name down in the godless cornbread column because I make Yankee cornbread. It's moist, not too crumbly, and has sugar in it. Then it's topped with butter and honey (or honey butter, made by creaming together equal parts of honey and softened butter) and a panful is gone in a flash. There's particular jockeying to get the center piece as that's the moistest piece, but no one will admit to it.

Yankee Cornbread
- adapted from The Good Housekeeping Illustrated Cookbook

1 cup all-purpose flour
3/4 cup cornmeal
1/4 cup sugar*
1 Tbsp double-acting baking powder
1 tsp salt
1 egg
2/3 cup milk
1/3 cup vegetable oil**

1- Preheat oven to 425 deg. F. Grease an 8 x 8-inch baking pan.

2- In a medium bowl stir together the flour, cornmeal, sugar, baking powder, and salt.

3- In a small bowl with a fork, beat together egg, milk and vegetable oil. Pour this mixture all at once into the flour mixture. Stir just until flour is moistened and quickly pour the batter into the prepared pan.

4- Spread batter evenly and bake 25 minutes or until golden. Cut into 9 squares and serve.

* To make a more righteous cornbread, reduce the sugar to 2 Tbsp.
** You can substitute 1/3 cup melted butter for the vegetable oil, but I honestly don't think it makes a taste difference.

Sunday, September 14, 2008

So Easy A Child Can Do It

Now that my older daughter is married and living with her husband, she's having a great time being queen of her own kitchen. She gets to decide what's on the menu, make it herself, and leave out the ingredients she hates (tomatoes). But she does occasionally run into the problem of not having instant access to the recipes for some of my old, favorite, tried and true dinners. I've gotten more than one phone call asking for a recipe with the refrain, "You've really got to put that on your blog, Mom."

Since she asked, I'm going to do a short series of posts that are some of my frequent guest stars on the menu. They might not be exciting, but they're easy, for the most part, and tasty. And really, they're for my kids living away from home. So the rest of you, be patient. The desserts shall return!

I looked for quite a long time for a chili recipe that didn't take days to make, yet was tastier than what comes out of a can. I'm sure this chili wouldn't make it out of the starting gate at any chili cook-off (mainly because your taste buds aren't seared off), but it's my favorite because I can make it in under half an hour and my children will eat it.

Where, you ask, did I find such a treasure? In a Klutz kids cookbook. My younger daughter received it as a gift one year and I've snuck it into my cookbook hoard because this recipe is such a keeper. You can make it with a pound of ground beef instead of the ground turkey; just be sure to drain off the grease well. Also, if you're out of green onions, chop up a half a yellow onion instead.


I had my son put on his chef outfit to show how easy this is to make. He quickly shed the outfit, but did a great job with the helping. His reward was a bowl of chili with cheese on top. He's easy to bribe.

Quick and Easy Chili Con Carne
- adapted from Klutz Kids Cooking

1 small green pepper
3 green onions
1.25 lbs ground turkey
1 can (15 oz) tomato sauce
1 can (15 oz) kidney beans
1 tsp chili powder
3/4 tsp salt

Garnishes:
sour cream
grated cheese
corn ships

1- Chop the green pepper and green onions into small pieces.

2- Break up the hamburger meat into a 2 quart saucepan. Add the chopped onions and green pepper and put the pan onto medium heat.

3- Stir, watching the mixture carefully. When the meat is browned, take the pan off the heat and drain the fat. (I use ground turkey, so there is little fat to drain off. There will be more if you use ground beef.)

4 - Add the kidney beans (with their liquid), the tomato sauce, chili powder, and salt. Stir well and put back over high heat.

5- Cook until the mixture boils, stirring frequently. Then lower the heat to simmer and cook uncovered for another 10 minutes or so. The mixture will thicken as it simmers.

6- Spoon into bowls and top with your choice of garnishes.


Note: This recipe easily doubles in a Dutch oven to serve a crowd. The recipe as written serves 4 to 6.

Wednesday, September 10, 2008

Baking Education


I apologize for being so sluggardly in my posting lately. You might have wondered what happened to me. I haven't been hospitalized, kidnapped, or run away with the milkman. It's just that school has started.

For most moms who stay at home, the day school starts is a joyous day. They send their kids off to school and then enjoy the peace of a quiet home and the happiness of knowing they can clean and have the home stay clean until their little ones return in the afternoon.

I am not one of those moms. I homeschool. That means that as August winds down and the back to school sales start, I get a knot in the pit of my stomach, not unlike when I was in school myself. I dread the coming days. We have to transition from happy, carefree summer life (with some chores) to scheduled, structured life with workbooks and tests (and chores). I dread the responsibility - what if I do a horrible job and my children end up as dyslexic delinquents? I'll have no one else to blame!

In order to keep my tenuous grasp on sanity, I try to balance the serious part of schooling with the fun part. The great part of homeschooling is the freedom we have to choose what we want to do and how we want to approach it. Math can be done in a workbook or in the kitchen. What better way to learn fractions than with measuring cups?

I'd had these cookies bookmarked since I bought this cookbook last year. And since I have a surplus of lemon, I thought this would be a great opportunity for kitchen learning with the kids. We tied on aprons, washed hands, and set to measuring out the ingredients. The kids were having fun, but I was getting distracted with both kids asking questions. So when I measured out the 1-1/2 cups sugar with the 1/2 cup measure, I really couldn't remember how many I'd put in. One child said two, the other child said three. I went with the older, more reliable child's count and added another 1/2 cup of sugar.

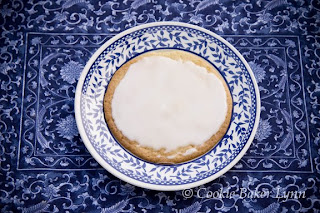
The recipe says it's supposed to make 16 large 4-1/2 inch cookies. Well, I can't tell you if that's what actually happens when you follow the directions. What happened for me was that the cookies spread out like an oil spill, melding and merging on the baking sheet. After the first batch I halved the amount used for each cookie and these came out as 4-1/2 inch cookies. The rest were gigantors, about 7 or 8 inches across.

I'll give you the recipe as it's written, but be aware that to duplicate the cookies in the picture, you need a couple of little helpers. Because, honestly, I have no idea how much sugar I put in these.

Lavish Lemon Cookies
adapted from Great Cookies by Carole Walter

1-3/4 cups all-purpose flour, spooned in and leveled
1 cup strained cake flour, spooned in and leveled
1 tsp cream of tartar
1/2 tsp baking soda
1/2 tsp salt
1 cup (2 sticks) unsalted butter, slightly firm
2 Tbsp freshly grated lemon zest
1-1/2 cups sugar
4 large egg yolks
1/4 cup fresh lemon juice
1 tsp pure vanilla extract
Lemon Glaze (below)

1- Sift the flours, the cream of tartar, baking soda and salt together 3 times. Set aside.

2- Using an electric mixer with the paddle attachment, mix the butter with the lemon zest on medium-low speed until creamy and lightened in color, about 2 minutes. Add the sugar in a steady stream, mixing again for 1 to 2 minutes. Blend in the egg yolks, mix for 45 to 60 seconds, then pour in the lemon juice and the vanilla, scraping down the bowl as needed.

3- Reduce the mixer speed to low and add the dry ingredients in three additions, mixing just until blended. Transfer the dough to a clean bowl and cover with plastic wrap. Chill for 1 hour.

4- Position shelves in the upper and lower thirds of the oven and preheat to 350 degrees. Line cookie sheets with parchment paper. If you have 14x 17 inch cookie sheets, use those, as the cookies will spread.

5- Working with one half of the dough at a time, place it on a floured surface. With lightly floured hands, shape the dough into a disk, coating it with a light dusting of flour. Using a dough scraper or a sharp knife, divide the dough into eight pie-shaped wedges. Flour your hands again and shape each wedge into a ball. This is a soft dough and shouldn't be overworked.

6- Place the balls on a cookie sheet 3 inches apart (6 per sheet if using an oversized cookie sheet). Using the heel of your hand gently flatten into 3 to 3-1/2 inch disks. Repeat with the remaining dough to form eight more disks.

7- Bake the cookies for 18 to 20 minutes or until the edges are golden brown. To ensure even browning, two-thirds of the way through baking rotate the sheets top to bottom and front to back.

8- While cookies are baking, make the Lemon Glaze. Remove the cookies from the oven, let stand for 5 minutes, then carefully loosen with a large, metal spatula. Transfer the cookies to cooling racks set over wax paper.

9- While the cookies are still warm, spoon 2 to 3 tsp of Lemon Glaze on each cookie. Immediately spread the glaze thinly over the top, coating the entire cookie. Set aside and let the cookies air-dry until the frosting has hardened.


Lemon Glaze

2 cups strained confectioners' sugar, spooned in and leveled
3 Tbsp hot lemon juice
1 Tbsp light corn syrup
1/2 tsp pure vanilla extract
Pinch of salt

Combine all the ingredients in a large bowl and stir with a whisk or spoon until very smooth. The glaze should pour from a spoon in a steady stream.

Thursday, September 4, 2008

Harvest of Bread


I'm a sucker for catalogs that comes in the mail. The glossy photos in catalogs always make stuff, especially kitchen stuff, look so appealing. I have to throw them away as quickly as they come, or else I take them into the "library" to browse and next thing you know I've got a wish list a mile long. The exception to the quick toss rule being cool kitchen catalogs that also contain recipes. Obviously you can't just chuck a perfectly good recipe. You might want to make that someday!

One of the worst offenders in the put-a-recipe-in-and-they'll-end-up-ordering category is the King Arthur Flour catalog. Not only do they have cool gadgets, nifty pans, spiffy tools, and hard to find ingredients, they also feature at least 3 mouth-watering recipes in each catalog.

A recent catalog featured a beautiful loaf they called Harvest Bread. It had me drooling just looking at the pictures. All of the ingredients sounded fabulous. Plus it was almost no knead. Time saving bonus! How could I resist?


The bread was beautiful- a symphony of flavors with a rustic texture that made each bit a pleasure. My husband said it was addictive. One slice was filling, but he kept wanting to go get another because it was so good! I loved the fruit flavors playing off the crunch of the nuts. Spread with a good butter, we had it for dinner. Delicious.

Harvest Bread
adapted from King Arthur Flour
(If you prefer ingredients listed by weight, those are available on the King Arthur website)


3 1/4 cups King Arthur Unbleached All-Purpose Flour
1 cup King Arthur Traditional Whole Wheat Flour
2 teaspoons salt
1/2 teaspoon instant yeast
1 3/4 cups cool water
1-1/4 cup mixed, dried fruit (I used the Trader Joe's mix of golden raisins, blueberries, cherries, and cranberries)
1 cup coarsely chopped walnuts


1) Mix the flours, salt, yeast, and water in a large bowl. Stir, then use your hands to mix and form a sticky dough.

2) Work the dough just enough to incorporate all the flour, then add in the fruit and nuts.

3) Cover the bowl with plastic wrap, and let it rest at room temperature overnight, or for at least 8 hours; it'll become bubbly and rise quite a bit, so use a large bowl.

4) Turn the dough out onto a lightly floured surface, and form it into a log or round loaf to fit your 14" to 15" long lidded stoneware baker, or 9" to 10" round lidded baking dish. Any fruit that is on top of the dough will burn, so try to have it all incorporated in the dough.

5) Place the dough in the lightly greased pan, smooth side up.

6) Cover and let rise at room temperature for about 2 hours, until a slight indentation remains when you poke it with a finger. Just before baking, slash the top several times to allow for expansion. Cover with the lid.

7) Place the pan in the cold oven. Set the oven temperature to 450°F.

8) Bake the bread for 45 minutes, then remove the lid and continue to bake for another 5 to 10 minutes, until it's deep brown in color, and an instant-read thermometer inserted into the center registers about 205°F. Remove the bread from the oven, turn out onto a rack, and cool before slicing.