Showing posts with label Bread Baking Babes. Show all posts

Monday, July 19, 2010

Bun Out Of The Oven

If you follow the Bread Baking Babes, you might have noticed that I was absent from our posting day last Friday. My absence was especially bad because I was the host kitchen!

Despite what you might think, I'm not a total flake. I had made the bread. Twice. I was ready to put up my post and talk about the recipe. I even had some ideas about how to incorporate that funky 70's hippie vibe that this bread put me in mind of. But then I got a phone call. At 4 am.

My pregnant daughter called to let me know that her water had broken. Four weeks early. Despite all her happy plans for a home birth attended by a wonderful midwife and doula, she and her husband had to go to the hospital. So her entourage went with her. We walked with them, sat with them, helped them make tough decisions.

And then came the labor. Intense labor. So, so hard, with not a moment to nap or recover. But my daughter was amazing. She went through the whole thing without medication and about 19 hours after her water broke, she gave birth to a beautiful little girl.

It was an intense day filled with heartbreak, disappointment, weariness, despair, pain, exhaustion, agony, much blood, and then the miracle of a new little life. So worth it.

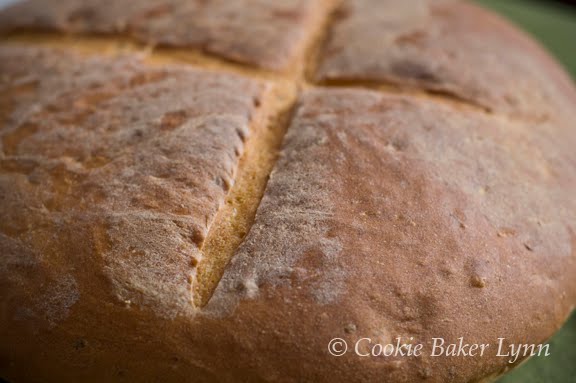
So, really, which would you rather I talked about? This, a dense, gummy loaf made from sprouted wheat-


or this. Isn't she perfect?

Wednesday, June 16, 2010

No Korni Jokes

The Bread Baking Babes are back and this month I've really let them down. Our bread for the month was a Korni loaf and I'm sure big things were expected from me in the way of Korni jokes, but I just couldn't get there. I was too busy making a simple loaf waaaaay harder than it needed to be.

When Lien, our host kitchen of the month, announced her choice was the Korni bread from The Village Baker, I promptly got the book from the library. I could have just printed out the recipe, but I wanted the book in case there was extra information I needed. Mistake. I was unaware that there are THREE Korni bread recipes in the book.


I opened the book to the (I thought) correct recipe and groaned. A starter. Pooh. That has to percolate for days. Double Pooh. Oh well, better to get started, so I mixed whole wheat flour, a bit of milk, some cumin, and some water to make a firm dough and let it sit in a bowl, covered, for 2 days. I fed it some more flour and water, covered it up and let it sit again. It wasn't until the third day that it dawned on me (yes, I really am that slow), that I was making a sourdough starter for the sourdough version of the Korni. Arggghhhh!

I can't tell you how the assigned recipe turned out. To find that out, you'll have to check the other Babe's sites (listed in the sidebar). I can tell you that the sourdough version is nice. Very moist, subtle flavor, speckled with crunchy bits. I'm not going to give you the recipe as it's too long, involved, and frustratingly vague. Check out the book if you want the sourdough version or make it the assigned way.


If you make and post the bread by the 29th, send the URL to Lien and she'll send you a handsome Bread Baking Buddy badge to proudly display on your site.

(The changes that I made were: I used soy nuts in place of the whole soy soak, roast process and I only used 1 tsp ground caraway seeds. Oh, and I made the sourdough version, but added 1 tsp instant yeast because I really didn't trust that sourdough to do much heavy lifting.)

Korni
(makes 1 round 3 1/2 pound loaf)
- adapted from Joe Ortiz' The Village Baker

Korni means corn or grain. It is made from a combination of grains that go well together for flavor, crunchiness, and good nutrition.

Soy bean mixture
1/2 cup organic (dried) soy beans (85 g)
1 cup boiling water (235 g)

Poolish
1 package (2 1/2 teaspoons; 1/4 oz) active dry yeast (1 1/2 tsp)
2 1/2 cups warm water (2 1/4 cup = 533 g)
1 cup organic rye flour (100 g)
1 cup organic whole wheat flour (130 g)
1 1/2 cups organic unbleached white (or all-purpose) flour (180 g)

Dough
1 teaspoon active dry yeast
1/4 cup warm water (60 g)
All of the starter from the previous step
3 cups organic, unbleached white (or all-purpose) flour (420 g)
1 tablespoon sea salt (2 tsp)
1 tablespoon ground caraway seeds* (1 tsp)
1/4 cup organic fax seeds (37 g)
1/2 cup organic millet (100 g)
All of the soy mixture

Glaze: 1 whole egg whisked with 1 tablespoon milk

Prepare the soy beans:
Place them in a small bowl, cover them with the boiling water, and let them soak for 10 minutes. Drain the beans and let them cool. Process the beans in a food processor fitted with the metal blade until they roughly chopped.

Place the beans on a cookie sheet and roast them in a preheated 350°F oven between 15 and 20 minutes, until they are completely dried out. Set them aside.

*(to make your own, grind a few tablespoons of whole caraway seed in a mortar with a pestle until you have a fine powder. If your powder still contains large chunks of seed, sift the mixture and use 1 tablespoon of the sifted powder)

Prepare the sponge/poolish:
First proof the yeast, in a large bowl, in 1 cup of the warm water. When it is creamy, mix in 1 1/4 cups warm water and slowly add the rye flour, whole wheat flour, and 1½ cups of white flour by handfuls while stirring the mixture with a wooden spoon.
Set the batter aside, in a large bowl, covered with a dish towel, for between 8 and 10 hours or overnight.

Make the dough:
Proof the yeast in the warm water, add it to the risen sponge, and mix the two together. Start adding the flour, handful by handful, stirring vigorously with a wooden spoon. After all but 1 cup of the flour has been added (this will take about 10 minutes), turn the dough out onto your worktable, sprinkle the salt and the ground caraway over the dough, and incorporate them by kneading the dough for about 5 minutes while adding the last of the flour. The dough should be very moist.

Add the fax seeds, millet, and roasted soy beans and knead the dough to incorporate them.
Set the dough aside, covered, to rise for 1 hour, until it has doubled in size.

Flatten out the dough again and then shape it into a round loaf. This loaf is best proofed in a canvas-lined basket (I used a large bowl sprayed with baking spray) and then baked on a baking stone in the oven. It can also be placed on a parchment-lined baking sheet. Let the loaf rise for about 1 1/2 hours.

Glaze the loaf with the egg and milk mixture and bake it in a preheated 425°F oven for between 30 and 35 minutes.

Let the loaf cool on a wire rack.

Saturday, April 24, 2010

Potatoes Al Dente

For some reason I procrastinate. Every month when the new Bread Baking Babes bread is posted I dutifully print out the recipe and then spend a month looking at it. I think about what ingredients I might need to buy, I think about the timing of the recipe and when I can fit it in, and then, at the last possible moment, I bake.

This month I was true to form. A lovely, easy, herbed potato bread. I had potatoes. I had chives. It didn't require an overnight starter or days of babysitting. I just needed to make it. Especially since my husband loves mashed potatoes; I knew he'd love this bread.

So what did I do? I started it yesterday, the day before the posting was due. Also, coincidentally, the same day my husband had a dentist appointment to get fitted for a replacement crown. Our previous dentist biffed his crown and left a pocket where decay was forming. (If you live in my neck of the woods, save yourself lots of time, money, and pain and never go to a dentist named Cooley.)


Hub's appointment was at 10:30, so I thought I might be able to get the bread done in time for him to have some for lunch. At 11:00 he called to say that he would be longer than predicted. The decay was so bad, that they were going to have to pull the tooth.

At 1:30 he called to say that the attempts to pull the tooth were not successful, as the tooth root was fused to the bone, so he was being sent for an emergency visit to an oral surgeon.

At 4:00 he got home, cheeks swollen, in pain. And to add to his torture, the house smelled wonderfully of potato bread with chives. Alas, he got pudding and a smoothie for dinner. Also, there's mashed potatoes....


I'll definitely have to make this bread again so he can enjoy it. The dough is delightful to work with and it gives a loaf (or two) with a beautiful, even, soft crumb and a nice crust. Thanks, Sara, for picking this fun recipe!

To see what the rest of the Babes did this month, visit their blogs (addresses in the sidebar), and if you'd like to be a Baking Buddy and get a badge to proudly display on your blog, you have a week to bake up a loaf, post, and send the URL to Sara.


Potato Bread with Chives
from Vegan Planet by Robin Robertson

"The addition of mashed potatos gives this bread a moist, dense texture and delicate flavor that is accented by that of the chives. This bread is best eaten slightly warm from the oven on the day it is made. It is also good toasted."

2 1/4 tsp (1 packet) active dry yeast
1 cup warm water
1 tsp sugar or pure maple syrup
2 Tb corn oil
2 tsp salt
1 cup cold mashed potatos
1 cup soy milk or other dairy free milk
5 cups unbleached all purpose flour, plus more for kneading
2 Tb minced fresh chives


In a large bowl, combine the yeast and 1/4 cup of the water. Add the sugar and stir to dissolve. Let the mixture stand for 10 minutes, then stir in the remaining 3/4 cup of water, the corn oil and the salt. Mix in the potatos, then stir in the soy milk. Add about half the flour, stirring to combine, then work in the remaining flour to form a stiff dough. Transfer to a lightly floured board.

Lightly flour your hands and work surface. Knead the dough well until it is smooth and elastic, 8 to 10 minutes, using more flour as necessary so the dough does not stick. Place in a large lightly oiled bowl and turn over once to coat with oil. Cover with a clean kitchen towel or lightly oiled piece of plastic wrap. Let rise in a warm place until doubled in bulk, 1 to 2 hours.

Meanwhile, lightly oil a large baking sheet and set aside. Punch the dough down and knead lightly. Turn out onto a lightly floured work surface, sprinkle with the chives, and knead until the dough is elastic and the chives are well distributed, 3 to 5 minutes. Shape the dough into one large or two small round loaves and place on the prepared baking sheet. Flatten slightly and cover with a clean damp towel or lightly oiled plastic wrap. Set aside in a warm place and let rise again until doubled in bulk, about 45 minutes.

Preheat the oven to 400'F. Use a sharp knife to cut an X into the top of the loaf or loaves. Bake on the center oven rack until golden brown, 35 to 45 minutes, depending on size. Tap on the bottom of the loaf or loaves - if they sound hollow, the bread is done. Remove from the sheet and let cool slightly on a wire rack before slicing.

Sunday, March 21, 2010

The Bread Baking Babes Go Gluten-Free!


When I started blogging I'd never heard of gluten-intolerance. It wasn't until I found Gluten Free Girl that I learned that gluten, the protein in flour that gives bread its structure, made some people sick. And after I learned that, people with gluten issues started popping up all around me.

My sister baked gluten-free treats for her knitting group, my daughter has a gluten-intolerant friend in her Bible study group, and my chiropractor, one of my favorite people to bake for, informed me that he was trying out the gluten-free lifestyle, too.

How timely, then, for Mary, this month's host kitchen, to choose a gluten-free bread for the Babes' challenge. And a no knead bread, at that!


Gluten-free loaves are specially suited for no knead because the kneading is there to develop the gluten strands. No gluten means no need to knead! It just lots of long, slow, cool rising.

Once I'd gotten all the special flours, it was quite easy to put this loaf together. The only time I ran into trouble was on the second rise. The directions say to let the loaf rise for 2-1/2 to 4 hours, until the dough is 1/8-inch above the pan rim. Well, I walked by my rising loaf after an hour and freaked - it was already there! I quickly turned on my oven, but by the time it had preheated, the dough was woofling down the sides of the pan.


I baked the loaf pan on top of a cookie sheet. Good thing - it caught all the dough dribbles that would otherwise be now encrusted on the bottom of my oven. After chiseling off the burnt dribbles, the bread released easily from the pan. The dribbles were actually my husband's favorite part. He said they made great crackers. He recommended that if I made the dough again to just spread a thin layer on a pan and make it all into crackers.

Did we all love it? Meh. But then we're spoiled by lots of good bread here. For someone forbidden to eat most breads, I'd imagine this would be a huge treat. I'll find out when I take some to my chiropractor.

Thanks, Mary, for picking this fun and really different recipe! Please check out what the other Babes came up with (Blogs on the sidebar). And if you'd like to bake along and get a Bread Baking Buddy badge, you have till March 31st to bake your bread, post it, and send a link to Mary.


Gluten Free No Knead Hearty Seeded Sandwich Bread
from Nancy Baggett's Kneadlessly Simple

1 2/3 cup white rice flour, divided (may need more depending on your dough)
1/2 cup cornmeal or brown rice flour
1/2 cup cornstarch
1/3 cup tapioca flour
1/3 cup flax seed or golden flax seed meal
1 1/4 tsp salt
1 tsp instant yeast
1 1/3 cup ice water
1/3 cup corn or canola oil
1/4 cup molasses (not black strap)
1 large egg, room temperature
1/4 cup plain yogurt, drained of excess liquid
2 1/2 tsp baking powder
3 Tablespoon of mixed seeds (millet, poppy seeds, sesame seeds, flax seeds, etc)


First Rise:
In large bowl, stir together 1 1/3 cups of white rice flour, cornmeal or brown rice flour, tapioca flour, flax seed meal, salt, yeast, and 2 Tbsp seed mixture. In another bowl, whisk together water, oil, molasses and mix thoroughly with flour mixture. If too stiff to blend, add more water to form a barely firm dough. (This confused me. It's not at all a dough, it's a very thick batter.) Tightly cover the bowl with plastic wrap. For best flavor, refrigerate dough for 3 - 10 hrs then let stand at cool room temperature for 12 - 18hrs. Dough will stiffen as it stands and it is alright if it doesn't rise very much.

Second Rise:
Whisk egg and set aside 1 Tbsp to brush top of loaf. Stir the yogurt, baking powder, and 1/3 cup white rice flour into the remaining egg. Vigorously stir the yogurt mixture into the First Rise dough until completely mixed. If it is too soft, you can add more of the rice flour (white or brown, doesn't matter which). Turn dough into a well greased 9" x 5" loaf pan and brush a little oil on top of loaf. Brush the reserved egg and seeds over the surface. Using a well oiled serrated knife, make a 1/2" deep cut lengthwise down the loaf. Cover the pan with a lightly greased piece of plastic wrap.

Let dough stand for 2 1/2 - 4 hrs in a warm room until dough extends 1/8" above the pan rim (mine reached this point in an hour under a warming light). Loosen plastic wrap as dough nears top of pan to prevent dough from smooshing down.

Baking:
15 minutes before baking, place a rack in the lower third of the oven and pre-heat the oven to 375 degrees. Bake bread on the lower rack for 55-60 minutes, until the top is nicely browned. If the top starts to over brown, cover with a piece of foil. Continue baking until a skewer inserted comes out with few crumbs or the internal temperature of the bread reaches 206-208 degrees. Bake for 5 minutes more. Remove bread from oven, and leaving bread in pan, let cool on wire rack for 15 minutes. Remove loaf from pan and let cool completely before slicing.

Thursday, February 18, 2010

Bread Snails


Baking with the Bread Baking Babes is a virtual globe-trotting tour. This month, our kitchen hostess, Karen of Bake My Day, took us to Spain to try Ensaïmadas. These delightful rolls were soft, pillowy, and delicious. They're supposed to be rolled up into snail shapes. Mine were slacker underachievers and relaxed into semi-croissants, but that didn't stop my family from yumming them all up.

I made two variations. The original recipe called for soft pork lard. That's not something I have lying around my larder (ha, little joke there), but I do have butter and I do have bacon grease. My family was hard pressed to say which they preferred. My daughter opined that the bacon grease rolls would be even more amazing with bits of cooked bacon and chopped onion rolled up in it.

If you'd like to bake along with us and be a Baking Buddy, you have till the 25th to get a post up and send a link to Karen. Check out what the other Babes have done with this challenge! (the addresses are in the sidebar)

Thanks, Karen, for this delightful taste of Spain!


Ensaimadas
- from Delicious Days
Active time: about 45 minutes, rising: several hours, baking: about 15 minutes
.
Ingredients (yields about 10 Ensaimadas):
500g all-purpose flour (plus additional as needed )
75g sugar
1/2 tsp fine sea salt
40g fresh yeast (= 1 cube)
200-250ml lukewarm milk
2 eggs (M)
2 tbsp olive oil
150g soft pork lard, bacon grease, or softened butter
powdered sugar for dusting


Add the flour together with sugar and salt into a large bowl (I used my KitchenAid bowl) and mix well. Make a hollow in the center, add the crumbled yeast as well as a decent pinch of sugar and pour over just enough of the lukewarm milk until the yeast is covered. Stir the yeast milk once or twice, then cover the bowl with a kitchen towel and let rest for about 15 minutes or until the surface of the yeast milk looks bubbly.

Add the other ingredients (the remaining milk, eggs,olive oil ) and knead well, either by hand or with your kitchen machine until the dough comes together nicely. I used less milk in the beginning (200 or 220 ml, while the original recipe suggests 250 ml) and my dough still turned out pretty sticky, I therefor added a tad more flour and let it knead at medium speed for 3 minutes (just for the record: my dough still felt really sticky). Let the covered bowl rest again in a warm place for at least 30 minutes or until the dough has doubled. (It took a long time for my dough to rise. Chilly kitchen, maybe.)

Punch it down softly, then flip the dough onto a well-floured surface and sprinkle with flour. Cut into about 10 equally sized portions and form into neat little balls, before letting them rest – sprinkled with flour, covered with a kitchen towel – once more for at least 30 minutes.

Shaping the Ensaimadas: Flatten one doughball, then roll out with a rolling pin (use flour as needed) until you get a pretty thin dough circle and brush it generously with the softened pork lard (or bacon grease or softened butter). Roll up cautiously, then let rest for a couple of minutes and continue with the other dough balls. (Meanwhile line the baking sheets with either parchment paper or silicone mats.)
Coil up each dough piece until it resembles the house of a snail (tuck the outer end under), ideally very loosely, because any spaces will fill up as the dough rises further. Place about five Ensaimadas on one baking sheet, making sure to leave enough space between them. Lightly brush with lard and cover up again.

The final rise is supposed to last overnight, yet I baked mine in three different batches (with rising times of 1 hour, 4 hours, 13 hours) and we preferred their look and taste with shorther rising times (1 and 4 hours). But do as you like.

Preheat the oven to 200°C (~390° Fahrenheit) and bake for 14 to 16 minutes or until golden brown. Take out and let them cool down on a wire rack for a couple of minutes, then generously dust with powdered sugar ( leave the bacon grease ones plain) and enjoy while still warm. Greasy fingers included!

Sunday, January 17, 2010

Some Baking Naan-Sense

After Christmas, I felt as if all my creativity had been squeezed out of me, leaving me flat. I'd done so much wrapping and then unwrapping, that my mind was definitely folding over on itself. And then I got tagged to pick the bread of the month for the Bread Baking Babes. So I picked Naan.

Does that seem like a naan-secquiter? Because it's not. It might seem like a naan-sense, but really it made perfect sense to pick a bread that's super easy to make and is really different, something naan-standard.

The challenging thing about Naan is that all the cookbooks preface their recipes with how you can't replicate the true cooking method of slapping the naan against the super hot walls of the specially-built clay oven. Well, I don't have that oven, but I don't think that lack makes it naan-negotiable. I used my cast iron skillet. A bit naan-traditional, but it worked.


Have you had enough of the bad puns? I hope so! Instead of more painful puns, I'll give you the recipe. Then be sure to check out what the other Babes have done with this month's challenge (links in the sidebar).

If you'd like to bake along and receive a Baking Buddy Badge to display on your site, bake the naan and post it before the 25th, send me a link to your post (lynncraigATcomcastDOTnet).


Curried Naan Bread
from Paul Hollywood's 100 Great Breads
- makes 6 naan

scant 4 cups white bread flour, plus extra for dusting
1-1/2 tsp salt
1 Tbsp olive oil, plus extra for frying
2 Tbsp mild curry powder
1/2 oz / 15 g. package compressed fresh yeast*
1-1/4 cups water
generous 1/2 cup golden raisins
3 Tbsp mango chutney


* If you are using instant or dry yeast, reduce the quantities a little (I used about 1-3/4 tsp active dry yeast)

1- Put the flour, salt, oil, curry powder, yeast, and water into a bowl and mix together for 2 minutes. Tip out onto a lightly floured counter and knead for 5 minutes, or until the dough is soft and pliable. Let rise for 30 minutes.

2- Line a baking sheet. Incorporate the golden raisins and chutney into the dough. Divide the dough into six pieces, then put on the baking sheet and let rest for 1 hour.

3- Turn the dough out onto a lightly floured counter and, using a rolling pin, flatten each piece into a circle, 25.5 cm / 10 inches in diameter. Put back on the sheet and let rest for 5 minutes.

4- Heat a skillet to medium heat and add a splash of olive oil. Shallow-ofry each dough until browned on both sides, then set aside to cool slightly before serving.

Plain Naan
- makes 3 naan

scant 4 cups white bread flour, plus extra for dusting
1-1/2 tsp salt
1/2 oz / 15 g. package compressed fresh yeast*
water to mix
1 tsp cumin seeds
1 tsp caraway seeds
olive oil for frying


1- Line a baking sheet. Put the flour, salt and yeast into a bowl and add enough water to make a soft, but not sloppy dough. Add the seeds, then divide the dough into three pieces and put on the baking sheet. Let rest for 1 hour.

2- Turn the dough out onto a lightly floured counter and, using a rolling pin, flatten each piece into a circle, 10 inches / 25.5 cm in diameter, and let rest for 5 minutes.

3- Heat a skillet to a medium heat and add a splash of olive oil. Shallow-fry each naan until browned on both sides, then set aside to cool slightly before serving.

Saturday, December 19, 2009

Baking Grace

One of the great things about Christmas time is that most people understand that time is short and stress is rampant and they try to extend a bit of grace to their fellow man. Some of the most cheerful people are the ones on the front lines.

Here's a shout out to Carlos at Target for checking out with a smile, a joke, and a wink. He asked the lady in front of me in line, who was around my age, for her ID since she was buying a bottle of wine. He studied it a moment and said, "I'm sorry, miss, you'll have to come back when you're 21 to buy this." I don't know if she was amused, but I gave him full marks for trying for a smile.


Next up, the amazing lady at the post office who turned my dreaded trek with 6 boxes, one of them international, into a quick and easy stop. She was fast and efficient, as well as polite and cheerful. Don't underestimate those postal workers!

Finally, the wonderful women who make up the Bread Baking Babes. They give me way more grace than I deserve (well, that's kind of the point of grace, isn't it?). I totally fluffed on the posting day for this month's bread and didn't get it baked till two days later. Oops. But I did get it done. And it would have been a shame to have missed this one. It's festive, beautiful, and makes my husband and son very happy. So, better late than never, right?

And if you've not yet mailed cards, wrapped gifts, or done whatever you think HAS to be by Christmas, just remember, it will come whether you're ready or not. Even if your to-do list is not all checked off, just make sure your heart is ready. And if you've got some spare time, you can join me in being a Bread Baking Buddy for this beautiful Viennese Striesel. And if you don't have time for that, you can just check out the lovely loaves from the other Babes and ooh and aah. Thanks, Katie, for this perfect Christmas bread!

Viennese Striesel

1 package active dry yeast
1/4 cup very warm water
1/2 cup milk
1/4 cup sugar
1 tsp salt
2 tbs butter, melted
2 3/4 - 3 cups flour
1 egg, lightly whisked
1/4 cup seedless raisins
1/4 cup candied cherries, chopped
2 tbs candied orange peel, chopped
1/8 tsp mace
1/2 cup confectioner's sugar
1 tbs milk
almonds or walnuts for sprinkling


1- Dissolve yeast in warm water.

2- Scald milk. Put milk, sugar, butter, and salt in bowl of mixer. Cool until just warm. Stir in 1 cup of flour. Mix in dissolved yeast and egg. Add 1 cup flour and stir to incorporate.

3- Add fruit and mace to the dough, then stir in 3/4 cups of flour. If the dough is still sticky, add up to 1/4 cup more flour, 1 Tbsp at a time, kneading till the dough is smooth.

4 -Shape into a ball, place in lightly greased bowl, cover and let rise until doubled, about 2 1/4 hours.

5- Punch down. Divide into 9 pieces, shape each into a ball and let rest 5 minutes.

6- Roll each piece into a rope about 15" long. Lay 4 strands on a lightly greased baking sheet, overlapping at the center. Braid from the center toward each end. With the side of your hand make a trench down the center. Now braid 3 strands, also from the center to each end, and place in the 'trench'. Twist the 2 remaining strands loosely together and place on top, bringing the ends over the end of the loaf and tucking in.

7- Cover loosely with plastic wrap sprayed with cooking spray, and let rise until doubled, about 1 1/2 hours. (I did this rise overnight in my refrigerator).

8- Bake, 350F (175C) for 40 - 45 minutes. Check after 30 minutes and if bread is browning too rapidly, tent foil over it. Remove and cool on a wire rack.

9- When bread is cool, mix milk and sugar -drizzle frosting over the top of the cooled loaf. Sprinkle with nuts.

Monday, October 26, 2009

Making Babies

With my eldest child about to get married and my youngest child well out of diapers (Thank the Lord!), I had thought I was all done making babies. But then Gretchen, the Bread Baking Babes' host kitchen for the month, introduced us to Tanta Wawas, Peruvian bread babies, our assignment for the month.

I was blessed to have Tanna, our founder, come bake with me. She happened to be in town and offered to come make babies with me. And it's a good thing she did, as they were a handful!

The recipe we were originally given made a massive amount of dough - way too much for my mixer, so it was all done by hand. The dough was very dry and shaggy and we ended up adding 300 ml of additional water, just to get all the flour absorbed and the dough in some sort of shape to knead.


Deciding on the right amount of yeast was a brain strain, as I don't stock fresh yeast. We finally agreed on an amount for the instant yeast and proceeded.

The kneading went on and on and on and never seemed to change the characteristic of the dough much. It stayed lumpy, hard, and dense. We let it rest and rise. When we returned, it was still lumpy, hard, and dense.

The shaping of the dough was daunting. We had seen pictures of beautiful, intricately crafted dough creations, but no instructions other than "shape." Tanna and I were not feeling overly creative, so we asked my husband for help. He may seem like a straightforward, no nonsense engineer type, but in preschool he got a ++ Smiley Face in play dough, so he was the man for the job.


After he'd crafted a fighter jet and a Wallace head (as in Wallace and Grommit), Tanna and I had enough confidence to attempt a fish, a camel, an octopus, and a gun totin' bandallero bambino.

We left the creations to rise for 3 hours (the just barely rose) and then popped them into the oven. The result? Hard to describe. Sweet....ish. Spicy.....sort of. Dry....but moist. And definitely moreish.


Gretchen retooled the recipe and came up with a moister version that is much smaller. You can check out her page for the new and improved version. I'll give you what I worked with. Just in case you've got a preschool class that needs a craft.

If you'd like to bake up some babies, you can earn a Bread Baking Buddy badge. Just send a link to your blog post to Gretchen by November 6th, and she'll send you a badge to proudly display on your website.

And be sure to see what all the other creative Babes did this month! (Links in the sidebar)


Tanta Wawa (Peruvian Bread Babies)
Makes 8

500g of whole wheat flour

2 kilos of bread flour

675g of sugar

125g of shortening

100g of fresh yeast (we used 38 g instant yeast)

25g of salt *note: Peruvian salt is powdery, so we ground it in a mortar and pestle

4 eggs at room temp

25g of ground cinnamon

5g of ground cloves

25g of sesame seeds

125g of butter

200 milliliters of milk

300 milliliters of water

1/2 teaspoon of vanilla

4 egg yolks (for painting)


1. In a bowl, mix the flours, sugar, yeast, salt, cinnamon, cloves, and sesame seeds. Make a well in the center and add in the shortening, eggs, butter, milk, water and vanilla. Mix well then turn out and knead for 10-15 minutes. (Add extra water as necessary to moisten all the dry bits.) Cover and let the dough rest for 20 minutes.

2. Divide dough into 8 portions of 500g each. Form them into ovals the size of your hand. Cover and let the dough rest for 10 minutes.

3. Stretch each dough ball and shape as desired. Place them on baking sheets which have been greased and floured. Cover with plastic and let the dough babies grow to three times their size. (I left mine for 3 hours)

4. Preheat the oven to 180C (350 deg. F)

5. Brush the egg yolks over the dough babies. Bake at 180C for 30 minutes, till an instant read thermometer reads 190 deg. F.

Monday, August 24, 2009

Baker in the Rye

Baking is one of my favorite things to do, but it's even more fun to bake with a friend. You can laugh together at silly mistakes, comfort each other over frustrating failures, challenge each other to try more than you thought you could do, and encourage each other when life is too tough to even get to bake. That's what baking with the Bread Baking Babes is like.

This month we gathered around Görel's virtual kitchen table. She had cookbooks stacked up and scraps of paper with bits of recipes flying around. While we elbowed for room around the table, she explained that she wanted us to bake a Russian Black Bread this month, but was having trouble deciding on a recipe. So, with a little bit of this and a little bit of that, she made up her own! And it's a doozy. The ingredients include ground coffee, shallots and old bread. You make a soaker out of that and leave it overnight, along with a sourdough starter. Combine in the morning with lots of rye flour and you get the stickiest dough ever.

When I described the process of making the bread to my neighbor, her eyes widened, possibly with terror. The next day I brought her some to try and she smiled, "Oh, the dump bread!" She reported back that she was pleasantly surprised with how nicely it turned out. I was too. You couldn't pick out any of the mystery ingredients - they just melded together to make a fragrant, moist dark bread.

Be sure to check out how the bread turned out for the other BBB's (blogs listed on the sidebar). And if you'd like to try your hand at this funky bread, bake it before September 7th, blog it, and send a link to Görel, and she'll send you a handsome Baking Buddy badge to proudly display on your website!


Görel's Russian Black Bread

SOURDOUGH

300 g (10.6 oz) Medium rye flour
350 ml (1.5 cup) Water
2 Tbsp Active sourdough culture*

SOAKER

100 g (3.5 oz) Old bread**, toasted
15 g (0.5 oz) Coffee, ground
25 g (0.9 oz) Vegetable, neutral oil
60 ml (1/4 cup) Molasses
2 tsp Caraway seeds
1 tsp Fennel seeds
1 Tbsp Minced schallots
400 ml (1-2/3 cup) Water, hot

FINAL DOUGH

300 g (10.6 oz) Medium rye flour
400 g (14.1 oz) High gluten bread flour
20 g (appr. 1 Tbsp) Salt
Yeast -
Fresh: 15 g (0.5 oz) OR
Instant dry: 1.5 tsp
Soaker All of the above
Sourdough All of the above

* If you don’t have any active starter at hand, you can cheat by using a small amount (say 5 g fresh or 0.5 tsp instant dry yeast) instead.

** I used sourdough ciabatta bread, but I guess any old unsweetened bread will do, or any old bread in general.


Sourdough

Mix the ingredients to the sourdough, cover the container with plastic and leave for 12–14 hours at room temperature.

Soaker

Toast the old bread in a toaster or in the oven. The bread should be browned, but absolutely not blackened. Dice the bread or just tear it in pieces and put it in a bowl. Add the rest of the soaker ingredients except the water. Heat the water to near boiling and pour over the soaker ingredients. Cover and leave for the same duration as the sourdough.

Final dough

Mix the two flours in a separate bowl.

If using fresh yeast: Take a small amount of the soaker liquid and dissolve the yeast in it. Add the yeast mixture OR the instant dry yeast, soaker, sourdough and salt to a mixing bowl.

Add half of the flour mixture and work the dough by hand or in machine. Continue to add about 100 ml or ½ cup of the flour mixture at a time and work until the flour is completely absorbed before you add the next round. The dough shall be firm but still quite sticky. You might not use all the flour, or you might need to add more flour, all depending on the flour used.

Place the dough in an oiled container, cover with plastic and leave for 2–3 hours or until doubled in size.

Shaping and proofing

Drizzle some rye flour on the table top and place the dough on top. If the dough is very sticky, pour just enough rye flour on top of it to make it possible to handle.

Divide the dough in two and shape the parts into oblong loaves. (I placed them on parchment paper to make it possible to just slide the loaves into the oven.) Stretch the surface using both hands to get a tight loaf. Use more rye if the dough is too sticky to handle.

Cover with a tea towel and leave for 60 minutes. Don’t over-proof! (Fire up the oven after 30 minutes to have it ready.)

Baking

Place an empty metal container in the bottom of the oven. Put in your baking stone or an empty baking sheet. Heat the oven to 225 °C/435 °F.

Put 3–4 ice cubes in the metal container.

Move the loaves to the hot stone or sheet. Bake for 10 minutes.

Open the oven door to vent out some moist. At the same time, lower the temp. to 200 °C/400 °F. Bake another 30-40 minutes or until they sound hollow when tapped underneath, or when the inner temperature has reached appr. 97 °C/207 °F.

Let the loaves cool down before you slice them. Eat with butter and maybe some sharp cheese!

Wednesday, May 20, 2009

Knotty Math Problems

One of the reasons of being part of a baking group, whether that's you and your best friend, or you and the thousands of Daring Bakers, is that you get stretched, challenged, and learn new things all the time. I find that to be true every month with the Bread Baking Babes.

This month's excursion into yeastland looked to be pretty straightforward. Ilva, our hostess for the month chose Italian Knot Rolls. That seemed fairly easy, the only things that gave me pause were the shaping of the rolls and the flour needed. Yes, it was time for another King Arthur order for Italian flour.

Just a quick note about this flour, which I have never used before. It is amazingly fine and soft. Rubbed between the fingers it is almost like powdered sugar. If you are a flour scoffer and say, "Ha, all flours are alike, I"ll just use all-purpose," you won't get the nice, fine crumb you'd get with this beautiful flour.

So, I've set you up for how easy these rolls are, right? And if you want to see beautiful, perfect rolls, go visit the other Babes pages to see how wonderfully they did with this challenge. As for me, I didn't.


My big stumbling block was trying to convert fresh yeast in grams to dry active yeast in teaspoons for the biga. It didn't help that my engineer husband who was trying his best to figure it out for me didn't know that fresh yeast was not the same as active yeast. After a period of time which involved some raised voices, in frustration I guessed at the yeast, threw it over the flour I had measured out into a a bowl, then dumped the water in on top of that.

Um, that's not how it's supposed to go. At this point, I didn't care. I just stirred it all up. Except it wouldn't come together. So I added more water. And more. And more. Then I left it covered to do whatever it wanted. If I came back and it bubbled, fantastic. If not, I'd start over again.

Well, it was bubbly, so I ploughed ahead with the recipe. But it was awfully slack dough. Really moist and sticky. So when I shaped the knots, they didn't stay in their distinctive knotty shape, but relaxed into a pile of ooze on the baking sheets.

That might have even been OK, but for some reason I grabbed my spray bottle and spritzed in the oven when I put the rolls in. Steam = crust. I didn't know how the rolls were supposed to turn out, but I'm pretty sure it wasn't supposed to be so crusty.


So, I'll have to give it another try. When my brain comes back from holiday. And I have a lot of people hungry for delicious, warm rolls.

Thanks, Ilva, for the recipe and the excuse to stock my pantry with yet more flour.

If you'd like to try your hand at making Italian knot rolls, bake them up, post them by May 30th, and send a link to Ilva and she'll send you a Baking Buddy Badge to proudly display on your blog.


Pane Di Pasta Tenera Condita (Italian Knot Bread)

biga:

500 g / 1.1 lb normal bread flour
5 g / 0.17 oz fresh yeast, 1/4 tsp dry instant yeast, or 1 tsp active dry yeast
240 ml / 1 cup water

- Dissolve the yeast in a little water and quickly work the dough together.
- Put it in a container, cover it with a half closed lid or kitchen towel and leave it for 15-24 hrs.

bread:

1 kg / 2.2 lb. flour (type 00)
60 g / 2.1 oz lard (or shortening)
30 g fresh yeast , or 2 Tbsp active dry yeast
450-550 ml / 1.9-2.3 cups water, handwarm
25 g salt (about 2 Tbsp)
50 g/ 1.7 oz extra-virgin olive oil
25 g / .88 oz honey
500 g / l.l lb. biga

- Put the flour either in a big bowl or on a baking board, add the lard (or shortening) and mix it with your fingers until it has 'crumbled' and is completely mixed with the flour.
- Dissolve the yeast in little tepid water and add it to the flour. Mix as well as you can.
- Mix salt, olive oil and honey with the handwarm water and add it to the flour. Now work it it until it holds together and then add the biga.
- Work the dough until it is smooth and doesn't stick.
- Put it into a big bowl, cover it with plastic film and leave to rise until it has doubled.
- Now take up the dough and divide it into 12 equal parts and roll them it into long strands (about 30-35 cm)
- To make the knots: (Ilva's page has pictures of this)
1- Roll out the dough into snakes and lay them out on a flat surface.
2- Make a semi-circle with the dough strands.
3- Twist the two ends together like in the photo.
4- Bring the two ends towards the upper part of the circle.
5- Lift/fold the top part over the twisted part.
6- Take the two end and join them together under the actual knot, this will make the knot part come out more and it hides the ends.

- Put the knots on baking sheets and leave to rise (covered) until they have doubled in size.
- Bake in a pre-heated oven (200°C/390°F) for 25-35 minutes until golden brown.

Sunday, April 19, 2009

Feasting With The Family


When Mary of The Sour Dough announced the Bread Baking Babes' challenge for this month I seriously considered bowing out. It had two elements that I just couldn't see working in my home. The first was a obnoxiously smelly starter sitting on the counter for 5 days. My husband has a very sensitive nose and he would not be a happy camper with the kitchen smelling like old gym socks for almost a week.

The second issue was with the end product. Not that it was bad bread, but that it was designed to be eaten as part of a meal of "foreign" food. My family is not very adventurous when it comes to trying the food of other cultures and I was afraid of going to great effort, spending lots of money of ingredients I don't stock, and ending up with a meal that got thrown away because it "looked yucky."

Then, happily, a fellow Babe told of how she'd served the meal for her extended family and even the least daring of them enjoyed the meal, especially eating with their hands. I loved the happy family reunion picture she painted and suddenly it clicked in my mind - I was going to visit my family and we could do the feast at my sister's house! They love "foreign" food, we'd have lots of happy family to share the feast with, and, best of all, the smelly starter could sit on my sister's counter instead of mine because there was no way I'd be able to take it on an airplane as carry-on!


So, with my wonderful sister's help, the starter percolated and was fed for five days. Then we cooked up the injera. It is kind of like a sourdough pancake, although since Teff flour is used (a staple of Ethiopian cooking), the bread is gluten-free. Then we made a vegetarian version of the stew. And to round out the meal we recycled a previous dinner of barbequed turkey (renamed for the feast as Thompson's Gazelle) and homemade coleslaw (rebranded as Ethiopian greens).


The result? It was a wonderful feast. Everyone enjoyed scooping up the food with torn bits of injera, feeling a bit like naughty children for not eating with forks. Even though it looked like something the dog horked up, it was all delicious and I might even be able to convince my family at home to try it. Maybe. But at least I got to. Thanks, Mary for this fun and truly different recipe. The great thing about being a Babe is having the envelope pushed a bit, and this month was no exception!

Be sure and check out what the other Babes did with this fun challenge (their blogs are listed on the sidebar), and if you'd like to try your hand at an Ethiopian feast, you have until May 9th to make and post your version and send a link to Mary. She'll send you a handsome Bread Baking Buddy logo to post on your blog. Have fun!

Teff Starter:
This takes five days. If you want to have some starter left over to keep to make injera again, wait seven days. Follow Day 3 directions for Day 5 if you do a seven day starter.

Day One:
3/4 cup water, room temp. (70 degrees)
1/2 cup teff flour
A pinch active yeast (about 1/8 tsp)


Combine ingredients in a 4 cup container with a lid. Loosely cover the starter with the lid and let ferment for two days on the counter or someplace that is about 70 degrees. You should see some rising in about four hours.

Day Two: Do Nothing. You can look and check it out but it should just be sitting there starting to smell funny.

Day Three:
1/2 cup water, room temp. (70 degrees)
1/3 cup teff flour


Stir up starter to combine any hooch on top and feed the starter. Loosely cover the starter with the lid and let ferment for two days on the counter or someplace that is about 70 degrees. You should see some rising in about four hours.

Day Four: Do Nothing. You should start seeing layers of thick gunk on bottom, brown/gray liquid middle, and foamy stuff on top. It should smell um..bad.

Day Five:
1/2 cup water, room temp. (70 degrees)
1/3 cup teff flour


You should definitely have layers. When you stir up the starter it probably will fizz. Good! It will smell pretty bad. Feed it, stir it up, and let it sit until you are ready to make the Injera batter.

Make the batter about 4 hours before you plan on making the injera.

Cook the injerra just like you would a crepe. When the bubbles have stopped popping on the surface, it's done. Do not flip over and cook on the other side. Stack the cooled (important) injerra between pieces of waxed paper.

To serve with the injerra:

Niter-Kebbeh

2 sticks butter (16 ounces), unsalted
1/4 cup onion, chopped
2 cloves garlic, minced
2 teaspoons ginger, grated,peeled,fresh
1/2 teaspoon turmeric
4 cardamom seeds, crushed
1 cinnamon stick
2 cloves, whole
1/8 teaspoon nutmeg
1/4 teaspoon ground fenugreek
1 tablespoons fresh basil or dried basil

In a small saucepan, gradually melt the butter and bring it to bubbling. When the top is covered with foam, add the other ingredients and reduce the heat to a simmer.
Gently simmer, uncovered, on low heat for about 45 minutes or until the surface becomes transparent and the milk solids are on the bottom.

Remove from heat and pour the liquid through a cheesecloth into a heat-resistant container. Discard the spices and solids.

Covered tightly and store in the refrigerator. Niter Kebbeh will keep for up to 2 months.

Note: A good quality olive or other oil may be substituted for the butter.


Berbere

Note: This is the "heat" in all recipes. If you don't like it really spicy, reduce red chili pepper flakes to 1/8 cup. Or you can leave it out all together to make it not spicy at all.

1/3 cup red chili pepper flakes
2 1/2 teaspoons garlic powder
1 teaspoons dried onion flakes
1 teaspoons ground ginger
1 teaspoons ground cloves
1 teaspoon salt
1/2 teaspoon ground cumin
1/2 teaspoon ground fenugreek
1/2 teaspoon ground cinnamon
1/2 teaspoon ground cardamom
1/2 teaspoon ground black pepper

Combine all ingredients. Mix thoroughly. Store mixture in an airtight container.

Wot/Wet (Stew)

1/2 cup onion, finely chopped
1 clove garlic, minced
1 1/2 teaspoons berbere
1 1/2 teaspoons sweet Hungarian paprika
2 tablespoons niter kebbeh
2 tablespoons tomato paste
1 16oz can of diced tomatoes
1 1/2 cup vegetable stock
salt
black pepper
1/2 cup green beans, cut into thirds
1/2 cup carrot, chopped
1/2 cup potato, cubed
1/2 cup tomato, chopped
1/2 cup cabbage, roughly chopped

In dutch oven or stock pot: Saute the onions, garlic, berbere, and paprika in the Niter Kebbeh for 2 minutes.

Add the veggies, continue to saute for about 10 minutes, stirring occasionally to prevent burning.

Add the chopped tomatoes, tomato paste, and the vegetable stock. Bring to a boil and then simmer for 15 minutes, or until all of the vegetables are tender and the stew is thickened.

Add salt and pepper to taste.


Monday, March 16, 2009

The Young and The Yeastless

It's that time again. The Bread Baking Babes have taken on a new challenge and this one was a lot of fun. I have to admit that sometimes I look at our new recipes and gulp a bit when I realize it's going to mean a shopping scavenger hunt to find a weird ingredient (usually flour), or a couple of weeks of prep time prior to popping the loaf into the oven.

This month I didn't gulp at all. The recipe that Sara of I Like To Cook, our host kitchen of the month, gave us is really quite easy and calls for water, bread flour, and salt. Did you read yeast? I didn't type yeast. As leaven for this loaf you use 1/4 cup of leftover dough, called a "chef." It's a 2 day loaf, but worth the wait. For me it produced dainty loaves with a sturdy crust and lovely texture inside. And it's so much fun to make, I can't wait to try it again.

Check out all the other Babes (see the sidebar) and see what lovely loaves they've concocted, then try it yourself. If you make it and post it by the 29th, send a link to Sarah and she'll send you back a handsome Bread Baking Buddy badge to proudly display on your site.


Pane Francese
- adapted from King Arthur Flour, inspired by Joe Ortiz and The Village Baker

Early on the first day:

Creating the Levain
chef (1/4 cup leftover dough, or 1/4 cup sourdough starter, unfed)
1/4 cup warm, chlorine-free water
1/2 cup King Arthur Unbleached Special Bread Flour (I used plain bread flour)

Let the chef soften in the warm water, then whisk out any lumps. Mix in the flour until yo8u've formed a stiff dough. Turn the dough out onto a floured surface, and knead it for 5 to 8 minutes. The chef (now called a levain) should be moist but firm. Place the levain in a bowl, cover it with a damp cloth, and let it rise in a warm place till doubled. This will take 5 to 6 hours.

Sometime after lunch:

Second-Stage Levain
All of the levain (from above)
1/2 cup warm, chlorine-free water
1 1/2 cups King Arthur Unbleached Special Bread Flour

"Refresh" the levain by placing it in a medium-sized bowl, chopping it into small pieces, and adding the water and 1/2 cup of the flour, stirring till smooth. Add the remaining flour gradually to create a stiff dough. Knead the dough for several minutes, then return it to the bowl, cover it with a damp cloth, and let it rise for 3 to 5 hours, till it doubles in size. Punch down the risen levain, and reserve 1/4 cup as your next chef. (Let the piece ferment at room temperature for 3 hours, then wrap it in plastic and store it in the fridge. It'll develop a hard crust; that's OK.)

In the evening:

Dough
all of the second-stage levain (from above)
3/4 cup warm, chlorine-free water
2 teaspoons salt
2 cups King Arthur Unbleached Special Bread Flour

Chop the levain into small pieces, and mix them with the water, stirring till they begin to dissolve. Add the salt, then 1 1/2 cups of the flour. Turn the dough onto a lightly floured or lightly greased work surface, and knead until the dough is smooth and satiny, adding only enough additional flour to keep the dough from sticking unbearably. Return the dough to the bowl, cover it with a damp cloth, and let it rise in a warm place for 8 to 10 hours (overnight).

The next morning:

Shaping:
Cut the dough into 2 pieces, and shape each piece into a round or oval. Transfer the loaves to a lightly greased or parchment-lined baking sheet, or to a floured banneton; cover with a heavily floured cloth, and allow them to rise for 2 to 3 hours, or until they're almost doubled in bulk.

Don't slash or glaze the loaves. Bake the bread in a preheated 450°F oven for 35 to 40 minutes, with plenty of steam, or until they're a deep, golden brown. Yield: 2 loaves.


~~~~~~~~~~~~~~~~~~~~~~~~~~~~~~~~~~~~~~~~~~~~~~~~~~~~~~~~~~~~~~~


And now, the announcement you've all been waiting for.... the winner of the See's $25 gift certificate is.....(drumroll)...Elyse! Congratulations, Elyse! Please send me your full name and mailing address so we can get it right out to you.