Saturday, December 29, 2007

Brain Fluff Soup

I must admit it - I'm not perfect. Wow, I could hear those gasps of surprise all the way from here. But, I assure you, it's true. Every once in a great while I have what can be described as a pre-senior moment, an unscheduled cognitive vacation, or a brain fluff.

I receive so many nice comments on my posts. I really appreciate it when people take the time to leave a note about what I've written. Perhaps some people might be reluctant to leave a comment, fearing it will go to my head and I'll become an insufferable prat, too big for my oven mitts. Never fear, dear friends, never fear. I have far too many real life brain fluffs to think I'm the next big thing.

Here is the tale of one such incident.

I leafed through a cookbook and found an onion soup recipe that called for Applejack, something I had just purchased for another recipe. Score! I quickly scanned through the ingredients and found I had or could substitute for all of them. It started by sauteeing the onion in butter, so I plopped the butter in the pan to start melting while I diced the onion. Then it occurred to me that 4 large onions was a lot of onion, and since it made 8 cups, and my son was likely to turn up his nose at it, we'd have onion soup leftovers for a long time to come. So I quickly adjusted plans and halved the recipe. It worked beautifully.

My family raved about the soup. My husband said, "This is so good! It must have a lot of butter in it." I patted myself on the back and smiled. Then, later, the daughter with a life came home and had some. "Wow, this is delicious!" she said. "Does it have a lot of butter in it?" Hmm, I was sensing a theme here. As I was about to reassure her that I'd halved everything in the recipe, the instant replay in my mind saw the stick of butter falling in slow motion into the pan. Yes, I'd halved everything. Except the butter.

I'll give you the recipe how I meant to make it. I'm sure it's quite tasty that way. And if you want people to rave about it, double the butter.

French Onion Soup with Applejack
adapted from America's Best Recipes - 1988

2 large onions, diced
1/4 cup butter
1 cup Chablis or other dry white wine
1 32 oz. carton beef broth*
3 Tbsp applejack brandy
1/2 tsp Worcestershire sauce
1/4 tsp dried whole thyme
1/2 bay leaf (optional)
1 clove garlic, crushed
Large croutons
1/2 cup (2 oz.) grated Gruyere cheese

Melt butter in a Dutch oven. Add onion and saute until tender. Add wine; cook over high heat 10 minutes or until liquid evaporates, stirring frequently.

Stir in broth, brandy, Worcestershire sauce, thyme, bay leaf, and garlic. Cook over medium heat 30 minutes. Remove and discard bay leaf.

Place 4 ovenproof bowls on a baking sheet. Ladle soup into bowls. Top each serving with croutons, and sprinkle with cheese. Broil 6 inches from heat 3 minutes or until cheese melts. Serve immediately. Makes 4 servings.

* I used chicken broth, as that's what I had on hand. French onion soup purists might blanch at that, but it still tasted good.

Wednesday, December 26, 2007

Merry Christmouse


Twas the night after Christmas
And all through the house
Not a creature was stirring
Except maybe a mouse...or two

I made these delightful little critters for a cookie exchange. My daughter had a great time helping to decorate them (something I don't have the patience for on my own) and when they were baked we wrapped them up on plates to give away. But I think a couple of them got away. We found them lurking under the holly, scavenging cheese, and making merry.


If you have the patience to make all the little faces ( and I recommend tweezers for the holly bows if you don't have long fingernails), these are great cookies. Guaranteed to bring smiles to the faces of the recipients, they are also quite tasty. But keep a close eye on them or they might scurry away.


Peanut Butter Christmas Mice
adapted from Taste of Home

1 cup creamy peanut butter

1/2 cup butter, softened
1/2 cup sugar
1/2 cup packed brown sugar
1 egg
1 tsp vanilla extract
1-1/2 cups all-purpose flour
1/2 tsp baking soda
1/2 cup peanut halves
2 Tbsp green and red M & M miniature baking bits
Cake decorator holly leaf and berry candies (I used trees on edge)
60 to 66 pieces red shoestring licorice - (2 inches each)

In a large mixing bowl, cream peanut butter, butter, sugar and brown sugar. Beat in egg and vanilla. Combine the flour and baking soda; gradually add to the creamed mixture. Refrigerate for 1 hour or until easy to handle.

Roll into 1-inch balls. Place 2 inches apart on ungreased baking sheets, pinching each ball at one end to make a nose. I flattened the balls a bit so mine came out like mouse patties. Don't flatten and you'll have a chubbier, mousier cookie.

Insert two peanut halves in center of each ball for ears. Add one M&M baking bit for nose and two chocolate chips for eyes. Arrange holly and berry candies in front of one ear.

Bake at 350 deg. for 8-10 minutes or until set. Gently insert one licorice piece into each warm cookie for tail. Remove to wire racks to cool completely.


Yield: 4-5 dozen

Saturday, December 22, 2007

Try It, Yule Like It!

Sometimes I need to be talked into things. If I go clothes shopping alone, I usually come home empty handed. I need a buddy there, generally my daughter, to tell me "It's totally cute! You need to buy it." Then I'll buy it and come home happy.

So it was with the Daring Bakers. In the food blogging world, this is the cool kids club. I wistfully eyed their lovely creations every month, but didn't think that I lived up to the name of Daring Baker, so I didn't join.

Then, the sweet and talented Tanna of My Kitchen In Half Cups approached me with the idea of joining. It sounded wonderful, adventurous, and exciting and I wanted to be talked into it. Tanna did, and I'm so glad she did!

This month's challenge is a Yule Log. I was jumping up and down with excitement when I found that out. I've always wanted to make one, but that grand plan always fell to the bottom of the priority list come Christmas time. Now it was a homework assignment! An excuse to get all creative in the kitchen when I could (or should) be cleaning, vacuuming, wrapping presents, or addressing Christmas cards. Yippee!

This month's hostesses for the challenge were Ivonne at Cream Puffs in Venice and Lis at La Mia Cucina. They provided us with the recipe to follow and certain guidelines.

The only way I deviated from the guidelines was that I used melted chocolate in the butter cream frosting instead of coffee. I'm not much of a coffee gal, but I am a big fan of chocolate!

There were some new techniques to try, but it wasn't difficult to make. I loved the arty part of making the mushrooms and decorating the log. I served it up at a gathering of friends and it went down with zero complaints and many compliments.

Yule Log
(from Perfect Cakes by Nick Malgieri and The Williams-Sonoma Collection: Dessert)

Recipe Quantity: Serves 12
Cake should be stored in a cool, dry place. Leftovers should be refrigerated

Recipes:

Plain Genoise:
3 large eggs
3 large egg yolks
pinch of salt
¾ cup of sugar
½ cup cake flour - spoon flour into dry-measure cup and level off (also known as cake & pastry flour)
¼ cup cornstarch


one (1) 10 x 15 inch jelly-roll pan that has been buttered and lined with parchment paper and then buttered again

1.Set a rack in the middle of the oven and preheat to 400 degrees F.

2.Half-fill a medium saucepan with water and bring it to a boil over high heat. Lower the heat so the water is simmering.

3.Whisk the eggs, egg yolks, salt and sugar together in the bowl of a heavy-duty mixer. Place over the pan of simmering water and whisk gently until the mixture is just lukewarm, about 100 degrees if you have a thermometer (or test with your finger - it should be warm to the touch).

4.Attach the bowl to the mixer and, with the whisk attachment, whip on medium-high speed until the egg mixture is cooled (touch the outside of the bowl to tell) and tripled in volume. The egg foam will be thick and will form a slowly dissolving ribbon falling back onto the bowl of whipped eggs when the whisk is lifted.

5.While the eggs are whipping, stir together the flour and cornstarch.

6.Sift one-third of the flour mixture over the beaten eggs. Use a rubber spatula to fold in the flour mixture, making sure to scrape all the way to the bottom of the bowl on every pass through the batter to prevent the flour mixture from accumulating there and making lumps. Repeat with another third of the flour mixture and finally with the remainder.

7.Scrape the batter into the prepared pan and smooth the top.

8.Bake the genoise for about 10 to 12 minutes. Make sure the cake doesn’t overbake and become too dry or it will not roll properly.

9.Once the cake is done (a tester will come out clean and if you press the cake lightly it will spring back), remove it from the oven and turn the cake over onto a kitchen towel. Peel off the parchment paper, fold the towel over the long edge of the cake, and begin rolling the cake at that edge. Let the cake cook, rolled, to room temperature, then transfer to the refrigerator to cool thoroughly.

10. To frost, remove the cake from the refrigerator. Carefully unroll the cake, peeling back the towel. Frost the top of the cake with half the frosting, then carefully re-roll. If it cracks a bit at this point, do not despair. Frosting covers over a multitude of cracks.

11. Trim the ends on the diagonal, starting the cuts about 2 inches away from each end.

12. Place the log on a serving platter. Position the pieces on the log, cut sides adjacent to the log, so that it looks most like a log to you.

13. Cover the log with the reserved buttercream, making sure to curve around the protruding stump.

14. Streak the buttercream with a fork or decorating comb to resemble bark, then decorate with mushrooms, berries, greenery, or whatever you wish.


Chocolate Buttercream:

4 large egg whites
1 cup sugar
24 tablespoons (3 sticks or 1-1/2 cups) unsalted butter, softened
1/2 cup melted semi-sweet chocolate, cooled

1.Whisk the egg whites and sugar together in the bowl of an electric mixer. Set the bowl over simmering water and whisk gently until the sugar is dissolved and the egg whites are hot.

2.Attach the bowl to the mixer and whip with the whisk on medium speed until cooled. Switch to the paddle and beat in the softened butter and continue beating until the buttercream is smooth. Add the cooled, melted chocolate and beat till fully incorporated.


Marzipan Mushrooms:

8 ounces almond paste
2 cups icing sugar
3 to 5 tablespoons light corn syrup
Cocoa powder

1.To make the marzipan combine the almond paste and 1 cup of the icing sugar in the bowl of an electric mixer and beat with the paddle attachment on low speed until sugar is almost absorbed.

2.Add the remaining 1 cup of sugar and mix until the mixture resembles fine crumbs.

3.Add half the corn syrup, then continue mixing until a bit of the marzipan holds together when squeezed, adding additional corn syrup a little at a time, as necessary: the marzipan in the bowl will still appear crumbly.

4.Transfer the marzipan to a work surface and knead until smooth.

5.Roll one-third of the marzipan into a 6 inches long cylinder and cut into 1-inch lengths.

6.Roll half the lengths into balls. Press the remaining cylindrical lengths (stems) into the balls (caps) to make mushrooms.

7.Smudge with cocoa powder.

( The secret to having really dark, earthy mushrooms like I do is to use very old almond paste. I was pleased to have a reason to finally use that can of paste I'd had on my shelf since the Bush Sr. administration. Good thing I don't like marzipan and didn't plan on eating the mushrooms!)

Thanks, Lis and Ivonne for the fun challenge, and thanks, Tanna, for talking me into joining! Be sure to check out the Daring Bakers' Blogroll to see all the other creative concoctions by the rest of the Daring Bakers.

Friday, December 21, 2007

Merry Southern Hem. Christmas

In my house we have been talking a lot about normals. I use the word in a plural sense because there is no one single normal in the world. Normal is just a word that describes what you're used to. A lot of it is cultural and a lot of it is the traditions within your family.

Because my daughter is getting married soon, she has been exploring what her "normals" are versus what her fiancee's "normals" are in order to defuse conflict. A lot of blazing rows could be avoided by realizing that it's not right or wrong to have popcorn strings on the Christmas tree, it's just what you grew up with.

At a recent family party, Sarah was chatting about Christmas with the aunt from Australia who said that in her mind Christmas is a warm time and everyone goes to the beach on Christmas day. No images of snowmen, mittens, hot cocoa, and sledding associated with Christmas. Definitely no hoping for a white Christmas.

I've been thinking about this and realized that in my blog I've been neglecting my Southern Hemisphere friends. While I'm happy as a clam firing up the oven for two batches of cookies a day, it might not be that appealing in the middle of their summer. So here is a Christmas present for all of you who have balmy Christmas weather. Yes, this is a leftover from our summer, but I hope you'll enjoy it anyway. It's creamy, dreamy, bursting with fresh peach flavor, and easy, peasy to make. No custard to contend with, so less time at a hot stove!


Peach Ice Cream
adapted from The Perfect Scoop by David Lebovitz

1-1/3 lbs (600 g) ripe peaches (about 4 large peaches)
1/2 cup (125 ml) water
3/4 cup (150 g) sugar
1/2 cup (120 g) sour cream
1 cup (250 ml) heavy cream
1/4 tsp vanilla extract
A few drops freshly squeezed lemon juice

Peel the peaches, slice them in half, and remove the pits. Cut the peaches into chunks and cook them with the water in a medium, nonreactive saucepan over medium heat, covered, stirring once or twice, until soft and cooked through, about 10 minutes.

Remove from the heat, stir in the sugar, then cool to room temperature.

Puree the cooked peaches and any liquid in a blender or food processor with the sour cream, heavy cream, vanilla, and lemon juice until almost smooth but slightly chunky.

Chill the mixture thoroughly in the refrigerator, then freeze it in your ice cream maker according to the manufacturer's instructions.

If you like to have actual chunks of peach in your ice cream, peel an extra peach and dice it. Add this peach to the mixture after you've processed it before you put it in the refrigerator or add it in the last 5 minutes of freezing.

Monday, December 17, 2007

It's A Wrap

One Christmas, a group I was a part of had a gift exchange. We all brought wrapped gifts that were under a certain dollar amount. After the eating and talking and laughing part we placed all the presents on the floor and sat in a circle around them. Then we drew numbers out of a hat. Number One picked a gift. Number Two got to either pick a gift or take the gift from Number One. And so on around the circle. And when everyone had a present, we all opened the gifts.

The first gift to be picked up was gorgeous - shiny silver wrapping paper with a large, glittery silver bow. It was a work of art...that contained a rather lame ornament.

The last gift to be picked was mine. I am not a gifted wrapper and my poor little offering looked like a two year old had helped wrap it (which was probably the case). But, and I say this not to boast, my gift was the best. I had searched long and hard for just the right item for that group and there was a collective intake of envious breath as the last gift-picker revealed her treasure. Each of them had passed over the wonderful gift because of it's appearance.

The moral? Well, the obvious is the one about judging a book by its cover, but the one I'm going for here is that it's all about presentation. This is a lesson I struggle with all the time. I'm in such a hurry to be done that I rush the final step - presentation- and it's the presentation that sells. Whether it's food, clothes, or gifts, you buy with your eye before you reach for your wallet (or fork).


A friend of mine has an amazing gift for making things beautiful. She is the queen of wrapping and has frequently been told she should open up a business doing gift wrapping. But she always says no because it's a labor of love for her to find just the right wrap, just the right gift tag, just the right large ribbon, the right coordinating smaller ribbon, from which hangs the perfect charm.

She gave me a lesson in wrapping once and my packages improved in appearance, as long as I was willing to take the time.

She popped into my mind the other day when I was throwing together a batch of cookies. The son-in-law-to-be is back in town and I wanted to make his favorite cookies. Then I thought, with my friend in mind, why not take it up a notch and make them something special? So to his favorite chocolate and peanut butter cookie I added more chocolate. Then some peanut butter topping. Then a smooth chocolate ganache sliding over it all. The result? A fabulous cookie that was lifted from cookie jar status to first-to-go at the buffet table.

Perfect Presentation Peanut Butter and Chocolate Cookies

2-1/2 cups all-purpose flour
3/4 cup cocoa powder
1 tsp. baking soda
1/2 tsp kosher salt
1-1/4 cups butter, softened
2 cups sugar
2 eggs
2 tsp. vanilla extract
1 cup peanut butter chips
1 cup semisweet chocolate chips

Peanut Butter layer:

1-1/3 cups peanut butter
2 Tbsp + 2 tsp butter, softened
3/4 cup powdered sugar

Chocolate ganache:

3/4 cup heavy cream
8 oz. chopped semi-sweet chocolate

1- Heat oven to 350 deg. F.

2 - Sift together the flour, cocoa, baking soda, and salt.

3- Beat butter and sugar in the large bowl of a mixer until it's fluffy. Add eggs and vanilla; beat well. Gradually add flour mixture, beating well. Stir in the chips.

4 - Drop by rounded teaspoons onto ungreased cookie sheets. Bake 8 minutes. Do not overbake; the cookies will puff up while baking and flatten while cooling.

5- Cool for two minutes on the cookie sheet then remove to a wire rack. Cool completely.

6- In a mixing bowl cream together the peanut butter and butter. Add the powdered sugar and blend until smooth.

7 - Top each cookie with 1/2 to 1 tsp of the peanut butter mixture, spreading it to 1/4-inch from the edge. If possible, place the cookies in the refrigerator to set while making the ganache.

8 - Place the chocolate in a heat-proof bowl. Heat the heavy cream in a saucepan till it's steamy but not boiling. Pour the cream over the chocolate. Let it sit for two minutes then stir till smooth. Top each cookie with ganache so that just a hint of the peanut butter shows.

Return the cookies to the refrigerator to set the ganache, at least two hours. Store the cookies in an airtight container in the refrigerator.

Wednesday, December 12, 2007

The Weather Girl


My family laughs at me because I've become such a weather nerd. I track the weather. Not just the temperature and whether or not it's going to snow, but I track the humidity.

Growing up in an arid desert climate I took two things for granted. One was that if I handwashed a sweater, rolled it in a towel and squeezed all the excess moisture out, then laid it on another dry towel, in a day I'd have a dry sweater. After I moved to Seattle I learned that if I tried the above steps with a beautiful angora sweaterdress that I'd gotten for my birthday, by the third day I'd have a soggy sweaterdress that had mildewed. Euwwww.

The other thing I took for granted was divinity. When I was in high school I got onto a divinity making jag and could churn out the fluffy stuff. Delightful, sweet little puffs with a barely firm exterior, meltingly smooth on the inside. Aaaahhh. I made it so much that my mother said I burned out the motor on her KitchenAid. Since winter is the time to play around with hot, steamy pots in the kitchen, divinity was one of the things I associated with Christmas.

Several years after I'd moved here I got a KitchenAid mixer of my very own and was so excited to be able to make divinity again. Except I couldn't. It turned out like a weird, nougaty sludge, making me cry. Every year at Christmas time I'd try again. Same sludge and I'd cry again.

My kids didn't understand this. To them, this was what divinity was. You scooped it off the wax paper with a spoon and it glued your mouth shut. This frustrated me even more; that my children should not know proper divinity!

I went on a quest. Was it the syrup temperature? Were my egg whites too stiff? Not stiff enough? I even had my mother send me the recipe from her cookbook that I'd used all those years, in case it was different from Joy of Cooking.

I'd read the instructions that said this should only be attempted on a clear day. I made it on a rare clear day and still ended up with a sticky puddle of sugar ooze on the counter. I even stumped a call-in cooking show and won a cookbook with my question of why oh why my divinity failed.

Then, I searched the internet and found a children's science fair project on divinity. I guess I don't know as much as a 5th grader! The key to divinity making is the humidity. Just a clear day won't do. You have to have low humidity. Maximum of 60%, preferably below 40%.

Well, a day like that was a snap where I grew up. There, rain was an occurrence, not a way of life. Here, even on a clear day, the humidity is likely to be above 70%. So I check the forecast regularly and if there's a chance of it dipping below 60%, I'm making divinity.

This past weekend the humidity hit 62% and I sprang into action. This was as close as it's likely to get here. Fearfully, hopefully, I hovered over the mixer, and Yeah! It worked! My kids were disappointed, though. It wasn't all sticky and gloopy, like they think it's supposed to be.

Don't attempt this recipe unless you have a candy thermometer and a heavy-duty stand mixer. It was made without either of those in the dark ages of baking, but those women (and men) must have had arms the size of logs. Of course, if you tried that, you might burn off the divinity calories before you even eat any!

Snowdrift Divinity
my grandmother's recipe

makes about 1-1/4 lbs.

2-1/4 cups sugar
1/2 cup white corn syrup
1/2 cup water
2 egg whites
1 tsp vanilla
1 cup coarsely chopped walnuts

Place the sugary, corn syrup, and water in a saucepan over low heat.

Stir until sugar is dissolved. When the syrup starts to boil, cover the saucepan with a lid for two minutes. This helps to wash the sugar crystals off the sides. Cook without stirring to hard ball stage on a candy-making thermometer (252 deg. F).

While the syrup is heating, in the large bowl of a stand mixer, beat the egg whites till stiff. It doesn't take as long to beat the egg whites as it does to heat the syrup, so start once your syrup about halfway to 252 deg.

Once the syrup reaches hard ball stage, remove the pan from the heat and pour it in a thin stream over the stiffly beaten egg whites with the mixer on medium-high.

Continue beating until the mixture loses its gloss and starts to hold its shape (it looks kind of streaky). I timed this and it took 13 minutes, so don't give up hope after 5 minutes. I think this was where my mother's KitchenAid motor suffered a seizure. Now, if it feels hot on top, I place a cold (not dripping!) compress on top of it to cool it off.

When the mixture looks done quickly add the vanilla and nuts. Remove from the mixer and drop by spoonfuls onto waxed paper* in individual mounds.


(Note: my husband and I got into a long, geeky discussion while I was making this about sugar solutions, viscosity, boiling points, and the changes a syrup makes as it is heated. After consulting multiple websites and much discussion, we decided that probably the temperature at which the syrup was heated was irrelevant. The recipe says over low heat, but if you turn the heat to medium high, it should achieve the same effect in a shorter time. The syrup won't reach hard ball until a certain amount of the water has been driven off as steam.)

(Subnote: yes, my family is that exciting to be around. Jealous?)

* Eco-tip for the day: If you eat boxed cereal, save the waxy wrappers that the cereal comes in. It's a food-grade material that's tougher than waxed paper. I love to use them for covering chicken breasts that I'm pounding (doesn't shred like waxed paper) and for candy making (it doesn't stick like waxed paper). I also will cover spattery foods that I'm reheating in the microwave (doesn't wilt like waxed paper). So, you get to re-use an item you already bought and you don't have to go buy waxed paper! Thrifty and green!

And just one more thing - if you're going to whine about not having a KitchenAid mixer, trot over here to see how you can bid to get one for just $10!

Sunday, December 9, 2007

Double Chocolate Goodness


Time is short. We're almost halfway through our chocolate advent calendar and there's still so much baking to be done. New cookies to try, old favorites to produce, and somewhere in there get my kitchen cleaned to the point where I can actually see the counters again. (Too many bookmarked cookbooks piled everywhere!) So today I'm not going to bore entertain you with a rambling anecdote. We'll get right to the meat of the matter. Or, more appropriately, the chocolate of the matter. Double chocolate in fact.

I've had a copy of this recipe from the August issue of Gourmet sitting on my pile for months. When I finally got around to making them, I wondered why on earth I'd taken so long. They are fabulous! Moist chocolatey cookies with chunks of chocolate, pecans, and dried sour cherries. They're wonderful fresh, but they mature nicely in the cookie jar. The dried fruit keeps the cookie soft and chewy for up to a 5 days in an airtight container, if for some reason they hang around that long.

If you wanted to dress them up for a party, you could drizzle a little ganache over the top, but for taste, they are delightful as is. Lots of chocolatey goodness with the crunch of nuts and the tangy counterpoint of sour cherries. Mmmm. This recipe is staying in my keeper pile!

Cherry Double-Chocolate Cookies
adapted from Gourmet

makes about 2 dozen cookies

1-1/4 cups all-purpose flour
3/4 cup unsweetened Dutch-process cocoa powder
3/4 tsp baking soda
Scant 12 tsp salt
1-1/2 sticks unsalted butter, softened
1-1/2 cups packed light brown sugar
2 large eggs
3-1/2 oz. fine-quality milk chocolate, cut into 1/2-inch chunks
1 cup pecans, toasted and coarsely chopped
1 cup dried sour cherries

1- Preheat oven to 375 deg. F with racks in upper and lower thirds.

2- In a small bowl whisk together the flour, cocoa powder, baking soda, and salt.

3- Beat together the butter and brown sugar with an electric mixer at medium-high speed until pale and fluffy, then add eggs 1 at a time, beating until combined well. Reduce speed to low and add flour mixture, mixing until just combined. Add chocolate chunks, pecans, and cherries and mix until just incorporated.

4- Drop 2 level Tablespoons of dough per cookie about 2 inches apart onto 2 ungreased large baking sheets. With dampened fingers, flatten cookies slighty.

5- Bake, switching position of sheets halfway through baking, top to bottom and rotating the sheets. After 12 to 1 minutes the cookies should be puffed and set. Transfer cookies to a rack to cool.

Friday, December 7, 2007

Warning: Hazardous Material

Normally I try to be nice and post things that you can make to delight your family, friends, and co-workers. I don't know what it is about me today, though. Too much to do? Not enough sleep? Whiny kids who don't understand the concept of "18 more days till Christmas?" Whatever the reason, I'm feeling evil. Not just cranky, but kicking the dog, taking candy from babies, and putting plastic jugs in the yard waste bin evil. (A little Seattle joke there.)

So I'm going to introduce you to the crack cocaine of the candy world. This stuff is seriously addictive. You cannot take one small nibble and walk away. You will eat a whole piece. And then another. And then another. Till the pan is licked clean and the medics have to come drag you out from under the table where you're huddled in a whimpering ball. You know it will make you feel rotten to eat it all, but you just can't help it. And it doesn't make a wimpy little 8 x 8 panful, it makes a big 9x 13 panful!

Small children should definitely not be introduced to this stuff. It's free-basing sugar and they'll climb the walls and swing from the curtains, only coming down to beg and whine for more.

Adults should stay away from it. It's a train-wreck for any diet, packing more calories into a piece than most third world nations consume in a month. And that's just one piece. And it's impossible to have just one piece.


The only reason that I can think of that you should make this is if you have an annoying neighbor who complains about your dog or your children. You can take them a big plate of it. And then chuckle evilly when you see the flashing lights of the aid car. Or if you have a contractor who's made a gaping whole in drywall and you absolutely want to insure that they come back to finish the job. Give him just one piece.

In fact, there might even be a ban on this stuff, it's so addictive. So if you're ever foolish enough to make it, keep a wary ear listening for heavy boots and pounding on the door. If the drug enforcement officers show up on your doorstep, hide under the bed till they leave. But take the pan with you. You wouldn't want them to take it as evidence. Especially not if there were four more pieces....

Killer Crack Peanut Butter Fudge

3 cups sugar
3/4 cup butter
2/3 cup evaporated milk
1 cup JIF peanut butter
1- 7 oz jar marshmallow creme
1 tsp vanilla

Combine sugar, butter, and evaporated milk in a heavy 2-1/2 quart saucepan. Bring to a full rolling boil, stirring constantly. Continue boiling over medium heat for 5 minutes, stirring constantly to prevent scorching. Remove from heat. Add the peanut butter, stirring until melted.. Add marshmallow creme and vanilla; beat until well blended.

Spread in a buttered 9 x 13 x 2 - inch pan. Cool at room temperature, then refrigerate. Cut into squares when firm.

Wednesday, December 5, 2007

Modern Art Cookies

cookiebakerlynn.blogspot.com Modern Art Cookies
I am not a patient person. It makes me crazy to wait in lines, especially with a slow clerk at the head of the line who's barely able to figure out which end of a ballpoint pen goes down. I want to charge up to the head of the line and shriek, "Give me the darn thing and I'll clear this line out in 2 minutes!"

I recently made cut-out cookies for my daughter's piano recital. I had visions in my head of lovely, decorated cookies, like those seen in catalogs, bakeries, and artful blogs. Of course, what happened was I made frosting and slapped it on. I got really creative and put two colors on one cookie, but that really tested the boundaries for me. I just don't have the patience to delicately hand-paint each cookie. They're going to get eaten, not framed!

That's why I love bar cookies. They're usually easy with little wait time till hungry scavengers can pop one into their mouths. And no time-consuming artistry is involved. Unless you so choose.

cookiebakerlynn.blogspot.com Modern Art Cookies
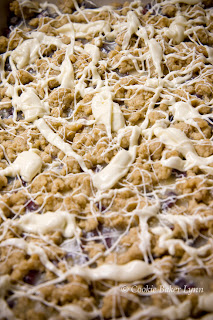
I was looking at a new recipe to try for December and thought it looked good but needed a little something. Chocolate? No, my daughter said. White chocolate. White chocolate should always be in a recipe with cranberries, she said. So I drizzled white chocolate over the top. It turned out kind of artsy. Not in a Renoir or Rembrandt kind of way; more in a Jackson Pollock kind of way. But hey, it's still art, which is a big accomplishment for me. Plus, they're wonderfully delicious. While I was cutting the bars into squares, two of them just leapt out of the pan and into my mouth. Mmmmm. Tart cranberries and sour cream, chewy crumbs, sweet chocolate. One just isn't enough!

Cranberry Pollack Bars
adapted from Taste of Home

1 cup butter, softenedcookiebakerlynn.blogspot.com Modern Art Cookies
1 cup packed brown sugar
2 cups quick-cooking oats
1-1/2 cups plus 2 Tbsp all-purpose flour, divided
2 cups Craisins or dried cranberries
1 cup (8 oz) sour cream
3/4 cup sugar
1 egg, lightly beaten
1 Tbsp grated lemon peel
1 tsp vanilla extract
1/2 cup vanilla milk chips (white chocolate chips)

(Note: I used Craisins, because that's what I had on hand. If you use the dried cranberries, the bars will be slightly less sweet.)

In a mixing bowl, cream butter and brown sugar. Combine oats and 1-1/2 cups flour; add to creamed mixture until blended. Set aside 1-1/2 cups for topping. Press remaining crumb mixture into an ungreased 13 x 9 x 2- inch pan. Bake at 350 deg. F. for 10-12 minutes or until lightly browned.

Meanwhile, in a large bowl, combine the cranberries, sour cream, sugar, egg, lemon peel, vanilla and remaining flour. Spread evenly over crust. Sprinkle with reserved crumb mixture. Bake for 20-25 minutes or until lightly browned. Place on a wire rack to cool.

Microwave the chips on high in a glass dish for 30 seconds. Stir until all the chips are dissolved. Use a spoon to drizzle the melted chips over the bars in the pan. You can get creative here and get in touch with your inner Jackson Pollack.

Monday, December 3, 2007

Life On The Treadmill


My parents didn't approve of television. I remember when we got our first television set. I was probably 4 or 5 years old. The set was black and white. And my parents didn't upgrade to color till I moved away to college. It blew my mind when I found out Star Trek was in color.

We were limited to one hour of TV time a day, so we had to plan and prioritize our shows that we wanted to watch. As an adult I can see the advantage of limiting the brain rot, but as a child I resented having to choose between The Flintstones and The Jetsons.

One scene in The Jetsons has stayed in my mind. George Jetson goes out to walk the dog on the treadmill, the dog chases the cat, the treadmill goes haywire, and George is running for his life on the treadmill, getting sucked into it, and coming out running, over and over, screaming, "Jane, stop this crazy thing!"

For me, December is that treadmill. I always seem to hit December 1st running, with a to-do list a mile long. Shopping, wrapping, mailing, cards to make, write, address and send, and, of course, baking. And baking in December means cookies. Lots of cookies. Cookies for neighbors, cookies for the office party, cookies for the cookie exchange, and cookies for my family to snork up. I'll be posting all (or mainly) cookies in December, so today is my last pie post for a while. (This also fits in nicely with the writer's strike since there will be no new episodes of Pushing Daisies until that's resolved.)


This is a fabulous pie. It's easy to put together, it's dressy enough for company, and it's totally delicious. If you choose to use a pre-made crust it's even faster to make. When I made my glut of Thanksgiving pies I had enough pie dough left over to roll out a single pie crust. Dorie's instructions for making a single pre-baked crust were different than I'd ever used before and I had such good success with them that I'll include them for you.

Raspberry Ribbon Pie
Adapted from Taste of Home

1 pre-baked pie shell
1 package (3 oz.) raspberry gelatin (Jello)
1 cup boiling water
1/4 cup sugar
1 cup fresh or frozen raspberries
1 Tbsp lemon juice
3 oz. cream cheese, softened
1/3 cup confectioners' sugar
1 tsp vanilla extract
Dash salt
1 cup heavy whipping cream

To make a pre-baked pie shell, use a 1/2 recipe of Dorie's Good For Almost Everything Pie Dough from Baking and chill, wrapped in plastic, for an hour or more. Roll out the dough and place into a 9-inch, buttered pie plate. Trim and finish the edges. Refrigerate the crust, covered with plastic wrap, while you preheat the oven to 400 deg. F.

Butter the shiny side of a piece of aluminum foil, fit the foil, buttered side down, tightly against the crust and fill with dried beans or pie weights. (I use old kidney beans and store them in a jar labeled "Pie Beans." You don't want to try cooking those beans afterwards.)

Put the pie plate on a baking sheet and bake for 25 minutes. Carefully remove the foil and beans. If the crust has puffed, gently press it down with the back of a spoon. Return the pie plate to the oven for another 10 minutes, till the crust is golden brown. Transfer to a rack and cool to room temperature before filling.

To make the pie filling, place the gelatin in a bowl and dissolve it with the boiling water. Add the sugar, raspberries and lemon juice and stir till the sugar is completely dissolved. Refrigerate until partially set, about 1-1/2 hours.

In a mixing bowl, beat cream cheese and confectioners' sugar until smooth. Add vanilla and salt. In another mixing bowl, beat whipping cream until stiff peaks form. Fold into cream cheese mixture. Spread 1/2 of this mixture over the bottom of the crust.

Spread 1/2 of the raspberry mixture over the top. Repeat the layers. Refrigerate for 8 hours or overnight before serving. Refrigerate leftovers.

Yield: 8 servings.

Thursday, November 29, 2007

Une Affaire de L'estomac

My sister and I used to do a lot of jigsaw puzzles together. Since we had a limited number of puzzles we did the same ones over and over again and got pretty good at them. We learned that in the bird puzzle the one piece that was dark green and looked like feathers was actually a piece of a pine branch that the goldfinch was sitting on. And the one really red piece didn't go with the cardinal, it was the ruby-throated hummingbird's throat. We could throw together a 750 piece puzzle in an afternoon. Unless there was a missing piece. A missing piece messed everything up.

This happens to me in cooking a lot. Whether I knew I had nutmeg (but didn't) or have no idea what an ingredient is, let alone how to pronounce it to ask for it at the store, missing an ingredient is frustrating.

Recently, I saw a beautiful soup on Nook and Pantry that called, nay, sang to me. I like mushroom soup, but this one was promising a torrid love affair. It had chantarelles. Ooh la la, an affair with a French mushroom soup? Yes, the possibility stayed with me.

And then, just as I thought I'd overcome that temptation, it happened. Right there in Costco, in the chilly produce section. I didn't care that other people were watching. I went weak in the knees and succumbed to the package of fresh chantarelles. Throwing caution (and budget) to the wind, I picked up the chantarelles and the crimini's* next to it. I was making soup!

But then, when I got home and printed out the recipe, I hit a snag. A major snag. According to the recipe, her delicious soup owed it's flavor to dried porcini mushrooms. Argh! They didn't have those at Costco. Or Safeway. Or Trader Joe's. Or Whole Foods. I knew when I couldn't get it at Whole Foods, I was out of luck. I was even willing to pay Whole Paycheck prices, but they were out.

But I was determined now to have my soup. Those lovely mushrooms would not rot in my fridge for lack of porcinis. I turned to my trusted Splendid Soups and it did not fail me. The soup was breathtakingly beautiful and and slid over the tongue like a gossamer curtain of creamy mushroom flavor. My whole family inhaled it and made happy, contented noises. Aaaaaahhhhh. It was as satisfying as finding the missing puzzle piece and putting it in place to complete the picture.


Wild Mushroom Soup
adapted from Splendid Soups by James Peterson

1 medium-size onion, finely chopped
4 Tbsp unsalted butter
3 Tbsp all-purpose flour
1/2 cup dry sherry
1 quart chicken, vegetable or dried porcini broth
8 oz. fresh crimini mushrooms, rinsed and dried
8 oz. fresh chantarelles, carefully rinsed and dried
1 cup heavy cream
Good salt and freshly ground pepper
1/2 cup heavy cream, lightly whipped

Prepare a velouté base by cooking the onion in butter in a 4-quart pot over medium heat, stirring almost continuously to prevent browning. When the onion turns translucent, after about 10 minutes, add the flour and stir over medium heat for 5 minutes more to cook out the starchy taste.

Add the sherry and broth, whisking the soup to get rid of any lumps, and bring it to a simmer. Simmer for 5 minutes.

Put the mushrooms in a blender and add 1 cup of the hot soup base. Blend the mushrooms on high speed for about 2 minutes, adding a little more soup base if necessary to get them moving, and blend till smooth.

Put a strainer over the pot and pour the contents of the blender through it into the pot with the rest of the base. Add the cream. If you want the soup perfectly smooth, strain it through a medium- or fine-mesh strainer. Bring the soup back to a simmer and season it with salt and pepper. Ladle it into hot bowls and put a dollop of whipped cream on each serving.

Serves 8

* Criminis are actually baby Portabello mushrooms. It's just size and marketing that separate them. Interesting, no?

Sunday, November 25, 2007

Living Rubies


I'm a sucker for children's books. I love picture books, story books and kids' adventure books. When my to-be-husband met me in college he was mystified by my collection of children's books. It wasn't like I had any kids. I told him they were for my some-day kids, but the truth is, they were for me.

One of my all time favorite series is the Chronicles of Narnia by C.S. Lewis. If I were forced at knifepoint to pick a favorite out of that series, it would probably be The Silver Chair. It has plucky children, a comic foil, giants, a quest, near misses, a serpent, and a prince held under enchantment. Toward the end of the book, when the prince is released from the spell and is trying to escape from the underground cavern in which he's been held, a chasm opens up leading to the deep land of Bism. One of the creatures from that land tempts the prince into joining him there saying that the jewels there are alive. You can bite into them and they're juicy, unlike the cold, hard, dead jewels we scratch out of the surface of the earth.

When I had my first pomegranate, I figured that this was what C.S. Lewis had in mind when he wrote that. The sparkling seeds are like living rubies, spraying ruby red juice when squeezed. I always feel like a Bism princess when I eat a pomegranate.

Last year my daughter fell in love with pomegranates. Every time we saw one in the store she'd beg for one (hey, it's better than begging for Twinkies) and I'd usually give in. So when I told her she could pick which dish for me to make first from my new Nigella Express cookbook, it was a no-brainer. Pink and perfectly delicious - No-Churn Pomegranate Ice Cream.

This ice cream is so easy that anyone can make it. No ice cream maker required (sighs of relief from everyone who complained over my summer-long ice cream making spree that they had no ice cream maker), only 4 ingredients, and it tastes heavenly! As the first bite slides over your tongue you taste pure, fresh pomegranate flavor and then you feel the silky cream. Beautiful enough to wow company, simple enough to indulge yourself anytime.

No-Churn Pomegranate Ice Cream
adapted from Nigella Express

1 large pomegranate or 2 small ones
1 lime- juiced
1-1/2 cups powdered sugar
2 cups heavy cream

1- Place about 3/4 of the pomegranate seeds into a sieve placed over a bowl. Reserve the rest of the seeds in a plastic bag in the refrigerator. Using a spoon or your hand, crush the seeds down to release their juices. Then pick up handfuls of the seeds and squeeze them to get every last drop of juice. You'll have a pile of sad, used seeds to throw away and approximately 3/4 cup of pomegranate juice.

2- Add the lime juice to the bowl through the sieve.

3- Add the powdered sugar and whisk to dissolve.

4- Whisk in the cream and keep whisking until soft peaks form in the dainty pink cream.

5- Spoon and smooth the ice cream into a rigid plastic container with a tight-fitting lid, about 32 oz. size. Freeze for at least 4 hours or overnight. Scatter the reserved pomegranate seeds over the top when you serve it.

Tuesday, November 20, 2007

Change Is Good


I am all for traditions. Traditions comfort us. They anchor us. They are a structure around which to build our lives. But sometimes the structure can be a little claustrophobic. And then it's time to break out, shake things up, and try something new.

If you've been keeping track, you might have noticed that I missed posting a pie for Pie Day last week. I did make a pie, but I held off posting it on purpose. This pie hasgot such lovely flavors that say fall and Thanksgiving to me that I wanted to share it with you in case you needed to take a break from pumpkin, apple, or whatever your standard Thanksgiving pie is. And if it's not Thanksgiving time for you, feel free to indulge just because it's a fabulous pie!

Mix together a pecan pie, a cheesecake, and caramel and what have you got? A diet busting, too good to pass up, amazing pie. I made it, fully intending to take pictures and then give the rest away. Of course, the photo shoot piece had to be eaten. And then since the pie was there, it turned into dessert for the family. Half of it was gone. Still determined not to have it hanging around I called a neighbor to ask if she wanted some. By the time she got back to me the next day, my family had whittled it down to a nub in the pie pan. So much for watching calories. We watch them. Then we eat them. But it was worth the splurge!

Caramel-Pecan Cheesecake Pie

1 (8-oz) pkg cream cheese, softened
1/2 cup sugar
4 eggs
1 tsp vanilla extract
1 unbaked pie shell (9 inches)
1-1/4 cups coarsely chopped pecans
1 cup caramel ice cream topping*

Preheat oven to 375 deg. F.

In a small bowl, beat the cream cheese, sugar, 1 egg, and vanilla until smooth. Spread this into the pastry shell and sprinkle with the pecans.

In a small bowl whisk remaining eggs; gradually whisk in the caramel topping until blended. Pour over pecans.

Bake in preheated oven for 35 to 40 minutes or until lightly browned. Place foil on top after 20 minutes if pie is browning too quickly.

Cool on a wire rack for 1 hour. Refrigerate for 4 hours or overnight before slicing. Refrigerate leftovers.

* I didn't have any caramel ice cream topping, but I did have leftover wrapped caramels from making caramel apples. I put about 16 in a glass measure with 1/4 milk and microwaved on low heat, stirring frequently until the caramel was all dissolved.


Happy Thanksgiving!

Sunday, November 18, 2007

I Met Nigellla!

It's said that some people are motivated by money, some by love, and some by recognition. I love prizes. It doesn't even really matter what the prize is; I just love winning something.

When I was told that I had won the recipe contest I was thrilled that I had won. After all, a free cookbook is a free cookbook. That I got to get it personally signed was not a big deal to me.

The day of the book signing my husband, two little kids and I arrived about 20 minutes early and I was puzzled to see that the lower floor of the bookstore where the signing was to take place was filled with people. What was the crowd for? Surely they weren't all there to buy a cookbook and get it signed.

The source of my mystification? I'd never really heard of Nigella Lawson. I might have looked at one of her cookbooks in the library and seen some of her recipes blogged, but to me she was someone who wrote cookbooks. Sound strange? Here's the explanation. We are possibly the last family in the country to not have cable television. Don't need it, don't want it. But this means that I'm woefully out of touch with the celebrechef culture. No Food Network. No "Bam!" No Italian cleavage. And no Nigella.

But once Nigella was introduced and began to speak, I got it. I understood the crowd who adored her. First of all, she's gorgeous. She looks like a 1950's movie star. And she's got a beautiful speaking voice. And she's articulate and funny. Oh, and she does some cooking, too.

I loved how she championed the home cook, saying that chefs were making it an intimidating thing to put dinner on the table. She did a Q & A and told her favorite books (David Copperfield and Persuasion), related some anecdotes from her show, and talked about her writing schedule. I thought something her late husband told her was profound - that the ritual of putting off writing is part of the writing process. It allows thoughts to percolate so that when you sit down to write everything flows.

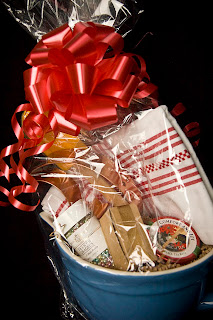
After she spoke the bookstore had the three contest winners come up and we all got swag. Not just a whisk or something, but seriously good swag! Check out the pictures below to see what treats I got to bring home. My son was so excited that I got a prize with a bow; he wanted to open it right away.


The winners then got to be at the head of the line to get our books signed. Nigella was very gracious and kind as she signed, asking which recipe was mine and commenting on it. I can see why people love her.

My daughter and I pored over the cookbook together. I let her pick what I'm going to make first from it (I'm not telling, except to say that it's pink). It's starting to bristle with bookmarks, just like all my favorite cookbooks.

This is my first Nigella cookbook, but I doubt it will be my last!

Friday, November 16, 2007

Olive a Good Loaf


I may have conquered my fear of yeast, but I definitely have miles to go into the realm of breadmaking. Man cannot live by white bread alone; not when there are artisan breads, sourdough breads, and regional specialities to try.

It was a treat for me this summer to get together with Peabody and Tanna for lunch. What fun it was to sit and talk food and blogging with two such awesome ladies! Peabody, besides being cute, smart, and funny, is an awesome baker. If you've ever been to her site, you know you need to bring a drool bucket along to read her blog.

Tanna is wonderful, as well. She's travelled around the globe, making friends, baking, and sharing life. Plus she is a bread guru. After meeting her I began e-mailing her questions about sourdough. I've had sketchy success with sourdough starter. She kindly answered my questions and sent information. I checked out a stack of breadmaking cookbooks from the library and was confounded that each and every one of them had a different recipe for starter. Tanna shared her words of wisdom with me - find one that works. Then she sent me pictures of her starter. Holy smokes! It had blown it's top and was trying to climb out of the jar. Mine sat sluggishly on the counter like a teenager lounging on the couch in front of the TV.


I was so impressed with her starter that I sent her a recipe I'd been trying. She promptly whipped up a lovely loaf and sent me the pictures, saying we should both post our loaves. I made a loaf and, oh baby, was it sad and ugly. My daughter took one look at the pathetic, squashed ring and said, "It looks like road kill!"

I think my starter needs something. A pep talk. A swift kick in the patootie. Or just to start over again. The recipe says to let the dough rise for 3 hours, or till doubled. I put mine in the lightly warmed oven. Three hours later it had just lay there, so relaxed it was a puddle. I closed the oven and then forgot about it till I went to preheat the oven for dinner two hours later. Good thing I checked first! The dough had risen enough that I called it doubled.

After I popped dinner in the oven I put together the olive loaf. The dough was all limp and floppy, as if I'd kneaded Valium into it instead of flour. I formed the ring, put it on the baking sheet and left it to rise inside it's plastic bag tent overnight.

When I got up in the morning I was faced with a puddle of "dough" with olives poking out. Not at all promising. Not at all like the pictures in the cookbook. Where they optimistically said to slash the dough, I dragged a knife back and forth across the goo. But I popped it into the steamy oven, hoping, if not for the best, at least for something edible.


The instructions said to cook 8-15 minutes. At 8 minutes I checked and the edges were already burned. Wow, what a winner of a loaf this was! Flat, dark, and lumpy, but....once cooled and served with dipping oil and balsamic vinegar, strangely moreish. Once we got over the fact that this was never going to be a runway model for King Arthur's fall collection, we gobbled the whole thing in under a day.

So, take heart, wary bread bakers, even with wimpy starter and pathetic dough, you can still get an edible loaf.


Olive and Thyme Bread
(aka Roadkill Loaf)
adapted from Bread from sourdough to rye by Linda Collister

1-1/2 cups all-purpose flour
3 Tbsp fine whole-wheat flour
1 tsp sea salt
2/3 cup sourdough starter
about 2/3 cup tepid water
scant 1 cup good quality black olives, such as kalamata or nicoise, pitted
2 tsp fresh thyme leaves, stripped from the stalks

1- Put the flours and salt in a large bowl and mix. (I added 1/4 tsp yeast at this point.)

2- Make a well in the center and add the starter and water.

3- Work the starter and water together with your hands to make a soupy mixture, then gradually work in the flour to make a slightly soft dough. Depending on the consistency of the starter, you may need to work in a little extra white flour or water.

4- Turn out onto a lightly floured work surface and knead for 10 minutes until very pliable and smooth.

5- Return the dough to the bowl, cover with plastic wrap, and let rise in a warm spot until doubled in size, about 3 hours depending on the vigor of the starter.

6- Punch down the risen dough a couple of times to deflate, or turn it out onto a lightly floured work surface before punching down.

7- Using your knuckles, gently pat the dough into a narrow rectangle about 16 inches long.

8- Sprinkle the olives and thyme down the middle of the dough.

9- Fold over the sides to enclose the filling.

10- Pinch the seam to seal in the filling, then gently roll the dough with your hands to make a sausage about 2 feet long.

11- Carefully lift the dough onto a greased baking sheet and shape it into a ring, joining the ends. Slip the sheet into a large plastic bag, slightly inflate, close securely (clip), then let rise in a warm spot until doubled in size, about 2 hours.

Meanwhile preheat the oven to its maximum setting, and put a roasting pan of water in the bottom to create a steamy atmosphere.

12- Uncover the ring and slash lightly with a sharp knife or razor blade. Put into the hot oven and, if possible, spray with water to increase the steam.

Bake until the loaf is a very good brown, very crisp, and sounds hollow when tapped underneath, 8-15 minutes depending on your oven. Cool on a wire rack. Eat warm within 24 hours.

This is excellent for dipping in olive oil and balsamic vinegar!