Wednesday, April 30, 2008

Manly Meat-Eaters


My daughter and I are very excited about a new venture we're going into. Sometime in the future, at an as yet unspecified date, we're going to launch an on-line magazine. We realized that there's a demographic that is underrepresented in the magazine industry - men. Not all men. There are plenty of magazines for men who put product in their hair or want to know what the latest fashions out of Italy are. No, we want to break ground and make a manly man's magazine. Here is a sneak preview of what's coming in.....(drumroll here).....Bad A Magazine.

The first issue is, of course, crucial in launching the magazine's image and grabbing our demographic. We can't leave a thing to chance, so our cover model will be, of course, Chuck Norris. In fact every issue will have a regular Chuck column. Chuck Norris fitness tips, fashion tips, and of course, jokes. "Once a cobra bit Chuck Norris' leg. After five days of excruciating pain, the cobra died."

Since I am somewhat food oriented, there will be a food section to the magazine giving both restaurant reviews and recipes. Restaurants will be rated according to how many items on the menu feature beef and whether there's an open pit barbeque on the premises. Recipes are, naturally, centered around meat, preferably grilled. No tofu or quiche here!

There will be a movie review section. It's a fast-paced world out there, and the manly man on the go needs to know whether his time and theatre dollars will be well spent on a movie. We'll provide in-depth reviews, summed up with a quickie rating system: chainsaws. Terminator? 2 chainsaws revved. Pretty in Pink? 2 rusty chainsaws.

Each month will profile a different man, asking probing questions about his deep sea fishing experience, his power tool collection, and his prowess on a Harley. If we're impressed, he'll be awarded the badge of manliness - the coveted Leather Jacket award. Those that fail to impress will slink away, head hung low, forever branded with the Pink Polo of shame.

And then there will be the Ask Arnold Advice column, Suck It Up And Be A Man. That's not the title of the column, that's the adivce Arnold has for any and all questions.

As you can see, this will be a hot magazine. If you'd like to be on the waiting list for the premier issue, let me know. Subscription rates will be quite reasonable, especially considering that every month you'll have recipes guaranteed to please the carnivores in your house like this absolutely delicious Italian Grinder Lasagna. Yes, all the meat eating pleasure of a sandwich in a hot dish. Making your own lasagna noodles makes it even tastier and it's manly because it involves a machine. Bonus points if you rig it up to a chain saw motor to speed up the process.


Italian Grinder Lasagna
- adapted from Lasagna: the Art of Layered Cooking

1 lb. ricotta cheese
3 Tbsp fresh basil, chopped
1 Tbsp dried oregano
2 eggs
1/8 tsp red pepper flakes
1/4 cup grated Parmesan cheese
1 lb. dried lasagna noodles or fresh pasta sheets cut into lasagna noodles
2-1/4 cups Quick Tomato Sauce (below)
1/2 lb. prosciutoo, thinly sliced
1/2 lb Genoa salami, thinly sliced
1/2 lb smoked deli ham, thinly sliced
1/2 lb. sweet capicola, thinly sliced
1/2 lb shredded mozzarella cheese


These are all suggestions. You can take this recipe and go wild, layering in all your favorite meats and cheeses.

Preheat oven to 375 deg. F. Coat the bottom and sides of a 9 x 13-inch baking dish evenly with olive oil. In a large mixing bowl, combine ricotta cheese, basil, oregano, eggs, pepper flakes, and Parmesan cheese. Mix until eggs are thoroughly combined.

In a large pot of salted, boiling water, cook the dried pasta according to package directions; cook fresh pasta for 2 minutes. Drain the pasta and rinse it with cold water. Place it on a paper towel to dry before using it in the dish.

Place 3/4 cup tomato sauce on the bottom of the baking dish. Top with a layer of lasagna noodles. Top noodles with 1/3 cup of the ricotta cheese mixture, spreading evenly over the noodles. Top with another layer of pasta. Top pasta with half of the meats, layering them evenly. Top the meat with half of the provolone, and top this with half of the shredded mozzarella cheese. Repeat with a layer of pasta, then 3/4 cup of sauce, then 1/3 cup ricotta cheese mixture. Top the ricotta cheese mixture with another layer of pasta, then the remainder of the meats, provolone cheese, and mozzarella cheese. Finish with a final layer of pasta, topped with the remainder of the tomato sauce and the remaining ricotta cheese mixture.

Coat a large sheet of aluminum foil with oil and cover the baking pan with it, oil-side down. Bake for 30 minutes, covered. Remove foil and bake for an additional 15 to 20 minutes or until the top is bubbly and the cheese begins to brown. Remove the lasagna from the oven and let it rest for 10 minutes before cutting to serve.

Quick Tomato Sauce

2 (28 oz) cans best-quality, peeled plum tomatoes with juice
4 cloves garlic, peeled and coarsely chopped
1 Tbsp coarse salt
1 Tbsp sugar
6 Tbsp extra-virgin olive oil
1 cup loosely packed fresh basil leaves
2 Tbsp tomato paste
1/4 tsp black pepper
2 tsp dried oregano 1/4 cup red wine

Place all the ingredients in a large saucepan. Bring to a boil, stirring and boiling for about 5 minutes, crushing the tomatoes with the back of a spoon while stirring. Reduce the heat and simmer for 20 minutes, stirring occasionally. Serve immediately or refrigerate for up to five days. The sauce may be made, chilled, and frozen in airtight containers for up to three months.

Monday, April 28, 2008

Pop Goes the Cheesecake


My daughter was about 6 when she had her first taste of cheesecake. It was love at first bite and she ate so much of it she got wretchedly sick on it. Cheesecake is like that. It's delightful, but a little goes a long way.

What a good idea, then to put a little bit on a stick. And then cover it with chocolate. And add sprinkles. This was the happy idea for this month's Daring Baker's challenge. Elle ofFeeding My Enthusiasms and Deborah of Taste and Tell decided on this fun recipe for the Daring Bakers to take on.

I was enthusiastic when it was announced, but in the actual execution of the recipe I had a few stumbling blocks and by the end of the process I was much less than jolly about this challenge.

The 10-inch cake pan that I have isn't super deep and the cheesecake sort of mushroomed up and over the edge while it baked. Fortunately, there were no drips to scorch on the bottom of the pan and it didn't matter if it looked elegant as the cheesecake was just going to be scooped out anyway.

Scooping was messy, to put it mildly. The cheesecake was a wonderfully creamy consistency, which would have been great for a slice, but to try to get a neat scoop or chunk was difficult. I tried some scoops, then just cut triangles out and scooped up the leftovers. Both were untidy. And I learned quickly that licking the fingers to deal with the mess means you end up eating a lot of cheesecake.

Then there was the sheer volume of cheesecake I had to deal with. Two full cookie sheets of cheesecake blops to find room for in my freezer. I'm fortunate to have an extra freezer in the garage. If I'd had to squish them into my itty bitty refrigerator freezer, I'd have been doomed.

Then the dipping of the pops went on as long as a cross country car trip and I used about twice as much chocolate as the recipe called for. I'm not sure if I overdid on the chocolate, but I couldn't see how else to do it. Dipping is not a strong point of mine. I enlisted my daughters to help. I dipped, then passed off the pop to eldest daughter who sprinkled, then she passed off to youngest who held a fist full of pops till the chocolate set enough so that they could be set down on a plate. Thank you girls!

So, now we have a freezer full of pretty party pops. Drop by and have some. Please! Because for now, I've had enough of cheesecake.

Be sure to check out the other (much more talented and less whiny) Daring Bakers and their beautiful version of the Cheesecake Pops.

Cheesecake Pops

Makes 30 – 40 Pops

5 8-oz. packages cream cheese at room temperature
2 cups sugar
¼ cup all-purpose flour
¼ teaspoon salt
5 large eggs
2 egg yolks
2 teaspoons pure vanilla extract
¼ cup heavy cream


Boiling water as needed

Thirty to forty 8-inch lollipop sticks

1 pound chocolate, finely chopped – you can use all one kind or half and half of dark, milk, or white (Alternately, you can use 1 pound of flavored coatings, also known as summer coating, confectionary coating or wafer chocolate – candy supply stores carry colors, as well as the three kinds of chocolate.)

2 tablespoons vegetable shortening

(Note: White chocolate is harder to use this way, but not impossible)


Assorted decorations such as chopped nuts, colored jimmies, crushed peppermints, mini chocolate chips, sanding sugars, dragees) - Optional

Position oven rack in the middle of the oven and preheat to 325 degrees F. Set some water to boil.

In a large bowl, beat together the cream cheese, sugar, flour, and salt until smooth. If using a mixer, mix on low speed. Add the whole eggs and the egg yolks, one at a time, beating well (but still at low speed) after each addition. Beat in the vanilla and cream.

Grease a 10-inch cake pan (not a springform pan), and pour the batter into the cake pan. Place the pan in a larger roasting pan. Fill the roasting pan with the boiling water until it reaches halfway up the sides of the cake pan. Bake until the cheesecake is firm and slightly golden on top, 35 to 45 minutes.

Remove the cheesecake from the water bath and cool to room temperature. Cover the cheesecake with plastic wrap and refrigerate until very cold, at least 3 hours or up to overnight.

When the cheesecake is cold and very firm, scoop the cheesecake into 2-ounce balls and place on a parchment paper-lined baking sheet. Carefully insert a lollipop stick into each cheesecake ball. Freeze the cheesecake pops, uncovered, until very hard, at least 1 – 2 hours.

When the cheesecake pops are frozen and ready for dipping, prepare the chocolate. In the top of a double boiler, set over simmering water, or in a heatproof bowl set over a pot of simmering water, heat half the chocolate and half the shortening, stirring often, until chocolate is melted and chocolate and shortening are combined. Stir until completely smooth. Do not heat the chocolate too much or your chocolate will lose it’s shine after it has dried. Save the rest of the chocolate and shortening for later dipping, or use another type of chocolate for variety.

Alternately, you can microwave the same amount of chocolate coating pieces on high at 30 second intervals, stirring until smooth.

Quickly dip a frozen cheesecake pop in the melted chocolate, swirling quickly to coat it completely. Shake off any excess into the melted chocolate. If you like, you can now roll the pops quickly in optional decorations. You can also drizzle them with a contrasting color of melted chocolate (dark chocolate drizzled over milk chocolate or white chocolate over dark chocolate, etc.) Place the pop on a clean parchment paper-lined baking sheet to set. Repeat with remaining pops, melting more chocolate and shortening (or confectionary chocolate pieces) as needed.

Refrigerate the pops for up to 24 hours, until ready to serve.

Saturday, April 26, 2008

Spring Flutterbys


The first formal dance I went to in high school was a spring dance. I had no idea what I was supposed to wear, other than a formal. I had a long, navy blue velveteen dress that was quite elegant. But it had only straps and I thought that would be a tad chilly, so I put a shiny turtleneck on underneath. Boy, did I feel like the odd one out at the dance. All the other girls were wearing frothy confections in pastel colors. (If you've seen Romy and Michele's High School Reunion, you know what I'm talking about.) Everyone else looked like a spring garden, and I looked like the winter carpet, rolled up to go to the cleaner's.

Bad fashion memories aside, I think spring is the happiest season of the year. The drudgery of dreary winter is buried under a carpet of cherry blossoms, dainty flowers lift their cheerful heads to the sun, and the promise of warm summer is in the breeze.

My daughter needed a dessert to take to a meeting and in thumbing through my copy of Nigella Express I came across these adorable cupcakes. They are quick and delightfully simple to make and will lift the heart of any recipient with the thrill of seeing the first butterfly of spring. I made a double batch so I'd have even more joy to spread around. And if you want to cut corners and use a boxed cake mix, I won't tell!


Butterfly Cupcakes
- adapted from Nigella Express

1/2 cup plus 1 Tbsp soft butter
1/2 cup plus 1 Tbsp sugar
2 eggs
1 tsp baking powder
1/2 tsp baking powder
1 tsp pure vanilla extract
1 Tbsp milk
1 cup heavy cream
food coloring of your choice
colored sugar crystals

1- Preheat the oven to 400 deg. F. If making a single batch, place a rack in the center of the oven. If making a double batch, position the racks in the upper and lower thirds of the oven. Line a 12-cup muffin pan with paper liners. (Two, if doubling the recipe.)

2- Cream the butter and sugar together till light and fluffy.

3- Add the eggs one at a time with a little of the flour, beating after each addition.

4- Fold in the rest of the flour, the baking powder and baking soda. Gently fold in the vanilla and the milk.

5- Spoon the batter into the paper liners, dividing equally.

6- Put the pan in the oven and bake for 15 - 20 minutes or until the cupcakes are cooked and golden on top. Take the cupcakes in the paper liners out of the pan and let cool on a wire rack.

7 - Once they're cool, cut off the mounded peak (if one has formed), digging down a little with your knife. This will leave a small hole you'll fill with cream. If the cupcakes haven't peaked, just cut a slightly wider circle, digging in as you do so. Cut the removed top into half to form the butterfly wings.

8- Whip the cream until thick, coloring with food coloring if you wish, and place about 2 tsp of cream in the hole of each cupcake. Stick the wings into the cream, rounded edges together. Sprinkle the colored sugar down the middle to form a butterfly body.

Serve soon after making or store in the refrigerator.

Thursday, April 24, 2008

A Sweet Visit


My nephew is in town. This is exciting for us, as we've had small contact with him since he joined the army. He's only home for 18 days of leave, but it's so great to be able to see him and give him a hug and know that he's OK.

I was there the day he was born. I made a Birth Day cake for my sister as she labored, making her laugh between contractions (not a nice thing to do to a woman in labor). Her labor went on and on, so I wasn't able to be there when Daniel finally made his appearance.


He was the cutest little boy; a pointy chin and large dark eyes dominated a face that usually had an impish grin on it. When he was still a tot in diapers my sister and I took him with us to a homeschool supplier's warehouse sale that was an hour and a half from our homes, out in the wild woods. There were crowds of people, but they were all nice homeschoolers and their kids, so we had our radar down just a bit. Then we discovered Daniel wasn't playing with the other children, where we thought he was. Escalating panic ensued as we searched for him. Just when my sister was about to get hysterical, a kind woman came up the long, twisting drive, with Daniel in hand. She said she'd found him at the end of the 1/4 mile driveway where it entered the road. When she asked him his name, he tearfully replied, "My name is Daniel, but my mommy calls me Sweet Cheeks Chocolate Bar."

Daniel had a favorite pair of Salt Water Sandals that he wore till his feet couldn't squeeze into them any more. They were lime green and we called them his hoppy frog sandals, telling him that they'd help him jump higher. He wore them everywhere. When my other sister got married, Daniel wore a three piece suit, a red bow tie, and his green hoppy frog sandals.


Long gone are the days of the hoppy frog sandals. Daniel is now an RTO in the army, serving in Iraq. We only get to hear what his life is like through the blog his mother maintains. And we pray for him every night to return home safely.

When I heard he was coming home, I of course had to make him cookies. And the cookies that came to mind were these ooey, gooey, chocolatey bar cookies. I had made them many years ago to take to a family gathering. As I was eating my dinner on the porch, my nephew sat down beside me with a cookie in his hand. "Aunt Lynn," he said, "these cookies are like a little piece of heaven."

It's a little piece of heaven for us to have you home, Daniel.

Piece of Heaven Bars

1 3/4 cups quick or old-fashioned oats
1 3/4 cups all-purpose flour, divided
3/4 cup packed brown sugar
1/2 teaspoon baking soda
1/4 teaspoon salt, (optional)
3/4 cup butter or margarine, melted
2 cups chocolate chips
1 cup chopped walnuts
1 12-oz jar caramel ice cream topping


Directions:
PREHEAT oven to 350ยบ F. Grease bottom of 13 x 9-inch baking pan.

COMBINE oats, 1-1/2 cups flour, sugar, baking soda and salt in large bowl. Stir in butter; mix well. Reserve 1 cup oat mixture; press remaining oat mixture onto bottom of prepared baking pan.

BAKE for 12 to 15 minutes or until golden brown. Sprinkle with morsels and nuts. Mix caramel topping with remaining flour in small bowl; drizzle over nuts to within 1/4- inch of pan edges. Sprinkle with reserved oat mixture.

BAKE for 18 to 22 minutes or until golden brown. Cool in pan on wire rack; refrigerate until firm. Cut into bars.

Tuesday, April 22, 2008

Meals For Money


When I was in high school I got accepted into the Pep Club. This was a group of 100 Juniors who stood in the stands and did cheers, marched at half time, decorated the player's houses before games, and made banners to hang up in the hallways at school. We were supposed to cheer alike, march alike, and look alike with matching uniforms. The uniforms was the problem for me, as I didn't have a source of income at that point.

My mother made me a deal. She would pay me $4 for every dinner I planned, cooked, and cleaned up after. If I made dinner all summer long, I'd be able to afford the uniform. It was a huge learning opportunity for me, as I'd never done much beyond bake cakes and cookies till then.

I was thrilled to be in charge of the menu planning at first. First off the menu - liver and onions! Yeah, no more disgusting food no one wants to eat! But then I had to dream up something to take its place. Did I learn a rotation of reliable, easy, tried and true dishes? No, I opened a French cookbook I'd bought my mother a few years before (I think in a vain hint to vary the menu) and made.....eggs poached in wine sauce. Euwwww. Grey eggs are not appetizing, no matter how "French" they are supposed to be.

I experimented and played, imagining that just by being in charge in the kitchen I'd be a great chef, but quickly got frustrated at how terribly my meals turned out and the lackluster reception of them.

And then the dishes. How come when I cooked there were dirty dishes everywhere? Mountains of them. I felt like I was doing dishes forever. A few nights I even forfeited my $4 just so I could get out of the kitchen earlier.

Is any of this sounding familiar? Yes, I was taking Real Life Home Ec, without even knowing it. My sneaky mother; when I thought she was helping to earn money for my uniform, she was teaching me about life and being a responsible adult. It wasn't fair, making me learn on my summer break!

I had a lot greater appreciation of her meals when she went back to being chief cook and bottle washer and I'd like to say that I realized what a burden it is to plan, prepare, and clean up after meals day after day after day, so I jumped in and offered to help more often. But that didn't happen. I was a selfish teenager, off the hook, so I opted to go play.

What a boon it would have been to have had the internet and the food blogging community back then. I could have surfed my favorite blogs and come up with a tasty, tried and true dish for every night of the week. You beginning cooks, count your blessings!

And here is my contribution to your education. A dish that is fancy enough to impress, easy enough to prepare, and tastes great. You can cook it for company or serve it to your family to show how much you care. They will be thrilled that you chose this over the grey poached eggs.

Chicken Piccata
- adapted from Barefoot Contessa at Home

4 split (2 whole) boneless, skinless chicken breasts
kosher salt and freshly ground black pepper
1 cup all-purpose flour
2 extra-large eggs
1-1/2 cups seasoned dried bread crumbs
good olive oil
3 Tbsp unsalted butter, at room temperature
1/3 cup freshly squeezed lemon juice (2 lemons), lemon halves reserved
1/2 cup dry white wine
sliced lemon, for serving
chopped fresh flat-leaf parsley, for garnish


1-Preheat the oven to 400 deg. F. Line a sheet pan with parchment paper.

2- Place each chicken breast between 2 sheets of plastic wrap and pound it out to 1/4-inch thickness. (I like to use the plastic liners from cereal boxes for this. They're thick enough to not tear when pounded, plus you get an extra use out of something headed for the garbage already.) Sprinkle both sides with salt and pepper.

3- Mix the flour,, 1 tsp salt, and 1/2 tsp pepper on a shallow plate. In a second plate, beat the eggs and 1 Tbsp water together. Place the bread crumbs on a third plate. Dip each chicken breast first in the flour, shake off the excess, and then dip in the egg and bread-crumb mixtures.

4- Heat 2 Tbsp olive oil in a large saute pan over medium to medium-low heat. Add 2 chicken breasts and cook until browned, about 2 minutes on each side. Place them on the sheet pan while you cook the rest of the chicken. Heat more olive oil in the saute pan and cook the second 2 chicken breasts. Place them on the same sheet pan and allow them to bake for 5 to 10 minutes while you make the sauce.

5- To make the sauce, wipe out the pan with a dry paper towel. Over medium heat, melt 1 Tbsp of the butter then add the lemon juice, white wine, the reserved lemon halves, 1/2 tsp salt, and 1/4 tsp pepper. Boil over high heat until reduced by half, about 2 minutes. Off the heat, add the remaining 2 Tbsp of butter and swirl to combine. Discard the lemon halves. Serve one chicken breast on each plate, spoon on the sauce, and serve with sliced lemon and a sprinkling of fresh parsley.

Friday, April 18, 2008

Missing You - Yellow

I'm not much into blogging events. They all look fun and interesting, but I have my own agenda of what I want to bake. But when I saw there was a blogging for cancer event, LiveSTRONG with a Taste of Yellow, I started pondering what I could contribute. Barbara, at Winos and Foodies started this event last year. There were 149 participants. This year I expect there to be a much larger number as so many people have been touched by cancer.

My family was hit by cancer in 2000. My in-laws had been visiting for Christmas and my father-in-law was complaining that his knee ached constantly. After returning home he went to the doctor to see what was going on. My mother-in-law called with the bombshell - kidney cancer.

Kidney cancer is one of the silent, sneaky cancers. By the time it is diagnosed, it's almost always fatal. Only 9% of those diagnosed after the cancer has already spread survive 5 years. My father-in-law was determined to be in that 9%, his cancer having already spread to his knee. He fought valiantly for just over a year, have a knee replacement, chemotherapy, radiation therapy, and kidney removal.

Just 14 months after his diagnosis he left behind the respirator, the IV's, and the pain and went to be with Jesus.

We still miss him. His quirky sense of humor, his love of gadgets, and his stories he loved to tell and retell. He shared a love of technology with my husband who convinced him to buy his first Mac. Now when my husband sees a cool new product release (like the iPhone), he'll say, "My Dad would have been so excited about this." Or when we see a goofy, funny story in the news we wish we could send it to him, as it would have made him laugh a lot.

My father-in-law was born in Hawaii. Even though he moved to the mainland when he was 16, he always held Hawaii close in his heart. So, when I thought about what yellow foods meant something to my father-in-law, I thought Hawaii. He had taken his wife and boys to a real luau on the beach hosted by a native Hawaiian lady for her 90th birthday party. There was 4 days of feasting and celebrating, and there was a whole pig roasted in a sand pit.


To commemorate a life that was about celebration, fun, and making the most of the moments, I made Teriyaki Pork Kabobs. Nothing elaborate, but something easy to throw together and enjoy with friends. I think my father-in-law would have enjoyed them.

There's not a special recipe for these. I just marinated pork loin cubes in teriyaki sauce (use your favorite), then threaded them on skewers alternating between meat and fruits. I used pineapple, mango, and yellow bell peppers for a taste of Hawaii.

Wednesday, April 16, 2008

Pass It On

When I was young a popular party game was Telephone. All the children would line up or sit in a circle and the first would think up a message to whisper to the next in line. Each person would repeat the message they heard to the next person and then the one at the end of the line would announce what he heard. Usually a message like "Mrs. Weston bought 6 eggs and a dozen rolls at the store." would end up mildly garbled as "Mrs. Winston got 6 eggs and some rolls at the store."

Where's the hilarity in that? So when it was my turn I'd try to make the message I passed on as far as possible from the original. With me playing the game, the last person, instead of relating some lame tale of a lady's shopping excursion would say, " Twelve tiny trolls tripped while teaching tinikling in tight togas." There, much more amusing.

Of course, not everyone saw it the way I did. They'd back track the message and pinpoint me as the source and scold me for not playing right. Well, why play right if it's not fun?

I'm kind of like that with recipes that are passed on to me. I like to play with them and tinker a bit. I'll do a cookbook recipe exactly as written, but for some reason, a recipe from a blog or that a friend gives me, I need to tweak it a bit to make it my own.


Recently I had the privilege of joining a great group of women to make scones for our church's Easter services. Two thousand scones, give or take a few. We had a great assembly line going. My job was to transfer weighed globs of dough to the ladies who were patting and cutting. When all of the dough was weighed out I moved to the other end of the line and drizzled lemon icing over the baked scones.

While I was icing I got into a conversation with the lady next to me. We discovered that we're both bake-aholics and love Taste of Home. Several years ago Taste of Home had a cookie recipe contest and they published all the best recipes, all except for the winning one. That irked me. But Judy, the nice lady co-icing with me, told me how she had ordered many boxes of the winning cookie recipe mix from Taste of Home and then had baked over 200 batches of cookies to try to reproduce this recipe. Then she offered to send her version to me!! Wow!

I was blown away by her generosity and by the cookies. I didn't feel quite right making them straight from her recipe and posting it that way, as that was her work. Also, I didn't have a few of the ingredients. So I played telephone and changed it up. But just a bit.


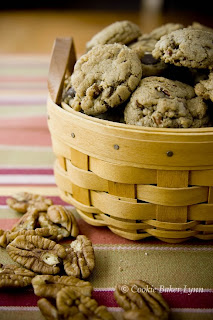
These cookies are different from any cookie I've made before. They're not a standard chocolate chip cookie with something different added or substituted. They are moist, with crunchy, chewy bits, redolent of butter, and with a palate teasing aftertaste that makes you reach for another one to figure out what that elusive flavor is. My husband said that the dough was fabulous eaten with a spoon and was almost better than the cookies.

The original recipe called for some artificial flavors, but I chose to pump up the flavor with a trick from my low-fat days, browning the butter. This delivers a more intense butter flavor with no change to the calories or consistency.

Enjoy my version of the prize-winning cookies then play with it and make it your own. Then pass it on.

Lynn's Butter Brickle Munchers

3/4 cup butter
2 cups brown sugar
2 eggs
2-1/2 tsp vanilla
1/2 tsp almond extract
1/16 tsp anice extract
3 cups flour
1/2 Tbsp baking soda
1/2 tbsp cream of tartar
1/2 tsp salt
1/8 tsp cinnamon
1/8 tsp nutmeg
1 Tbsp cocoa powder
1 cup Hershey's Heath Milk Chocolate Toffee Bits
2/3 cup Pecans, toasted and minced
1 Cup Semi-sweet chocolate chips

1- At least 3 hours ahead of time, brown the butter by melting it in a medium-sized saucepan over medium heat. Adjust the heat so the butter boils very gently but steadily. Cook, uncovered and stirring frequently, for 4 to 6 minutes, until foaming subsides and butter turns golden but not brown; watch carefully to avoid burning on the bottom. Immediately remove pan from heat, stirring for 30 seconds. Set aside to cool slightly then place in the refrigerator until firm.

2- Allow browned butter to come to room temperature. You want it softened, but not melty. As the browned butter chills, it will separate into layers. Don't worry about this, just chuck the whole thing into a large mixing bowl with the brown sugar and cream them together until fluffy.

3- Add the eggs, one at a time, beating well after each one.

4- Add the Vanilla, almond extract and anice extract and beat well.

5- In a medium bowl whisk together the flour, baking soda, cream of tartar, salt, cinnamon, nutmeg, and cocoa powder. Add the flour mixture gradually to the butter mixture with the mixer on Low speed, mixing just till the flour is incorporated.

6- Stir in the toffee bits, pecans, and the chocolate chips.

7- Drop by rounded tablespoon onto ungreased cookie sheets about 2 inches apart. Bake at 375 deg. F for 9-11 minutes, just till set and very lightly browned. A little moist looking in the center is OK. Cool on the baking sheet for 3 minutes then remove to wire rack to cool. Store in an airtight container. They can be frozen.

Thanks, Judy!

Monday, April 14, 2008

California Dreaming

There are things that you do when you're young that you look back on as an older, wiser person and say, "What the *%@# was I thinking??" One of those times in my past was The California Trip.

When I was a senior in high school our choir group traveled to Anaheim, California to sing at the National Music Educators Convention. It was an honor to sing for them and we were thrilled. But truly, more thrilled to have 4 days to play in Southern California. For many of us it was our first time ever to see Disneyland and all of the touristy sites.

Our motel was just across the street from Knott's Berry Farm. Two buddies and I were just leaving the park when a long, black limousine with smoked windows glided up next to us. We oggled. A real, honest to goodness limousine, right next to us! Were there stars inside? We tried to sneak a peek but couldn't make out any passengers. Then the driver rolled down his window and started a conversation with us. He told us he'd just dropped off Neil Diamond and his family inside the park, but we weren't allowed to go tell anyone. Wow!

We chatted for a bit and he, perhaps because he was amused by our naive, wide-eyed wonder, or perhaps to test our gullibility quotient, asked if we wanted to ride in a limousine. We conferred for a moment, decided there was safety in numbers, and said, "Yes!"

(SMACK! That's the sound of my adult hand hitting my adult forehead. Hellooo? Getting into a strange car with a strange man in a strange city? Not a brilliant plan by any standard.)

But, God is gracious. We weren't abducted or molested. We reclined in the back seat, playing with all the buttons while the chauffeur drove us around the block and dropped us off at our motel, lecturing us on how foolhardy is was to get into a car with a stranger.

Then he invited us out to dinner. Slow learners, we cheerfully agreed. (SMACK) He picked us up 2 hours later and drove us to a nice restaurant for steak. He was interested in what we were doing in Anaheim. When my pretty blonde friend with the fabulous voice confessed that she wanted to be a professional singer, he told us stories about what a cesspit show business is. Refusing to name names, he told us that you wouldn't believe what goes on in the back of a limousine.


He also gave me what I'll always cherish as my favorite compliment. "You know, your face is kind of pretty, if you look at it straight on." Yes, that made me feels lots better about my nose.

We gave him our phone numbers (SMACK) and parted ways. He called later to ask what we wanted for Christmas, which was when I finally told my parents what we'd done. My mother had very strong views about a 40 year old man calling a 17 year old girl, so after I received my Mickey Mouse sweatshirt, I wrote him a polite thank you note and asked him not to call again.

So, what does this have to do with sourdough bread? Well, unlike getting into a stranger's car, making sourdough bread is something I encourage my daughter to do. She loves to use her hands to blend the starter with the water, then mix in the bread. I finish off the loaf, and when it comes out of the oven we beam with pride at our joint effort.


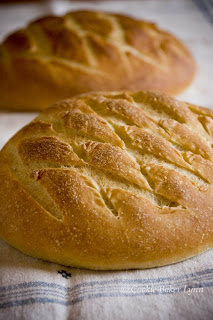
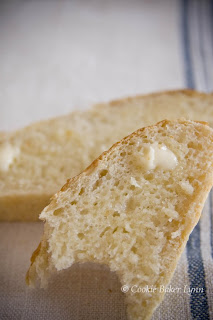
The starter I've got is a rather mild one, so this loaf is not overpoweringly sour. It has a tender crumb, a crackly crust, and is excellent, for eating with butter, dipping, or making sandwiches. Plus, it makes two loaves so you've got one to snork up warm and one to eat tomorrow.

California Sourdough Bread
- adapted from Bread: From Sourdough to Rye by Linda Collister

1 cup sourdough starter
2 cups tepid water
1 pkg yeast
6 cups all-purpose flour
2 tsp salt, preferably sea salt

2 baking sheets, greased

Put the starter and water into a large bowl and mix with your hand to make a soupy batter. Mix the flour, salt, and yeast, then gradually beat into the liquid with your hand until well mixed. The dough should feel soft but not sticky: if it feels too slack, work in extra flour, 1 Tbsp at a time: if it feels hard or dry, or there are crumbs left in the bottom of the bowl, work in extra water, 1 tbsp at a time.

Turn out onto a floured work surface and knead thoroughly to make a smooth, firm, very supple dough. Wash out the bowl and return the dough to the bowl and cover with plastic wrap. For the best flavor, let rise slowly in a cool room until doubled in size, about 4 hours, or overnight in the refrigerator, which is what I prefer.

Turn out onto a lightly floured work surface and punch down to deflate (if dough has been stored in the refrigerator, let it come back to room temperature before continuing, 1 1/2 - 2 hours).

Divide the dough into 2 equal pieces, cover with ; plastic wrap, and let rest for 10 minutes. Shape each piece into a neat ball, handling the dough as little as possible. Put onto the prepared trays, then slide into a large plastic bag, slightly inflate, and close the end. Let rise at normal room temperature until almost doubled in size, about 2 hours.

Meanwhile, preheat the oven to 425. Put a roasting pan of water into the oven to heat; the steam created will help develop a good crust. Or you can put a shallow pan on the lowest rack of the oven and throw some ice cubes into it just before putting in the loaves.

Uncover the loaves and quickly slash the top in a diamond pattern using a small serrated knife or a razor blade. Put into the heated, steamy oven, giving a few shots of water with a squirter bottle, and bake for 30 minutes or until the loaves sound hollow when tapped underneath. Cool on a wire rack.

Eat within 5 days. Can be frozen for up to 1 month.

Makes 2 medium loaves.

Thursday, April 10, 2008

Les Salad Mis


I really hate whining. Maybe because I'm such a whiner myself. I whine about the weather (too hot, too cold, too rainy, too bright), I whine about clothes shopping (what sadistic genius thought up putting fun-house mirrors in dressing rooms?), and I whine about making salads.

I love eating salads, I just don't like making them. There's something annoying about having to wash the lettuce, dry the lettuce, and shred the lettuce. Don't ask why, it just is. I make my daughter do it whenever I get around to putting salad on the menu.

Recently I went out out to dinner and had an amazing salad. It was part of a three course meal and I knew I shouldn't eat it all if I was going to save room for dessert, but I couldn't help it. It was so delicious I savored every last bite.

As I thought about that salad, I recalled that I had a similar recipe that a friend had given me years earlier. I pulled it out of my recipe stash and it was really close. I bought a giant Costco container of mixed organic salad greens and we ate salad three days in a row. It was that good. And no lettuce prep involved. Yeah!

(The recipe calls for blue cheese, which I dislike, so I used a wonderful Irish Dubliner cheese, also from Costco.)


Apple Walnut Salad
- adapted from Simply Classic

Serves 6

Mixed organic salad greens
1 large flavorful apple (I used Braeburn)
3/4 cup Glazed Walnuts (recipe below)
3/4 cup tangy, crumbled cheese - blue or other favorite


Dressing:

1/2 cup vegetable oil
1/4 cup cider vinegar
2 Tbsp shallots, minced (I didn't have, so I tossed about 2/3 Tbsp dried onion flakes in and let the dressing sit for a while.)
2 Tbsp fresh lemon juice
1 Tbsp maple syrup
1/4 tsp salt
1/4 tsp ground pepper

For Dressing, plut all the ingredients into a small jar with a tight fitting lid and shake until evenly combined.

Place salad greens in a large bowl. Cut apples into small chunks and scatter over the greens. Sprinkle walnuts and cheese evenly over the salad.

Drizzle dressing over salad and toss gently. Serve immediately.


Glazed Walnuts:

1/4 cup butter
1/4 cup light corn syrup
2 Tbsp water
1 tsp salt
1 pound walnuts

Preheat oven to 250 deg. F. Line a baking sheet with foil. Combine butter, corn syrup, water and salt in a medium saucepan and bring to a boil. Add pecans and stir to completely coat nuts. Spread nuts evenly on lined baking sheet. Bake for 1 hour, stirring every 10 minutes. Cool and serve. Store in an airtight container.

Monday, April 7, 2008

I Succumb


A good friend of mine says that the best way to get over temptation is to give in to it. That way you're no longer tempted. I don't endorse this approach if you're married and are tempted by the hot UPS driver, but if you're tempted in the baking realm, I know of no better way to overcome temptation. Brownies or chocolate cakes that haunt your dreams don't just disappear; they have to be baked and at least tasted in order to vanquish their specter.

There is a wanton temptress out there who's been singing a siren song to me. I've tried ignoring her, just shutting the window and walking away. But her song wafts to me in the night, calling me to come try making macarons. You probably know who this seductress is - none other than the beautiful and talented Tartelette. It seems like at least once a week I visit her enchanting site and there is another batch of macarons, in an even more enticing flavor combination than the last.

The last straw for me was seeing the tantalizing macarons in a cookbook,Desserts by the Yard. There's something about thumbing through a cookbook repeatedly that really locks the temptation in place and finalizes the urge to take the plunge. I also love having instructions written out for me so I don't have to print off yet another recipe from the computer. Plus, these were filled with ice cream. Mmmm. A macaron ice cream sandwich!

So I took the plunge.I gave in to temptation and made my first batch of macarons. I am no longer a macaron virgin. But when you look critically at my pictures, be gentle with me. It was my first time.

I was excited to see little feet developing on the cookies in the oven. They were rising with smooth, glossy tops, but when I shifted the cookie sheets as directed, the tops deflated and got crinkly-looking. Since I'm not experienced with this type of cookies, I have no idea whether they were OK by macaron standards or not, but they were OK by my family's cookie standards. The only criticism was that they were a bit large, especially when filled with a scoop of ice cream. If I made them again, I'd pipe them to 2 inch disks, rather than 3 inch, and use less ice cream.

Chocolate Macarons with Black Currant Tea Ice Cream
- adapted from Desserts by the Yard by Sherry Yard

(Make the ice cream 3 days before making the macarons, so the egg whites will be the right age.)

Black Current Tea Ice Cream:

1 cup heavy cream
1-1/2 cups milk
2/3 cup sugar
2 black currant tea bags
8 large egg yolks
1 Tbsp creme de cassis
2 tsp fresh lemon juice
Pinch of salt

1- In a medium, nonreactive saucepan, combine the cream, milk, and 1/3 cup of the sugar. Place the pan over medium heat and bring the mixture to a boil. Add the tea bags and turn off the heat. Cover and steep for 20 minutes.

2- Combine the egg yolks and the remaining 1/3 cup sugar in a medium bowl and whisk them together until lemony yellow.

3- Squeeze the tea bags to extract as much of the flavor as possible, then throw them away. Return the cream mixture to the heat and bring to a simmer. Remove from the heat and slowly ladle 1/2 cup into the egg yolks while whisking. Once the cream is incorporated into the eggs, whisk the eggs back into the cream, scraping all the eggs out of the bowl with a rubber spatula.

4-Place the pan over low heat and immediately begin to stir the custard. After about 2 minutes, it will begin to thicken. Keep stirring until the consistency is like thick cream. The custard is done when the temperature reaches 180 deg. F. Test for readiness with your spatula: dip it into the custard, pull it out, and run your finger across the back of the spatula. Your finger should leave a clear trail and the rest of the spatula should remain coated with custard. If the custard does not run into the finger trail, it is thick enough and can be taken off the heat. If it does run, cook the custard for another minute, or until the consistency is right.

5- Remove the pan from the heat and immediately pour the custard through a fine-mesh strainer into a bowl set in an ice bath. Stir the custard occasionally for 5 to 10 minutes, until the temperature drops to 40 deg. F. Stir in the creme de cassis, lemon juice, and salt. Transfer to an ice cream maker and freeze according to the manufacturer's directions. Transfer to a freezer container and place in the freezer for 2 hours, or until firm.


The Macarons:

1 cup almond flour
2 cups confectioners' sugar
3 Tbsp unsweetened cocoa powder
3 large egg whites, covered and refrigerated for 3 days, then brought to room temperature
1/4 tsp cream of tartar
2 Tbsp sugar
1 drop red food coloring (optional)


1- In a food processor fitted with steel blade, combine the almond flour and confectioners' sugar. Pulase a few times, then add the cocoa and pulse a few times more. Pass through a fine sifter and set aside.

2- Line two baking sheets with parchment paper. Fit a piping bag with a #6 plain tip. (I don't have this, so just used the closest one I had.)

3- In a large bowl with a stand mixer or hand mixer, beat the egg whites on low speed until they begin to foam. Add the cream of tartar and turn the speed to medium. Slowly stream in the sugar and continue to beat to stiff peaks. If you turn the bowl upside down, the whisk should remain in place. Beat in the drop of red food coloring, if using.

4 - Using a rubber spatula, fold the almond mixture into the egg whites until well combined. This will take about 40 folds and turns of the bowl; after about 20 turns, the batter will come together and deflate, and after 20 more turns, it will be slightly runny, then more runny after a few minutes.

5 - Fill the piping bag two-thirds full with the macaron mixture. Pipe 3-inch disks onto the parchment-covered baking sheets, holding the piping bag straight up and piping until the batter runs out to 3 inches. Allow 2 inches of space between each macaron. You should have 16 macarons.

6 - Allow the piped macarons to sit for 2 to 4 hours. They will dry out on the top and develop a skin, which is what you want.

7 - Place racks in the middle and lower third of the oven and preheat the oven to 300 deg. F, or 275 deg. F in a convection oven.

8 - Bake the cookies for 15 minutes. Rotate the baking sheets from top to bottom and from front to back and continue baking for another 5 to 10 minutes, until the macarons are no longer tacky when touched lightly. If you are using a convection oven, leave the oven door cracked after you turn the pans around. Remove the cookies from the oven and allow to cool on the baking sheets. (After cooling, the macarons can be stored in the freezer for 2 weeks wrapped airtight.)

9 - To assemble, place 1 chocolate macaron on a plate and top with a scoop of ice cream. Press down on the scoop to flatten slightly (easier if the ice cream is slightly softened), and place another macaron on top.

Thursday, April 3, 2008

High Carbs R Us

The Bread Baking Babes have become nannies. Mary the Breadchick, gave us a recipe to follow to make a sourdough starter for our May project. It's been keeping us busy with a schedule of feeding, burping, and changing the baby. If you'd like to bake along with us, you'll need to get started now. The directions are here (scroll down to March 25th for the beginning instructions).

My starter is doing quite well, but with my frugal upbringing, it pains me to daily throw half of it away. I hit upon the brilliant idea of using the throw away for making one of my favorite bread machine breads. It's one of the few whole grain bread machine breads that doesn't bake into a brick. I used to make it frequently, but I had hit or miss success with it. One time it would be perfect, the next time a wet lump, the next time a dry dough ball.

When I pulled the recipe out to try it again, I was amazed that gremlins had been at my recipe book. There was a whole paragraph there that I swear had never been there before. It involved making a "sponge" the night before. Wow, reading that paragraph really made a difference to the consistency of my bread!

If you already have a sourdough starter going, then you can jump right into this bread. Or if you'd like to start one following Mary's instructions, you're sixteen days away from having delicious, homemade, sourdough, whole-wheat bread. What are you waiting for?

Sourdough Whole-Wheat Bread
adapted from The Bread Machine Book

(Directions are for a 1-1/2 lb loaf)

Sponge:

1/2 cup sourdough starter
1/2 cup bread flour
2 Tbsp water

Bread:

6 Tbsp cracked wheat
1/4 cup + 2 Tbsp water
3 Tbsp butter
1-1/2 Tbsp honey
3 Tbsp dried milk
1-1/2 tsp salt
1-1/2 cups bread flour
1-1/2 cups whole-wheat flour
2-1/4 tsp yeast

The night before making the bread, mix the sponge ingredients in a small bowl. Cover loosely and put in a warm place for at least 6 hours.

In the morning, at least 20 minutes before starting the bread, put the cracked wheat in a small saucepan. Cover it with water. Bring it to a boil, then boil for 6 minutes, stirring occasionally so it doesn't scorch on the bottom of the pan. If there is any water unabsorbed at this point, drain it off, then set the pan aside to cool for at least 10 minutes.

Stir down the sponge and put it in the bread machine pan with the remainder of the water. Add cooled wheat and remaining ingredients in the order suggested by your bread machine instructions. Set for dough.

When the cycle has ended, remove dough to a lightly floured surface. Roll dough into a rectangle, about 9 x 12 inches, and roll it up into a loaf shape. Pinch edges to seal and place in a greased 9 x 5 inch loaf pan. (The greasing really does matter. I discovered this once when I forgot it. Chiseling bread out of the pan does not make a pretty loaf!)

Let the dough rise in the pan 30 to 40 minutes. Preheat the oven to 350 deg. F and bake the bread for 30 to 35 minutes.

When it's done, remove the bread from the pan and let it cool on a rack (for as long as you can resist the temptation to saw off a big piece and slather it with butter).

Tuesday, April 1, 2008

The Diagnosis*


After many years of my condition worsening, I finally have a diagnosis. It is irreversible, it's not treatable. It's cephalasievaloma. Basically, bit by bit, day by day, my brain is turning into a sieve. I drop in the pieces of information, they fall out the other side. I can't find my glasses, forgot to mail a check, and desperately wish I could remember where I saw that recipe for those choolatey cookies with the sparkly sugar bits. Was it in a cookbook? One of my own or one I borrowed from the library? Or, worse yet, was it on a blog? If so, I'll never find it!

Worst of all is when my brain fluffs go public. It makes me so a) angry, b) frustrated, c) humiliated, or d) all of the above, to learn I've left out ingredients or instructions on a blog recipe. Well, it's d) all of the above. I can't tell you how many times I've gotten a nice note saying something like, "You recipe looks great. I'd love to try it, but at what do you do with the pound of marshmallows? The recipe never says." Or, "Honey gravy sounds good, but you don't have honey listed in the ingredients. How much do you use?" Arggghhhhh!

But the one thing my condition has taught me is that if I'm not perfect, I really shouldn't expect others to be. Therefore, I extend grace to others when this occurs. Even in a cookbook. Even in Baking. Yes, Baking, the holy grail of kitchen bliss has an omission. I finally got around to making the Whopper cookies that my husband has been asking for since I got the cookbook last year (Bad wife, no biscuit!). I made the dough and then couldn't find the oven temp. I reread the recipe. Twice. Then had my husband look it over. Still no go. So I did an internet search. Aha, mine wasn't the only copy without that vital information. I'd like to say that I took the recipe before it and the recipe following it and averaged the baking temp from them, because that sounds fun, but I actually got it from an online chat.

So, if you want to try one of my recipes, read it through first. And if you have questions, drop me a line. And if I've blown it, I apologize in advance. But I do feel a little better knowing it can happen to Dorie, too.

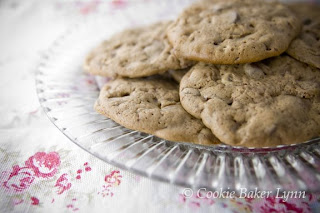
These cookies turned out wonderfully, full of malt and chocolate flavor, with little pockets of chocolate chunks. They soften up as they're stored, which I think is a good thing. Also, I've tried Malteasers and think they are better than Whoppers, so if you have access to those, use them instead.

Chocolate Malted Whopper Drops
-adapted from Baking - from my home to yours by Dorie Greenspan


1-1/4 cups all-purpose flour
1 cup malted milk powder (or Ovaltine)
1/4 cup unsweetened cocoa powder
1-1/2 tsp baking powder
1/4 tsp salt
1 stick plus 3 Tbsp unsalted butter at room temperature
2/3 cup sugar
2 large eggs
1 tsp pure vanilla extract
1/4 cup whole milk
2 cups (6 oz) Whoppers, coarsely chopped
6 oz bittersweet chocolate, coarsely chopped, or 1 cup store-bought chocolate chips or chunks

1- Position the racks to divide the oven into thirds and line two baking sheets with parchment or silicone mats. Preheat the oven to 350 deg. F.

2- Sift together the flour, malted milk powder, cocoa, baking powder and salt.

3- In a large bowl with an electric or stand mixer, beat the butter and sugar together on medium speed for about 3 minutes, until very smooth. Add the eggs one at a time, beating for 1 minute after each addition. Beat in the vanilla; don't be concerned if the mixture looks curdled - it will smooth out when the dry ingredients are added. Reduce the mixer speed to low and add half the dry ingredients, mixing just until they disappear into the batter. Mix in the milk, then the remaining dry ingredients, mixing only until they are incorporated. The batter will look more like fudge frosting than cookie dough - and that's fine. With the mixer on low, or by hand with a rubber spatula, mix in the malted milk balls and chopped chocolate.

4 - Drop the dough by rounded tablespoonfuls onto the prepared sheets, leaving about 2 inches of space between spoonfuls. The cookies will spread as they bake. Bake for 11-13 minutes, rotating the sheets from to to bottom and front to back after 6 minutes. When done, the cookies will be puffed and set but slightly soft to the touch. Let the cookies rest on the sheets for 2 minutes before using a wide spatula to transfer them to racks to cool to reoom temperature.

5 - Repeat with remaining dough, being sure to cool the baking sheets in between batches.


* The post date is April 1st. Happy April Fool's Day! But no foolin' on the cookies - they are really good.