
Showing posts with label caramel. Show all posts

Thursday, December 22, 2011

Christmas Crack


It's been 4 years now since I shared on my blog the perilous substance known as Killer Crack Peanut Butter Fudge. I've been strong and resisted the temptation to make it for quite a while now, but I've gotten some terrific comments from readers who have. My favorite was this:

This is the fudge my husband rebukes, the way any good evangelical man rebukes sin, fearing and secretly lusting after it. He literally carries plates of this stuff to the neighbors so that it will not dwell under his roof, or on his waist. And yet I keep making it. The making AND the rebuking; a weird holiday tradition now.

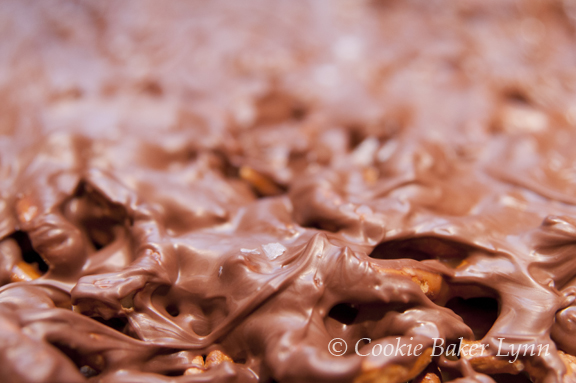
Yes, I am all about holiday traditions and keeping it festive for my readers. With that goal in mind, I present to you my latest concoction, Chocolate Caramel Pretzel Crack. This is the evil cousin of the Killer Crack Peanut Butter Fudge. It's pretty simple to make, and yet it's irresistible. And once you've tried it, you are helpless; you simply must go back for more. And more. And....well, you get the picture.


What is it, you ask? A layer of pretzels, a layer of caramel, a layer of chocolate, and then a sprinkling of Crack. And by crack I mean sea salt. Either chunks or flakes will do, just so long as you get a nice hit of salt with every sweet, sticky, gooey, chocolatey, crunchy bite. It's seriously amazing.

 I've made it three times now. The first time was just playing around with the idea, the second time was refining it and the third time was because the second pan went so fast I didn't take any pictures! And the third pan has been cut up and put into containers to be given away because I don't want my family to be in such a carb coma that they can't open presents on Christmas. But I'd better get those containers out the door quickly, or else certain unnamed family members might "accidentally" happen to pry open a container (even if it's already in a sealed box ready to be mailed) and "accidentally" fall face first into it. Not pointing fingers or naming names. I don't want to spoil Christmas. I'm just saying it's a possibility.

 
If you're looking for the ultimate last minute gift, the perfect hostess present, or just a decadent treat for your co-workers or yourself, this is it. Go buy some pretzels, cream, and chocolate and in a couple of hours (you can wait for the chocolate to set up, can't you?) you can be in serious salty-sweet heaven.


Chocolate Caramel Pretzel Crack


8 oz. pretzels
1 cup heavy cream
5 Tbsp unsalted butter
1 tsp sea salt
1/4 cup water
1-1/2 cup sugar
1/4 cup light corn syrup
1 lb. good milk chocolate, chopped
Sea salt (Fleur de Sel or Maldon Sea Salt are good choices)


1- Line a jelly roll pan (10-1/2 x 15-1/2-inches) with parchment paper and butter the paper. (Mine is a seasoned stoneware pan, so I skipped the parchment paper.)

2- Spread the pretzels in an even layer in the pan. Break up a few pretzels to fill in gaps as needed.

3- In a small saucepan combine the cream, butter, and salt. Bring to a boil over medium heat and remove from the heat. Set it aside.

4- In a large saucepan combine the water, sugar, and corn syrup. Stir gently just to combine. Be careful to not splash the sugar crystals up onto the sides of the pan. Cover the pan and bring to a simmer over medium-high heat. The steam from the simmering will help to wash any errant sugar crystals from the sides of the pan.

5- When the sugar is dissolved, remove the lid from the pan. Continue simmering until the liquid turns a golden caramel color. If your liquid is getting dark in one area and not in another, DO NOT STIR. You can pick up the pan and gently shake it side to side the even out the color.

6- When the liquid is golden caramel color, add the cream mixture and stir. The mixture will bubble up, so be careful. Simmer and stir with a clean wooden spoon until a candy thermometer in the mixture reaches 248 deg. F, approximately 15 min.

7- Pour the caramel over the pretzels evenly.

8- After the caramel has set, melt the chocolate in the top of a double boiler. For a prettier presentation, you can temper the chocolate. (I was attempting to temper the chocolate, but got distracted, so it didn't go well, hence the artistic swirliness of the chocolate. If that happens to you, don't worry. People will think you went to an extra effort to get those swirls, so if they compliment you, just say thank you.)

9 - Spread the melted chocolate evenly over the caramel layer.

10- Sprinkle sea salt sparsely over the top of the chocolate layer.

11- When the chocolate has set up but not hardened, use a pizza cutter or a knife to cut it into squares.


Tuesday, November 15, 2011

Chocolate Can't Fix Everything


Every relationship that you have changes you. Sometimes the changes are subtle, like emulating a friend's hairstyle, or the way in which they answer the phone, and sometimes they are drastic, like making a career choice or moving across the country, just to be with a friend. People brush up against your life and leave their fingerprints on it.

Sometimes that might be words of wisdom that come back to you at just the right time. Sometimes it's the memory of an extravagant act of selflessness that prods you to be a better friend. And sometimes it's pieces of pain, shared in quiet moments.

One of my friends once confided in me that her marriage was loveless. Not that either cheated on the other, just that there was no emotion, no passion. I had often wondered why she married this bland man, unremarkable in looks, personality, or finances and one day posed that question to her. She responded, "Because he asked. And I didn't think anyone else ever would." I cried inside, thinking of both of them living in a settle-for, I-can't-do-any-better-than-this marriage.

Another friend was in a truly unhappy marriage. Her husband was demanding, treating her as if she were a slave rather than a cherished gift from God. He was verbally abusive to her and I often found her in tears. I offered our home as a sanctuary for her daughter so that she could drop her off if the fighting got too ugly. More than one late night she came to visit.

One Sunday I sat behind my friend and her husband in church. From the set of her shoulders I knew that she was crying. She left the service early and when I went outside, she was sitting in her car, tears streaking down her cheeks. Though her face was saying, "just leave me alone," I motioned for her to roll down the window. I took her hand and kissed it, leaving an imprint of my lipstick on her hand, a kiss to take home. It made my heart ache that I couldn't do anything to fix it and make everything better.


And what could I say to my very dear friend who's husband of 20 years drained their bank account and left her and their 4 children for the woman he'd been having an affair with for 10 years? I offered to buy her a t-shirt that says, "It's better to have loved and lost than still be married to the crazy b-----d," but that wouldn't fix it all and heal the pain of loss and betrayal.

If only chocolate could fix everything. I'd make a batch of these bars and take them to every hurting woman in my life. But some days it seems like that would be a mountain of bars. I can't do it alone. So I have a challenge for you bakers out there. Make your favorite treat, then, rather than eating the whole batch and moaning about the size of your hips, wrap them up individually in cellophane and put a little ribbon around each one. Tuck some into your purse and see how many hurting people you can find that day to give them out to. And if you run out of hurting people to bless, try just brightening someone's day. There's nothing like the smile of someone who's been randomly given a cookie!


My Heart Breaks For You Bars
(aka Thousand Dollar Bars - adapted from King Arthur Flour)

shortbread layer:

1 cup (2 sticks) unsalted butter, at room temperature
1 cup confectioners' sugar
2 teaspoons vanilla extract
2 cups King Arthur Unbleached All-Purpose Flour


caramel layer:

2 cups caramel, cut into small chunks
3 tablespoons heavy cream


chocolate layer:

3 cups chopped milk chocolate or dark chocolate, melted
1 tablespoon coconut oil (optional)
Crunchy sea salt for garnishing


1- Preheat oven to 300 Deg. F. Line a 9 x 13-inch pan with parchment paper, leaving enough to hang over the edges.

2- In a medium-sized bowl, beat together the butter, sugar and vanilla. Add the flour. At first the mixture may seem dry, but will come together as you continue to beat at medium speed.

3- Take the dough (it will be somewhat stiff) and press it evenly into the pan. Lightly flouring your fingertips will help with any sticking.

4- Prick the crust all over with a fork. The holes will allow steam to escape and the crust will bake evenly with fewer bubbles.

5- Bake the crust until it's lightly golden brown on top and the edges are deeper golden brown, about 35 to 45 minutes. Remove from the oven and set it aside to cool completely.

6- Once the crust is cooled, melt the caramel and cream over low heat in a small saucepan. Pour the caramel over the cooled crust and set in the refrigerator for 30 minutes to chill and firm up.

7- Melt the milk or dark chocolate slowly in a double boiler or over very low heat. If it seems very thick, add a tablespoon of shortening to thin it. Pour evenly over the chilled caramel layer and spread to cover all of the caramel. Sprinkle the sea salt over the chocolate layer. Return to the fridge until the chocolate is well set. Cut into 2" x 2" squares to serve. (The chocolate may shatter if you cut it straight from the fridge, so you might need to let it warm up just a tad before cutting.) It's best to store these bars in the refrigerator.

8- These bars can also be cut and dipped in milk chocolate to resemble Twix ® bars. After the caramel layer has chilled firm, cut down the length of the pan, splitting the bars into two long, narrow bars. Then cut each long strip into "fingers". Dip the chilled bars into melted chocolate, place on parchment paper to set, sprinkle with sea salt, and allow to set up for several hours.

(Note: It's waaaaay easier to spread the chocolate on top, rather than dipping them, but dipping gives a nice, all-over layer of chocolate that's wonderful. Either way, they're delicious. And don't forget the crunchy salt. Salt + chocolate + caramel + shortbread = fabulous. If cookies could fix problems, these would do the job!)

Monday, December 28, 2009

The Sweetness of Christmas


I love the soft exhalation of stress that follows Christmas. All of the to-do's are either done or are no longer relevant. The family playing with toys, reading books or instruction manuals amid drifts of torn wrapping paper, illuminated by twinkling Christmas tree lights, are a lovely tableau of peace and contentment.

Normally on Christmas Day I choose to stay out of the kitchen, preparing only the easiest of heat and eat meals. I don't want to lose that easy, comfy feeling of having nothing that needs doing. This year, though, I choose to do one thing, just for fun. This recipe was featured in December's Bon Appetite and I thought it would be a lovely way to round out our Christmas dinner.


Because I didn't have the right size pan, I chose to make 6 individual tarts and see how that worked. No biggie if it didn't work, because I was just playing. I won't say it was a Christmas miracle, but it was certainly a gift, that everything about this tart worked out. Dividing the dough into 6 pans - just great. Dividing the filling - perfect. Making the caramel (not my forte) - easy, peasy, lemon squeezy. The only downside was that the tarts are sooooo rich that unless you have superhuman capacity, you can only eat a half of one. So if you have 6 couples eating, or 12 close friends, make the 6 tarts and have them share. Or make it per the Bon Appetite specs and cut slices. Either way, you'll wow the crowd.

Chocolate Caramel Macadamia Nut Tart
- adapted from Bon Appetit

CRUST
1 cup all purpose flour
1/3 cup powdered sugar
3/4 teaspoon salt
1/2 cup (1 stick) chilled unsalted butter, cut into 1/2-inch cubes
1 tablespoon (or more) ice water


GANACHE
1/3 cup heavy whipping cream
8 ounces bittersweet chocolate (do not exceed 61% cacao), chopped
1 1/2 cups unsalted macadamia nuts (about 7 1/2 ounces), toasted, coarsely chopped


CARAMEL FILLING
1 1/4 cups sugar
1/3 cup water
1/2 cup heavy whipping cream
1/4 cup (1/2 stick) unsalted butter
1 teaspoon vanilla extract
1/2 teaspoon salt


1- Blend flour, powdered sugar, and salt in processor. Add butter and pulse until mixture resembles coarse meal. Add 1 tablespoon ice water and blend just until moist clumps form, adding more ice water by teaspoonfuls if mixture is dry.

2- Divide dough into 6 equal lumps and gently press a lump into each of six 4-1/2-inch tart pans, patting it with your fingers up the sides of the pan and evenly across the bottom. Chill the dough in the pans for 1 hour.

3- Position rack in center of oven and preheat to 375°F.

4- Line each crust with foil; fill with dried beans, rice, or pie weights. Bake crust until pale golden around edges and sides are set, about 15 minutes. Remove foil and beans; bake until crust is golden and cooked through, about 11 minutes. Transfer to rack and cool crust completely in pan.

5- Bring cream for the ganache to simmer in heavy small saucepan. Remove from heat. Add chocolate; stir until smooth.

6- Spoon 3 tablespoons ganache into 1 corner of small resealable plastic bag and seal; set aside at room temperature for piping. Spread remaining ganache evenly over bottom of the crusts. Sprinkle chopped macadamia nuts evenly over ganache layer in crust. Freeze crust while preparing caramel filling.

7- Combine sugar and 1/3 cup water in heavy medium saucepan. Stir over medium-low heat until sugar dissolves. Increase heat and boil without stirring until syrup is golden amber, occasionally brushing down sides of pan with wet pastry brush and swirling pan, about 8 minutes. (I was concerned at this point because it appeared that sugar crystals were forming on top of the boiling mixture, but it wasn't a problem. I kept brushing and swirling and the sugar crystals went away.)

8- Remove pan from heat. Add cream and butter; stir until any caramel bits dissolve and mixture is smooth. Attach candy thermometer to side of pan and bring mixture to boil over medium-high heat. Boil without stirring until thermometer registers 240°F, about 2 1/2 minutes longer. Remove from heat. Whisk in vanilla and salt.

9- Remove crusts from freezer. (It's helpful if you can have someone else fetch them for you while you're whisking in the vanilla.) Working quickly, pour caramel filling into crusts. Gently shake tart pans to allow filling to settle evenly in crusts. Cool completely at room temperature, about 3 hours.

10- Place reserved resealable plastic bag with chocolate ganache in microwave and heat in 5-second intervals just until smooth and pourable. Using scissors, cut off very small tip from corner of bag with ganache. Pipe ganache decoratively over caramel filling in crosshatch pattern. Chill until chocolate is set, about 20 minutes. The tarts can be made 2 days ahead. Cover and keep chilled. Bring tarts to room temperature before serving.

11- To serve, remove the sides from the tart pans and place on pretty plates. If you feel you haven't reached your holiday quota of fats, you can garnish with a blop of whipped cream or vanilla ice cream.

Monday, September 14, 2009

I'm Happy to Help


A friend of mine always answers the phone, "Hello, how may I serve you?" I think that's pretty risky. After all, you never know who might be calling or what kind of favor they might ask of you. Sometimes favors can be painful, expensive, or just annoying.

Imagine my pleasure then on being asked by Beth Lipton (aka CookiePie) to help out with a virtual cookbook tour. Now that's my kind of favor! I got a copy of her new book, You Made That Dessert? - Create Fabulous Treats, Even if You Can Barely Boil Water and I was supposed to pick one thing from it to bake and blog. Tthe hardest part about it was selecting just one thing. I gave it to my husband to let him pick what sounded really good to him and he returned the cookbook bristling with bookmarks. They all look good!

I love this cookbook. It's geared toward folk with kitchen phobias, giving very clear directions, straightforward steps, and any term which might be confusing is defined. Although it's aimed at beginners, the recipes are far from mundane and boring. They're elegant desserts that call for real ingredients. A pet peeve of mine is recipes that call for a boxed cake mix or a boxed pudding mix as an ingredient. (There is one recipe that calls for a boxed brownie mix, but since she includes several brownie recipes in the book, I'll give her a pass on that one.)


The cookbook is not enormous, but it fits in so much practical information, Beth must have used a shoehorn to get it all in. There are conversion tables, a glossary of terms, a short compendium of kitchen tools and ingredients, as well as baking tidbits scattered throughout the book.

Each recipe is clearly presented with all of the ingredients and all of the tools required listed in a side bar. Helpful for a kitchen newbie who doesn't know what her springform pan from her springerle mold. I think this is a perfect wedding or shower gift. What a great start to a marriage to know how to make your sweetie's favorite sweeties!

I have made more than one recipe from the book, but the one I'm sharing with you today is a gem. It's super simple, amazingly tasty, and it uses up 4 bananas. The amazing caramel frosting is irresistible. I sat my son down to do his handwriting next to the covered cake and when I returned 1/2 an hour later, about 1/4 of the cake was denuded of frosting. Yeah, irresistible.

Still not convinced you need to get your hands on this book? Check out what some other bloggers have made from it:

Two Peas and Their Pod
Recipe Girl
The Life and Loves of Grumpy's Honeybunch
Eat Me Delicious
Culinary Concoctions by Peabody


Banana Snack Cake
- from You Made That Dessert? by Beth Lipton

8 Tbsp (1 stick) unsalted butter, at room temperature (plus 2 Tbsp for preparing baking pan)
1-1/2 cups (6.4 oz) all-purpose flour (plus 3 Tbsp for preparing baking pan)
1 cup (4.5 oz) whole-wheat flour (or all-purpose)
1 tsp baking powder
1 tsp baking soda
1/2 tsp salt
4 large ripe bananas
1 cup sour cream, at room temperature
2 tsp vanilla extract
1 cup (8.4 oz) packed dark brown sugar
2 large eggs, at room temperature
1/2 cup finely chopped walnuts or pecans (optional)

Tools needed:
9x13-inch baking pan
Small bowl
2 large bowls
Fork
Electric mixer
Flexible spatula
Toothpick
Wire cooling rack

1- Preheat the oven to 350 deg. F. Coat a 9x 13-inch baking pan with a thin layer of butter. Spoon 3 tablespoons of flour into the pan and move the pan all around to coat the bottom and sides with a thin layer of flour. Tap out and discard the excess flour.

2- In a small bowl, mix together the all-purpose and whole-wheat flour (if using), baking powder, baking soda, and salt, and stir with a fork. In a large bowl, mash the bananas with a fork, leaving some chunks, then stir in the sour cream and vanilla.

3- In a separate large bowl, with an electric mixer on medium speed, beat the butter and brown sugar until fluffy, about 2 minutes. Scrape down the sides of the bowl with a flexible spatula and beat again for 30 seconds. Add 1 egg, beat until incorporated, then beat in the next one. After adding the second egg, scrape the sides and bottom of the bowl with the spatula and beat again until uniform.

4- Using your flexible spatula, stir half of the dry ingredients into the butter mixture, mixing until the two are nearly combined. Stir in the mashed banana mixture, then add the remaining flour and walnuts (if using) and stir until completely combined, taking care to scrape the bottom of the bowl to incorporate all of the flour. Try to mix the batter as little as possible.

5- Pour the batter into the pan, smooth the top with your flexible spatula, and bake for 45 to 50 minutes, until a toothpick inserted in the center of the cake comes out clean and the cake springs back when lightly pressed. Let it cool completely in the pan on a wire rack. Dust the top with powdered sugar, or frost the cake with Rich Caramel Frosting.


Rich Caramel Frosting

1-1/2 cups (11.5 oz) packed light brown sugar
1/3 cup heavy cream
5 Tbsp unsalted butter, cut into 10 pieces
1/8 tsp salt
1 tsp vanilla extract

Tools:
Dry measuring cups
Liquid measuring cup
Measuring spoons
Saucepan
Whisk
Large bowl
Electric Mixer

1- Combine the brown sugar, cream, butter, and salt in a saucepan. Place over medium heat and cook, whisking often, until the butter has melted, the sugar is fully moistened, and the ingredients are combined, about 2 minutes. Continue to cook, whisking more frequently, until the caramel reaches a full boil (that is, even when you whisk it, it still boils). Once it reaches the full boiling stage, let it boil for 1 to 2 minutes, whisking vigorously and constantly. Remove it from the heat and whisk in the vanilla. (Be careful: The caramel might spatter a bit, and it is extremely hot.)

2- Pour the hot caramel into a large bowl and beat with an electric mixer on medium-high speed until cooled to lukewarm, and frosting has thickened to a spreading consistency and lightened in color, about 6 to 8 minutes. Use the frosting right away.

Thursday, April 24, 2008

A Sweet Visit


My nephew is in town. This is exciting for us, as we've had small contact with him since he joined the army. He's only home for 18 days of leave, but it's so great to be able to see him and give him a hug and know that he's OK.

I was there the day he was born. I made a Birth Day cake for my sister as she labored, making her laugh between contractions (not a nice thing to do to a woman in labor). Her labor went on and on, so I wasn't able to be there when Daniel finally made his appearance.


He was the cutest little boy; a pointy chin and large dark eyes dominated a face that usually had an impish grin on it. When he was still a tot in diapers my sister and I took him with us to a homeschool supplier's warehouse sale that was an hour and a half from our homes, out in the wild woods. There were crowds of people, but they were all nice homeschoolers and their kids, so we had our radar down just a bit. Then we discovered Daniel wasn't playing with the other children, where we thought he was. Escalating panic ensued as we searched for him. Just when my sister was about to get hysterical, a kind woman came up the long, twisting drive, with Daniel in hand. She said she'd found him at the end of the 1/4 mile driveway where it entered the road. When she asked him his name, he tearfully replied, "My name is Daniel, but my mommy calls me Sweet Cheeks Chocolate Bar."

Daniel had a favorite pair of Salt Water Sandals that he wore till his feet couldn't squeeze into them any more. They were lime green and we called them his hoppy frog sandals, telling him that they'd help him jump higher. He wore them everywhere. When my other sister got married, Daniel wore a three piece suit, a red bow tie, and his green hoppy frog sandals.


Long gone are the days of the hoppy frog sandals. Daniel is now an RTO in the army, serving in Iraq. We only get to hear what his life is like through the blog his mother maintains. And we pray for him every night to return home safely.

When I heard he was coming home, I of course had to make him cookies. And the cookies that came to mind were these ooey, gooey, chocolatey bar cookies. I had made them many years ago to take to a family gathering. As I was eating my dinner on the porch, my nephew sat down beside me with a cookie in his hand. "Aunt Lynn," he said, "these cookies are like a little piece of heaven."

It's a little piece of heaven for us to have you home, Daniel.

Piece of Heaven Bars

1 3/4 cups quick or old-fashioned oats
1 3/4 cups all-purpose flour, divided
3/4 cup packed brown sugar
1/2 teaspoon baking soda
1/4 teaspoon salt, (optional)
3/4 cup butter or margarine, melted
2 cups chocolate chips
1 cup chopped walnuts
1 12-oz jar caramel ice cream topping


Directions:
PREHEAT oven to 350º F. Grease bottom of 13 x 9-inch baking pan.

COMBINE oats, 1-1/2 cups flour, sugar, baking soda and salt in large bowl. Stir in butter; mix well. Reserve 1 cup oat mixture; press remaining oat mixture onto bottom of prepared baking pan.

BAKE for 12 to 15 minutes or until golden brown. Sprinkle with morsels and nuts. Mix caramel topping with remaining flour in small bowl; drizzle over nuts to within 1/4- inch of pan edges. Sprinkle with reserved oat mixture.

BAKE for 18 to 22 minutes or until golden brown. Cool in pan on wire rack; refrigerate until firm. Cut into bars.

Thursday, March 20, 2008

Playing With Marbles


When I was a wee tike my mother, in an effort to encourage my growth and development, and possibly to get me out of her hair, enrolled me in summer classes at the YWCA. I took creative movement which I loved. We got to swish like a washing machine, swim through honey, and flop like limp noodles. And I looked at it as my first step toward becoming a ballerina.

Another year I got to take an art class which was awesome. All of the projects were designed so that with limited art abilities a student could produce something to feel proud of. We pressed thin copper sheets into molds to make raised pictures which we mounted onto boards and shellacked. Mine, of course, was a ballerina. We did string art. And we made ceramics. I loved transforming liquidy gloop into a shape that was then painted, glazed, and fired. I still have the little fox I made with hand-painted accents.

I get a thrill when something I create is lovely. And my family knows I get very grumpy when a kitchen creation turns out.....on the homely side. Even if it's delicious, I pout if it's not a feast for the eyes as well, which happens rather more than I'd care to admit.


These bars were such fun to make. The shortbread base and oozy caramel layer were easy to put together, and I felt like I was back in art class swirling the melted chocolate around on the top. What a bonus that they're delicious, too!

Marbled Bars - adapted from The Cookie Book by Catherine Atkinson, Joanna Farrow and Valerie Barrett

For the base:

2-1/4 cups (9 oz) all-purpose flour
1/2 cup (3 oz) superfine sugar*
3/4 cup (6 oz) butter, softened


For the filling:
7 Tbsp (3-1/2 oz) butter, diced
1/2 cup (3-1/2 oz) light brown sugar
2 x 14 oz cans sweetened condensed milk


For the topping:
3-1/2 oz semisweet chocolate
2-1/2 oz milk chocolate
2 oz white chocolate


1- Preheat the oven to 350 deg. F. Line a 13 x 9-inch jelly roll pan with parchment paper and lightly grease it. (I don't own a jelly roll pan this size, so just used a 9 x 13 inch baking pan.)

*If you don't have superfine sugar on hand, just put granulated sugar in your food processor and whir it around until it's fine.

2- Put the flour and superfine sugar into a food processor and blend. Add the butter and pulse until the mixture resembles fine breadcrumbs. Continue pulsing until the mixture comes together and forms a dough. This step can also be done with your hands.

3- Put the dough into the prepared pan and press it out with your hand to cover the base. Then use the back of a tablespoon to smooth it and press it evenly into the pan. Prick all over with a fork and bake for about 20 minutes, or until firm to the touch and very light brown. Set aside and leave it in the pan to cool.

4 - To make the filling, put the butter, brown sugar and condensed milk into a pan and heat gently, stirring until the sugar has dissolved. Stirring constantly, bring to the boil. Reduce the heat and simmer the mixture very gently, stirring constantly, for about 5 - 10 minutes, or until it has thickened and has turned a caramel color. Take care that the mixture does not burn on the base of the pan, as this will spoil the flavor. Remove from the heat.

5 - Pour the filling mixture over the cookie base, spread evenly, then leave until cold.

6 - To make the topping, melt each type of chocolate separately in a microwave or in a heatproof bowl set over a pan of hot water. Spoon stripes about 2 inches wide of semisweet and milk chocolate down the length of the pan, alternating semisweet and milk chocolate.

7- Place spoonfuls of the white chocolate randomly over the top. Using a skewer (I couldn't find one, so I used a pointed chopstick), drag the tip through the chocolates, swirling to form the marbled effect.

Allow the top to cool thoroughly before slicing. Cut into 24, this makes generous sized bars. If you cut each bar into thirds, they make dainty nibbles.

Note: When I made them, the few bars that remained and sat overnight had the chocolate bloom (greyish color rises to the surface). I'm pretty sure tempering the chocolate would have prevented that, but I'm no expert at all in tempering chocolate, so....if you know how to, you might try it here. Or just make sure all the bars are eaten the first day!

~~~~~~~

The winner in the Spot Marilyn Contest is Melinda! She was the first to get the correct number of Marilyn references in my post Gentlement Prefer Blondies. Way to go, Melinda! Your lame prize is on it's way to you right now!

Tuesday, November 20, 2007

Change Is Good


I am all for traditions. Traditions comfort us. They anchor us. They are a structure around which to build our lives. But sometimes the structure can be a little claustrophobic. And then it's time to break out, shake things up, and try something new.

If you've been keeping track, you might have noticed that I missed posting a pie for Pie Day last week. I did make a pie, but I held off posting it on purpose. This pie hasgot such lovely flavors that say fall and Thanksgiving to me that I wanted to share it with you in case you needed to take a break from pumpkin, apple, or whatever your standard Thanksgiving pie is. And if it's not Thanksgiving time for you, feel free to indulge just because it's a fabulous pie!

Mix together a pecan pie, a cheesecake, and caramel and what have you got? A diet busting, too good to pass up, amazing pie. I made it, fully intending to take pictures and then give the rest away. Of course, the photo shoot piece had to be eaten. And then since the pie was there, it turned into dessert for the family. Half of it was gone. Still determined not to have it hanging around I called a neighbor to ask if she wanted some. By the time she got back to me the next day, my family had whittled it down to a nub in the pie pan. So much for watching calories. We watch them. Then we eat them. But it was worth the splurge!

Caramel-Pecan Cheesecake Pie

1 (8-oz) pkg cream cheese, softened
1/2 cup sugar
4 eggs
1 tsp vanilla extract
1 unbaked pie shell (9 inches)
1-1/4 cups coarsely chopped pecans
1 cup caramel ice cream topping*

Preheat oven to 375 deg. F.

In a small bowl, beat the cream cheese, sugar, 1 egg, and vanilla until smooth. Spread this into the pastry shell and sprinkle with the pecans.

In a small bowl whisk remaining eggs; gradually whisk in the caramel topping until blended. Pour over pecans.

Bake in preheated oven for 35 to 40 minutes or until lightly browned. Place foil on top after 20 minutes if pie is browning too quickly.

Cool on a wire rack for 1 hour. Refrigerate for 4 hours or overnight before slicing. Refrigerate leftovers.

* I didn't have any caramel ice cream topping, but I did have leftover wrapped caramels from making caramel apples. I put about 16 in a glass measure with 1/4 milk and microwaved on low heat, stirring frequently until the caramel was all dissolved.


Happy Thanksgiving!

Friday, May 4, 2007

Fabulously Awesomely Terrific Bars

You know that wonderful feeling of putting on a coat for the first time in the fall and finding $5 in the pocket? As a child I used to hide money in odd places, just so I could have the serendipitous thrill of later finding it when I was dusting or looking for something else. Yes, even then my memory was sharp as a tack.

It's a funny, fizzy thrill to find what you need, even when it's not what you were looking for.

A picture in Baking by the fabulous Dorie Greenspan has been calling to me for weeks. She describes her Snickery Squares as a slimmer, sleeker version of Snickers, my favorite candy bar. And the picture is totally droolworthy. I set my heart on making these and then read the ingredients. Dulce de leche? I don't have that. So I went to the store. They didn't have it. They said they'd order it. Which left me pining for the snickery squares, baking lust unrequited.

Then I read a post by the amazing David Lebovitz in which he tells how to make dulce de leche. So, problem solved. But as I was ruminating about the making of process, I thought how much his picture looked like the caramel sauce I had sitting in my refrigerator.

When I made the Turtle Cheesecake I had leftover caramel, about a cupful. In the saucepan in which I'd made the caramel I put about 1-3/4 cups of cream and brought it to a boil. Then I added the caramel, stirring it in with a spatula and let it boil for about 3 minutes. I put the sauce into a pint canning jar with a lid and put it in the refrigerator.

Well, I thought, if the dulce de leche is basically sweetened, carmelized milk, I could probably use the caramel sauce in it's place. If not the authentic Snickery Squares, I'd get something pretty toothable. And it worked! The squares are incredibly tasty. I didn't go to the trouble to candy the peanuts, since I wasn't following the recipe to the letter, and they taste just fine. A satisfying salty crunch to contrast with the gooey sweet caramel, the dense, bittersweet chocolate, and the crispy shortbread crust.

Since they're not Snickery squares, my daughter named them Fabulously Awesomely Terrific Bars (F.A.T. bars for short).

Fabulously Awesomely Terrific Bars

Crust:
1 cup all-purpose flour
1/4 cup sugar
2 Tbsp powdered sugar
1/4 tsp salt
1 stick unsalted butter, cut into small pieces and chilled
1 large egg yolk, lightly beaten

Filling:
Caramel sauce as described above. Or a store-bought jar. Or about 1-1/2 cups dulce de leche (and good luck finding it)
1 cup salted peanuts

Topping:

7 oz. bittersweet chocolate, coarsely chopped
1/2 stick unsalted butter, cut into 8 pieces, at room temperature.
1/4 cup chopped peanuts

1- Center a rack in the oven and preheat to 350 degrees. Butter an 8-inch pan.

2 - Put the flour, sugar, powdered sugar and salt into a food processor and pulse a few times to combine. Toss in the pieces of cold butter and pulse about 12 times, until the mixture looks like coarse meal. Pour the beaten egg yold over the ingredients and pulse until the dough forms clumps and curds - stop before the dough comes together in a ball.

3- Turn the dough into the buttered pan and gently press it evenly across the bottom of the pan. Prick the dough all over with a fork and slide the sheet into the oven.

4- Bake the crust for 15-20 minutes, or until it takes on just a little color around the edges. Remove the pan to a cooling rack and cool to room temperature.

5- Once the crust is cooled, scatter the cup of peanuts over the crust. Since my caramel sauce came out of the refrigerator I warmed it briefly in the microwave (about 10 seconds) and stirred it before pouring it over the crust. Spread it and smooth it with a spatula.

6 - Put the chopped chocolate in a microwave-safe bowl. I like to use my pottery bowl because it retains heat and helps the chocolate to gently melt. Melt in 30 second bursts, stirring after each burst, heating only until chocolate becomes glossy and begins to lose its shape. Stir in the butter until it if fully blended into the chocolate.

7 - Pour the chocolate over the caramel, smoothing it with a spatula, then sprinkle the chopped peanuts on top. Put the pan into the refrigerator to set the bars for about 20 minutes. Cut into 16 bars.

Monday, April 30, 2007

The Fastest Way To A Man's Heart Is...

The internet says that the fastest way to a man's heart is Chuck Norris' fist. I'm a traditionalist. I say the fastest way is through cheesecake.

.

When I was dating my future husband in college I knew he had a huge love for cheesecake. So one time when I flew home on break I made him a cheesecake. Not just any cheesecake, this was chocolate marbled cheesecake. I was so excited because this was a new culinary achievement for me and it turned out beautifully. I proudly carried this beauty onto the airplane, carefully stowed it beneath my seat, and then almost forgot it when deplaning. I had to run back into the plane to retrieve it from under my seat. Can you imagine that scene in today's security climate? Not a happy thought, there.

Anyway, when I presented my sweetie with the cheesecake he was thrilled. He promptly served himself up a generous piece and pronounced it wonderful. I think he ate a third of it the first day. The next day he ate it for breakfast, lunch, and dinner. Then a small piece the next day. A smaller piece the next day. I think he quietly threw away the rest of it and was unable to face a cheesecake for quite a while after that. So the morals from the story are that 1) most men really appreciate a good cheesecake, and 2) sharing is a good thing.

When faithful reader and kitchen princess, Gabe, requested a recipe for a Turtle Cheesecake for her sweetie I scrambled to find one. I didn't have a specific recipe that fit the bill, but put together several recipes that combine beautifully. The crust is from a magazine, the topping is from my faithful Baking by Dorie Greenspan and the cheesecake is from a new library find, The Best Recipe

The Best Recipe is a very cool cookbook from the editors of Cook's Illustrated Magazine. They exhaustively test all possible variations of a recipe to find the one, best way to make a dish. It's an engineer's dream cookbook. They discuss the way that all the variables affect the outcome and then tinker with them until they achieve the optimal result. So I turned to this source with confidence that their recipe would insure a wonderful product. And mostly that was correct.

I ran into only two problems. One was that I forgot the second layer of aluminum foil on the pan. This allowed the water from the water bath to seep into my crust so my crust was not crusty, it was more like mud. Tasty mud, but not pretty. The other was I underbaked it by about 5 minutes so the center is quite creamy. But still darn good. So good that I'm going to have to practice quite a bit of sharing so I don't get sick of cheesecake. Because I'll definitely need to make this again so I can get it right!

Turtle Cheesecake

CRUST:
1-1/2 cups chocolate wafer crumbs
2 Tbsp sugar
1/4 cup melted butter

FILLING:
2 lbs cream cheese
1-1/4 cups sugar
4 large eggs, room temperature
1 tsp zest from small lemon, minced
2 tsp vanilla extract
1/4 cup heavy cream
1/4 cup sour cream

TOPPING:
2 cups sugar
1/2 cup water
1-1/2 Tbsp light corn syrup
2/3 cup heavy cream
2 Tbsp unsalted butter, at room temp
1 cup salted peanuts

1- Adjust oven rack to middle position and heat oven to 350 degrees.

2- Combine chocolate wafer crumbs, sugar, and melted butter. Line bottom of 9-inch spring-form pan with foil, tuck foil underneath pan bottom, assemble pan, then pull foil up the side of the pan. Brush bottom and sides with butter. Press wafer crumb mixture into the bottom of the pan and about 1-1/2 inches up the side of the pan. Bake the crust for 10 minutes, remove to cool and reduce oven heat to 325. Once pan is cooled, cover underneath and along sides with a wide sheet of heavy-duty foil and set in large roasting pan. Bring kettle of water to boil for water bath.

3- While the water is heating, beat cream cheese in bowl of electric mixer until smooth. Gradually add sugar and beat on medium speed until sugar dissolves, about 3 minutes. Add eggs, one at a time, beating until just incorporated and scraping down after each addition. Add zest and vanilla and beat until just incorporated. Remove bowl from mixer; stir in cream and sour cream.

4- Pour batter into prepared pan. Set roasting pan on oven rack and pour in enough boiling water to come about halfway up side of springform pan. Be careful not to have water level over the rim of the foil. Bake until perimeter of cake is set but center jiggles like Jell-O when pan is tapped, 55 to 60 minutes. (I turned my oven off at 55 and in hindsight should have left it another 5 minutes. My cheesecake was quite jiggly in the center. I think a ring of "set" with jiggling just in the center is what to look for. The majority of mine was jiggly.)

5 - Turn off heat and leave oven door ajar, propping it open if necessary, for 1 hour longer. Remove springform pan from water bath and set on wire rack; cool to room temperature. Cover and refrigerate until chilled, at least 4 hours. It can be refrigerated up to 4 days.

6- After the cheesecake has chilled, make the caramel nut topping. You might want to save this step until just before serving for a warm, gooey presentation, but it can be done ahead of time. You'll just have a chewier topping.

7- Put the sugar, water and corn syrup in a medium heavy-bottomed saucepan, stir just to combine the ingredients and then put the pan over medium-high heat. Heat, without stirring, until the caramel turns deep amber, 5 to 10 minutes, wiping down any splatters on the sides of the pan with a pastry brush dipped in cold water. To test the color of the caramel, drop a bit on a white plate. If it's too pale, it won't have much taste.

8-Lower the heat a bit and, standing back from the saucepan because it will splatter, add the cream and butter. When the splatters are less vehement, stir to calm down the caramel and dissolve any lumps. Stir in the peanuts, and pour the caramel and peanuts into a 1-quart Pyrex measuring cup or a heat-proof bowl.

Spoon the peanuts out of the hot caramel and onto the cake. After that pour or spoon on enough caramel to cover all the nuts. You'll have a layer about 1/4 inch high. You'll probably have caramel left over - save it covered in the refrigerator for making caramel sauce.

Allow the topping to set at room temp. about 20 minutes before serving. Run a knife around the edge between the cake and the pan and carefully remove the outer pan before serving. If you choose to make the topping ahead of the serving time, top the cheesecake and once the topping has cooled, refrigerate it. Then for serving, take the cheesecake out of the refrigerator 20 minutes ahead of time and allow it to come to room temperature. If the caramel is still a little too stiff, a quick wave of a creme brulee torch will soften it up.

My family rates it two thumbs up!