Sunday, January 5, 2014

Traveling with high maintenance eating


I recently got back from a 2 week vacation to Maui. The adjustment has been a little rough. We drove to the airport in 85 degree weather and landed at SeaTac in 45 degree clouds. Ugh.

To console myself, I spend an inordinant amount of time scrolling through the pictures on my phone, remembering the sights, sounds, and smells of Maui. Aaaaah. What better way to hang onto a piece of the vacation? Well, maybe to share some tips in case you, too, want to go there. It’s going to be a long post so go get your cup of coffee now. Ready? OK, here we got.

The biggest challenge to traveling on GAPS is, of course, food.* This was a major stressor for me in the month leading up to our trip.  How on earth can you go on vacation and eat clean for 2 weeks? Well, it takes a lot of planning. And since I’m not that good at planning, I had my daughter help me. 

Tip #1 – Menu Plan for the entire trip, including breakfast, lunch, dinner, and travel snacks.

I kept a master notebook with pages for what to pack from the bathroom, the kitchen, and the bedroom, as well as extra odd things. In that same notebook, I wrote out a menu plan for the whole trip. Each day had 4 lines – breakfast, lunch, dinner, and snacks. Next to the day, I would also write what plans were for the day. The activities dictated what I would fix. If we needed to get out the door quickly (to get to the 7 am farmer’s market, for example), I’d do fried eggs. If there was more time, I planned smoothies or pancakes (recipe at the end of the post).

Now the important thing about the notebook was that it was flexible. It was not holy writ. Things could be shuffled from one day to another, depending on the weather, our energy level, and what we felt like.

As I menu planned, I kept running lists going on three separate notebook pages. They were shopping lists for Costco, Whole Foods, and the health Food store. Then I kept another page for the “Must buy or make before we go” items.


Tip #2 – Make Shopping lists for as soon as you leave the airport

Just outside the airport on Maui is a Costco. Must have items from Costco:
            Coconut oil
            Salad greens (organic)
            Sea Salt
            Bananas (they had local apple bananas there!)
            Wine (if you’re into it. Most other places don’t have a brisk turnover of stock and it’s not reliably good. Plus Costco’s prices are good.)
            Frozen fish
            2 pack of frozen organic chickens
            Frozen organic chicken breasts
            Cheese ( we got Dubliner and Gouda. Yes, we ate it all. Don’t judge.)
            Chicken Sausages (http://www.aidells.com/products)
            Onion
            Garlic
            Lemons
            Limes
            Avocadoes
           
(dragon fruit)
Whole Foods:
            Almond butter
            Organic Valley Pastured Butter
            Fresh veggies
            Organic canned Salsa
            Eggs
            Olive Oil
            Organic Apple Cider vinegar
            Tomatoes


Health Food Store:
            Coconut milk (the only place that carried coconut milk without guar gum. Be forewarned, it’s $3.86 a can)
            Additional fresh fruits and veggies
            Kombucha. At about $5 a bottle, this was a huge splurge

Farmer’s Market:
            Farm eggs (they cost $6/dozen. Get over it. That’s still a cheap protein source. )
            Raw Honey
            Coconut water kefir
            Local fruits and veggies

Things we packed:
            Wild, troll caught tuna from Costco. The Costco in Hawaii doesn’t carry it. Worth taking as it makes a great quick lunch or a snack.
            Frozen grass-fed beef in our checked-through luggage, double bagged in Ziploc bags
            Spices in zip bags, labeled. I included spice blends for specific recipes.
            Gelatin. WARNING – Place into a different container, like a jar with a lid. The change in air pressure made our tube of gelatin sneeze all over everything inside the suitcase, which made for several sticky messes)
            Epic bars. Greatest travel meal replacements ever. 
            2 lb bag of soaked, dried walnuts
            Dried apple slices
            Beef jerky (made from flank steak and beef heart – fabulous to sneak in organ meats.)
            Tea bags
            Fermented cod liver oil, nestled next to the frozen meat
            Coconut flakes (for This recipe. It’s tremendous)
            Coconut flour
            Raw Cocoa powder
            Water filter pitcher
            Coffee French press


Our condo was fairly well stocked, but unfortunately, all of the pans were non-stick. Boo! We even went to the thrift store to see if we could score a cast-iron skillet, but were out of luck there. All they had was non-stick cookware that was no longer non-stick and would shed large chunks of Teflon into your scrambled eggs. Double boo.

Other than that, we ate like kings! We feasted on lots of salads, quick meals like hamburger patties, tuna salad (over salad), chicken salad, and lots of grilled meat.


Even on the go, we ate well. I put together Paleo Packs in sandwich size plastic bags. The mix should be protein, fats, and carbs, so I put in jerky, nuts, coconut flakes, and dried fruit.

A couple of times I wanted DESSERT! So I made it. Cocoa powder, coconut oil, shredded unsweetened coconut, and a bit of honey. Awesome.

One of the favorite breakfasts for my family was a recipe that I cobbled together, adapting an online recipe with what I had on hand. We served it with sausage and it made for happy days with full tummies and even blood sugar levels.
Almond Butter Pancakes
(makes 12-16 4” pancakes, using about an 1/8 cup batter per pancake)

3 large eggs
1/4 cup coconut milk
1 tsp honey
2 Tbsp coconut flour
1/2 cup almond butter
1/2 tsp baking soda
1/4 tsp salt
1 overly ripe banana, medium sized, mushed
1 Tbsp gelatin

Combine all ingredients in a mixing bowl. Let sit for 10 minutes. The batter will thicken a bit as it sits. While the batter is resting, heat a large skillet (not non-stick!) over medium heat. Use coconut oil to grease the pan and scoop the batter into the heated pan. Let the pancakes cook till bubbles have formed throughout and then turn, cooking briefly on the other side.

Serve the pancakes with plenty of good butter. You can top with unsweetened applesauce, if you need a bit of sweetener on it.


*Technically, we weren’t on GAPS for the vacation. We couldn’t pack bone broth. But we did eat as clean as possible. And the rest we shrugged and said, “It’s vacation!”

Tuesday, September 3, 2013

So Much To Do At The Zoo


I went to the zoo this week with my kids and granddaughter. I am blessed to live a short drive from the fabulous Woodland Park Zoo. I've taken my kids there since they were tiny tots and they've loved seeing all the changes that have happened at the zoo.

Since we started going to the zoo, they've made a beautiful African savanna exhibit where the giraffes can wander and nibble on the trees, hippos can wallow in pools, and zebras can strike a pose for the cameras.

The penguin pool has been revamped so that you can see the penguins climb the rocks, dive into the water, swim underwater, and receive their ration of something that smells suspiciously like fish. Actually, I'm pretty sure it's fish. If not, they might want to get their refrigerator checked, because something definitely smells fishy there.

A Northwest trail has been built to showcase wolves, eagles, and other critters from around my neck of the woods. Gorillas now have a large area where they can swing, rolls, play, cuddle, and hang out to groom each other, French braiding their back hair. Otters have their own slip and slide stream. And there is an awesome space for little kids to get in touch with farm animals, seeing how chickens lay eggs, pretend milking a cow, and petting goats and sheep.

The animal exhibits aren't the only thing that's changed at the zoo, though. My daughter pointed out something fascinating. Kids at the zoo have changed.


When my kids were vey little I'd bring along an umbrella stroller (the kind that's lightweight and folds easily), just for them to rest in. But as soon as they were walking, they didn't spend much time in the stroller. They were too eager to run and explore. There were places to climb, things to touch, and, oh yes, animals to see. Why sit still in a stroller when there was all that to experience?

What we saw a ton of at the zoo this week was kids in strollers as big as an SUV. And these kids were strapped in. And they always had snacks in front of them. Once it was pointed out to me, I was shocked. Kids are ALWAYS EATING. Even when they are too big to put in a stroller, they walk with food in their hands.

What are we teaching our children if we take them to the zoo, strapped into what's basically a couch, and put food in front of them? Honestly, you might as well stay at home, put the kids on a real couch, turn on the Discovery channel, let them eat cereal and candy, and save on the gas.


Doing the zoo this way does two things:

1- The kids never engage with the environment. Sure, it's a pain to constantly make sure your kids aren't getting into trouble, but the seemingly easy trade-off for not training your children to obey you is that you get passive, couch potato children. They are not going to be curious, eager learners.

2- They will get fat. No exercise plus food they're not hungry for is a recipe for obese kids. Didn't I hear somewhere that kids these days are getting fatter? Yeah. There might be a reason for that. Parent's are strapping their kids into mobile restraining devices and feeding them unneeded junk. (In my book, even "healthy" whole wheat Cheerios are junk.)

So stroller + snacks = passive and massive. Ugh.

"But," I hear those mothers saying, "my cherub gets so hungry! If I don't bring snacks she whines the whole trip."

Easy solution. Feed that child a nourishing, satisfying, nutrient dense breakfast. Then let them run and play at the zoo. They'll be too busy to even notice that they don't have their snacks in front of them!

Most mornings at my house breakfast is either eggs (fried or scrambled, sometimes with cheese and salsa on top), or smoothies made with bananas, farm eggs (raw), spirulina powder, cacao powder, grass-fed gelatin, homemade raw yogurt and homemade raw milk kefir. On Saturdays, though, I tend to put a little more effort into it.

This is a wonderful coffee cake that I made with freshly picked strawberries. My husband and daughter both asked for scrambled eggs to go with it, as they feared the carb crash that usually follows a coffee cake. Not to worry! Since it has coconut flour and a ton of eggs, it's hearty and satisfying and won't leave you feeling lethargic in a carb coma. Try it and see how much more energy you have for the day!


Strawberry Breakfast Cake

6 eggs
1/4 cup coconut oil or butter, melted
2 Tbsp raw honey (or maple syrup, if you're not on GAPS)
1 Tbsp pure vanilla extract
1/2 cup milk of choice (coconut, almond, raw dairy)
1/2 cup coconut flour
1 tsp baking soda
1/4 tsp sea salt
1-1/2 cups strawberries, diced and divided

Topping:

1 cup nuts/seeds of choice (I used soaked and dehydrated almonds, walnuts, sunflower seeds)
1/2 cup shredded unsweetened coconut flakes
2 Tbsp raw honey
2 Tbsp butter or coconut oil
1 Tbsp cinnamon
pinch of sea salt

1- Preheat oven to 350 deg. F. Lightly grease an 8x8-inch baking pan with coconut oil.

2- In a large bowl mix together the eggs, oil or butter, honey, milk, and vanilla.

3- Add the coconut flour, baking soda, and salt. Stir until combined.

4- Fold in 1 cup of the diced strawberries. Pour the batter into the prepared pan.

5- Combine all of the topping ingredients in a small bowl.

6- Spoon the mixture over the top of the batter. Sprinkle the remaining 1/2 cup strawberries over the top.

7- Bake for 45 minutes, or until the a cake tester poked in the center of the cake comes out clean. If you need to bake longer than 45 minutes and the top is looking browned, cover it with a piece of foil so that the topping doesn't burn.


Saturday, August 10, 2013

You Might Be A Hippie If...


Sometimes I get so entrenched in my routines that I forget that what I do and how I live is not average or "normal." Then a visitor comes to my house and I see my life through their (wide) eyes and I realize, "Oh, this is kind of different." So, if you're not sure where you fall on the scale of Normal to Weirdo, this post might be helpful to you.

You might be a hippie if-

1- You schedule your week around the Farmers' Markets and picking up your Farm Box.

2- An essential kitchen tool is the roll of painter's tape and the sharpie for marking all of the mystery mason jars in the refrigerator. Otherwise, how do you know what's raw milk, what's kefired milk, what's homemade yogurt, what's homemade sour cream, or whey?

3- You walk outside barefoot as part of your health care regimen.

4- You blacken your teeth with activated charcoal. To get them white.

5- You make your own lotion, deodorant, and toothpaste.

6- Your most used kitchen appliance is your dehydrator. Or your juicer.

7- You spend a half an hour each morning swishing a mouthful of oil.

8- When you're pregnant, the big question is whether or not you'll have a water birth. It's a given that you will birth at home with a midwife.

9- You participate at nurse-ins.

10- You get excited to find a new recipe that uses beets. Or kohlrabi. Or fennel.

11- You plant food plants in the front yard instead of ornamentals.

12- You consider moving to a different neighborhood so you can keep chickens. Or you already have chickens, but want more.

13 - You consider moving to a different neighborhood so you can keep a goat.

14- Your kids are the only ones in their play group that aren't vaccinated.

15- Your dining room has a corner devoted to a collection of 2 gallon jars brewing Kombucha.

16- Your kitchen counters are full of jars bubbling with fermenting foods.

17- You not only know that the head of the FDA used to work for Monsanto, you care. Deeply.

18- You examine the label on every bar of chocolate at Whole Foods for one without the dreaded "soy lecithin."

19- Your toddler doesn't understand how to play with the plastic drive-though toy at the play center. Or orders "broccoli" at the window.

20 - You pack your lunch in glass and stainless steel.

And the top, most telling sign that you might be a hippie? Rinsing and reusing your plastic vegetable bags. Although, if you were really, truly a hippie, you'd bring your own homemade cloth vegetable bags.

Now that you've cleared up your standing on the normal to weirdo scale, let me introduce you to a new favorite dish in our home. As you might know, we used to have pizza every week. And that was one of the saddest parts of giving up grains. No more pizza!  But happily, we have found workarounds. Cauliflower crust pizza is a keeper. We also love making mini pizzas with rounds of squash (maybe lazy me will get around to blogging that someday). But this recipe incorporates pizza flavors with the ease of a quiche. My family gets so excited when it's on the menu!

The top three reasons for making pizza quiche are:

1- It makes two, so there's some for tomorrow's lunch.

2- It's delicious. Everyone will love it.

3- It's real, whole food, so you can enjoy it and not regret it later.


GAPS Pizza Quiche
 - adapted from Spunky Coconut

1 small butternut squash
Olive oil
1 lb Italian sausage
1 onion, diced
2 handfuls spinach or kale
1/4 cup sliced olives
1 can full-fat coconut milk
1/4 cup tomato paste
8 eggs
1/2 tsp sea salt, plus more for sprinkling
1/4 tsp garlic powder
1/2 tsp dried Italian Seasoning
1/4 lb. grated GAPS legal cheese

1- Preheat oven to 350 deg. with rack in the middle of the oven.

2- Peel the butternut squash and slice the neck into 1/4" thick slices. Cut the bulbous part in half and scoop out the seeds.

3- Brush 2 pie dishes with olive oil and lay the squash slices into them, covering as much as possible. Cut the bulbous part of the squash into pieces, fitting them into gaps for better coverage.

4- Brush the squash with olive oil and sprinkle with sea salt.

5- Place the pie plates in the oven for 15 minutes.

6- While the squash slices are baking, cook the sausage in a skillet over medium heat.

7- When the sausage is cooked through, remove it to a bowl and set it aside. Pour a tablespoon of olive oil into the skillet and cook the onions until they are softened.

8- When the timer rings, remove the squash from the oven and heat the oven to 375 deg.

9- Divide the onions between the two pie pans.

10- Place the spinach or kale into the skillet over med-low heat. Place a lid on the skillet and cook just to wilt the greens. Remove the lid and let the steam rise off the greens. If they're sweaty, roll them into a kitchen towel or paper towels and squeeze to remove excess moisture. Divide the greens between the two pie plates.

11- Divide the cooked sausage between the two pie plates.

12- In a blender puree the coconut milk and the tomato paste.

13- Add the eggs, salt, garlic powder, Italian seasoning and puree again till frothy.

14- Pour the egg mixture evenly over the sausage. Quickly sprinkle with the cheese and place in the oven right away so they won't lose their loft.

15- Bake for 30 minutes, or until just set in the middle. Let cool for 15 minutes before serving.


Wednesday, May 29, 2013

The Zen of Grocery Shopping

Most people I know find grocery shopping annoying. I think it's annoying to try to get out the door to go grocery shopping, but once I'm there, I enjoy the calm zen of shopping. How do I achieve that inner peace, you ask? I am happy to share my secrets of zen procurement with you.

Step One- This one is crucial and non-negotiable. Leave the kids at home. But it's a good teaching time, you say. No. There are other teaching opportunities. But I don't have anyone to watch them, you say. Let them watch television, I say. They'll never even know you're gone. (Bad parenting? Perhaps, perhaps.) The only exception to this iron-clad rule is if you have an infant. They will know. Especially if you're breast-feeding. And if your baby wakes up hungry and you're not there, you will be strolling down the aisles trying to cover your shirt with large collard greens to hide the leaking breast milk. Strap your baby to you to go shopping. Although, really, if you have a nursing baby, you should send your husband out to do the shopping. After all, you're already getting food for one member of the family.

Step Two - Don't rush it. Take you time. Go down each and every aisle. Stop to admire the artful produce pyramids. Take a few moments to read the labels. Chat with the butcher about the best way to cook a particular cut of meat.

Step Three - Enjoy the music. If they are playing hits from your high school years, you have my permission to hum along.

Step Four - If they are giving out samples, don't take one and rush along. Stop and chat with the sample lady. Ask questions about the product. They are happy to have people interested and it makes them feel less like a hog farmer at feeding time.

Step Five - If there is a wine section, find the wine guy and ask advice on what to serve with a vegetable medley casserole. Even if you don't drink wine. Wine guys are passionate about their wine and one question can keep them talking for upwards of 20 minutes.

Step Six - Chat with the person at the checkout counter. Ask about their plans for the weekend, whether they've tried the frozen shrimp and if they liked them, what the medical and dental benefits are of the grocery store. Talking slows them down.

Step Seven - If the store offers help getting your bags out to the car, by all means accept that offer. A nice chatty bag boy can extend the shopping excursion another 5-10 minutes. After all, he's happy to get out of the store and delay getting back in as along as possible.

Step Eight - You've been gone a long time now. When you arrive home, honk the car horn, indicating that you require assistance with the copious amounts of food you've brought home. And obviously, since you've had such an exhausting time getting the food (fighting traffic, fighting crowds, lugging the bags, etc), you can't be expected to put away all the groceries. That task should be done by other family members while you rest your feet and possibly sample that wine the wine guy recommended.

See how relaxing that sounds?


One of the things that annoys me deeply is having the zen of my grocery shopping time shattered by whining children. Some times I have to bite my lip hard to keep from going up to the parent and offering to smack their child for them. What terrible parenting to allow their child to whine relentlessly until they get their way! Why didn't they leave them at home parked in front of a cartoon?

And usually the stuff the kids whine for is garbage. Truly putrid stuff filled with artificial food coloring, HFCS, sulfites, and about a wheelbarrowfull of sugar. No wonder those kids are whiny if their parents let them eat that.

Instead, they should offer them treats like these brownies. Something that doesn't spike their blood sugar and make them behave like monkeys on cocaine. These are a decadent treat for those of us in GAPSlandia. Full of dark chocolatey flavor, sweetened only with honey, and grain-free. Whoo hoo! The berries were a delicious complement to the brownies. A dollop ice cream would not have gone amiss, but, sadly, I didn't have any on hand. But no one whined because, after all, not only did I bring home the groceries, I baked the brownies!


Real Food Grain-free Fudgey Brownies
(adapted from The Freckled Foodie)

1 large, ripe avocado
1/4 cup sunflower seed butter
1/2 of a small banana
1/4 c. honey
4 oz unsweetened, 100% dark chocolate
1 Tbsp coconut oil
1/4 cup unsweetened dutch process cocoa powder
3 large eggs
1 Tbsp vanilla extract
1 Tbsp coconut flour (sifted)
1 tsp baking soda
1/2 tsp fine sea salt

1- Preheat oven to 350 deg. F.  Prepare a 9x9 pan - either grease with coconut oil or line with foil.

2- Cut avocado in half, peel and seed, and place in food processor. Process until VERY smooth.

3- In the top of a double boiler set over simmering water, melt the dark chocolate and coconut oil together, stirring frequently.

4- Transfer avocado to a large bowl and add the melted chocolate mixture and the remaining ingredients.

5- Using a hand mixer, whip until very well combined and fluffy, about 3-5 minutes.

6- Spread batter into the prepared pan. Bake for 28-30 min. Remove when a toothpick inserted near the center comes out clean. Let cool before cutting.

7- If you have the willpower, allow these to chill in the refrigerator for up to 3 days for optimum flavor. Or, break down and serve immediately with berries and whipped cream or ice cream.


* * * * *

Note: for those who are humor impaired, this was a humorous post. Let me reassure you that I am not actually advocating leaving your children home unsupervised. Nor do I actually smack other people's children. But sometimes I am tempted.

Tuesday, April 30, 2013

More Notes From Gapslandia

When I work out I'm a terrible clock watcher. I know you're not supposed to do that; you're supposed to focus on your workout and be mentally present. Well, some days being physically present is the best I can do. And I look to the clock to help me get through the workout. I break things into fractions.

My mental conversation for the cardio portion of my workout goes something like this:
  " It's only 5 minutes in. I can't quit yet! I know my calves hurt, but they always hurt 5 minutes in. It'll get better. Keep going."
  " Oh boy, 10 minutes in. I'm a third of the way through!"
  " That particular move (bang, bang) means we're halfway through. Hooray!"
  " I'm tired, but there's only 10 minutes left. I know I can do 10 more minutes."
And then, I'm done. Sweaty and weary, but I made it all the way through!

It was something of a shock when I counted it out on my fingers to realize that we're already 6 months into GAPS. If we go the full 2 years, that means we're 1/4 of the way through. Hooray! I think we can do this thing!

Here are a few thoughts for those who are interested in GAPS, contemplating doing GAPS, or know someone who is on GAPS.

1- GAPS is not a "gosh I need to lose 10 lbs for swimsuit season" diet. It's a tough life-style change and not to be undertaken capriciously. Read up. Get all the information. If possible, talk to others who've done it. That might need to be online, as not a lot of people have heard of GAPS. My naturopath hadn't. (I'm no longer seeing that naturopath.)

And if you know someone who's on GAPS, please don't say things like, "Oh, you're so skinny, you don't need a diet!" "You can eat anything you want and not gain a pound." "Go ahead and live a little. You know you want it....." That's not helpful.

The decision to go on GAPS is motivated by serious health issues. Unless you want to hear a whole rundown on how that seemingly healthy person isn't, don't ask. It's a big decision that they've made for big reasons. Respect that.

2- If you've been convinced that you or your family would really benefit from doing the GAPS diet, look at where you are now and be realistic. If you're eating the Standard American Diet (aka, crap), then it will be brutal to jump to go right into the Intro Diet. Take some baby steps. Work towards it. Start reading labels and eliminating all the junk from your food. Clean out your pantry. Make the choice to stop buying soda, candy, chips, and junk. You know, if it's not there, you can't eat it.

After you've purged the pantry, start cooking. For some folks, this is no big deal. They already cook everything. But for some people, this is huge. There are families that never cook. Never. They either eat out, go get fast food, or pull something out of the freezer. The oven and stove are not used, other than for reheating. For that kind family, the intro diet would make their heads explode.


If you are that kind of family, start by making chicken broth. Broth is the backbone of the GAPS diet and you'll be making LOTS of it. And it's not hard at all, but if you've never made it it might seem daunting. I'll break it down for you below. Try it! Once you see how easy it is, you'll be motivated to try making other things.

3- Keep your reasons in front of you. It's easy to have a pity party about all the things you can't have, but you can change your attitude and be grateful for all the positive changes you are seeing. When the pounds come off on the Intro Diet, rejoice in that. When your picky eater husband tries green vegetables and likes them, get excited about that. When your picky eater child says, "I love this! Can you make it again?" to a dish he previously wouldn't have touched, throw a party! And when your skin clears up, your hair stops falling out, and your chronic stomach ache disappears, shout it from the rooftops!


Chicken Bone Broth

1 organic whole chicken
1-2 onions
4 (or so) organic carrots
4 (or so) organic celery stalks
4-6 peppercorns
Filtered water
Organic apple cider vinegar

What goes into a bone broth is really subject to what you have on hand. The only non-negotiable items are the organic chicken and the filtered water. The chicken needs to be organic as arsenic is routinely added to chicken feed to keep parasites away. That arsenic ends up in the non-organic chickens. Ick. And the water needs to be filtered so you don't make broth that tastes like a swimming pool.

Prior to making the broth, you can keep a scraps bag in the freezer. Bits and bobs of vegetables can go in there to save for broth - carrot shavings, the last 1/4 of an onion, etc. Then when you get around to making broth, you can dump it all in. If you don't have that bag in your freezer, no worries. You can still make great broth.

1- Pull the chicken out of the packaging, removing the giblets (the neck and organs, usually stuffed into the cavity of the chicken) and any non-chicken bits (the little chicken Pampers that soak up blood). If this sounds too icky to you, recruit a child to help. They'll think it's cool in a gross kind of way. Set the giblets aside.

2- Place the chicken in a stock pot. At least 4 quarts in size. Roughly chop up the vegetables and throw them in with the chicken. Cover the chicken with water (cold or room temperature) and set the pot over medium heat.

3- Bring the water to a boil, then place a lid on the pot and turn off the heat. Let the residual heat continue to cook the chicken for 15-20 minutes. Turn the chicken over, replace the lid, and let it sit for another 15-20 min.

4- Take the chicken out of the water (carefully, so you don't burn or scald yourself!) and remove it to a cutting board. If you poke it with a knife, the juice should run clear. Pat yourself on the back. You just poached a chicken!  Remove the meat from the bones and toss the bones back into the pot. Save the meat for other meals (chicken salad, chef salad, enchiladas, etc).

5- Add the giblets to the pot. Add more water, if necessary to bring up the water level.

6- Pour in 1/4 cup (or so) of apple cider vinegar or lemon juice. You need to ad an acid to draw the minerals out of the bones. Bring the broth to a boil over medium heat and turn it down to just simmering. Simmer for 24 hours. (This part can be done in a crock pot for safety and convenience)

7- Strain your lovely broth. It should be a dark, golden brown now and smell amazing. The bones should be soft and the cartilage dissolved. Toss all of the chunky bits your strained out and put your lovely broth into quart containers to freeze. Be sure to label the contents and put the date on it. It will keep in your freezer for at least 6 months, but if you're on GAPS, it won't last that long!

Monday, March 25, 2013

You Think I'm Nuts? You Might Be Right


Insomnia sucks. I've been battling it for over two years. In that time I've had maybe a handful of nights when I slept through the night. I have no trouble getting to sleep (because I'm so exhausted), but at 2 or 3 am my brain goes into hyper-drive and the weirdest thoughts come out to play, pinging around in my brain like quarks in a particle accelerator.

This morning what I woke to was my brain having a conversation with itself. "What if, " it postulated, "you did a mash-up of The Hunger Games and The Dating Game?" "Yes," it answered, " you could have a group of teenagers fighting to the death for a chance to go out with..... Justin Bieber!"

So while weary me is just wanting to go back to sleep, my brain is planning out what The Hungry Dating Game would look like.

The volunteers (I'm unsure on the number - one from each state? an even dozen? ) would stand on their platforms around the cornucopia, eyeing the loot and eyeing each other. Would it be smarter to run, or should they dash in to get the goodies. And which to choose? The hair dryer? The eyeshadow palette? The curling iron (a lethal weapon, if you can find an outlet)? A safe bet would be the Prada backpack. It's bound to have some mascara that can be used to stab someone in the eye.

I'm unsure how the actual games would play out. There would doubtless be some horrific scenes of broken nails and hair pulling. But when the final cannon sounded, there would be one victor. And poor Justin Bieber would have to go out with a mass murderer. But, that's why his bodyguards make the big bucks, right?

Eventually I fell back to sleep, waking groggy and disoriented several hours later. At which point I'm bored with bed and get up to go do the Sudoku on the computer. And think about breakfast.

All week long we have eggs for breakfast. If you're a fat-o-phobe, it might give you heart palpitations to learn that I have 2-3 eggs fried in coconut oil every day, topped with butter. My son, when he's hungry will have 4, sometimes making them into an omelette with cheese. But he gets bored with eggs. So on the weekends I try to do something different. Today I'm going to make waffles. Lovely waffles with coconut flour and lots of eggs, so they're high in protein and won't give a blood sugar spike, followed by a carb coma. I'm going to make an extra big batch so that we can have leftovers (hopefully). Left-overs in waffle land mean (gasp!) sandwiches for lunch! My husband, the sandwich-o-phile, will be so happy.


Coconut Flour Waffles
 - adapted from Health, Home, and Happiness

1/2 cup melted coconut oil, butter, or ghee
1/2 cup coconut flour, sifted or sieved
12 eggs
1 Tbsp pure vanilla extract (read the label to make sure there's no added sugar)
1/2 salt
1 Tbsp gelatin

1- Preheat waffle iron. Grease it generously with coconut oil.

2- Mix all the ingredients in a large bowl. Allow the batter to rest for 10 minutes. It will thicken as it rests.

3- Pour batter onto the iron, using a spoon or small cup appropriate to the size of your waffle iron. Cook for 3-4 minutes, or until golden brown.

4- Serve with lots of butter and whatever else you choose. If you want to save some for lunchtime sandwiches, allow them to cool draped over the handle of a wooden spoon so they don't get soggy.

Friday, March 22, 2013

Taco Rack Winner!


And the winner of the Taco Rack giveaway is.......Kelly!

Please get back to me by Monday with your contact information so we can get your Taco Rack shipped out to you.

Congratulations, Kelly, and happy tacoing!


Tuesday, March 19, 2013

Taco Bliss Giveaway


It blows my mind that someone invented the folding chair. I mean, I can barely get the things opened, and someone, looking at a regular chair one day said, "Hmm, if I could fold this up, it would take up way less storage space." And then they made it happen.

Inventors are amazing. When I'm irked by something, I whine and complain about it. If I do think up a solution, it's so impractical it's laughable. Case in point: getting stuck behind a semi going 35 mph on a freeway onramp. Frustration! Solution? Transporters. Like in Star Trek. Why don't we have them??

Clearly I do not have an inventor's brain. And inventor is someone who looks at a problem and then thinks through the steps to a solution. And then takes those steps to improve their life and the lives of countless others.

A friend of mine, Nicolas, is a fanatic about Mexican food. His deep and abiding passion in life is tacos. And Elvis. But that's another post. Back to the tacos. He loves tacos, but was always frustrated with them. Taco shells that shatter when you bite into them? Lame. It's eating taco salad with your hands. 

And really, what is the heart of Mexican food? The reason we love to go to Mexican restaurants? I mean, besides the margaritas. The cheese, of course! Melted, gooey cheese. The more the better!  Where in a typical homemade taco is that ooey gooey delight? You don't get it. By the time you sprinkle your cheese over your cooked meat, the meat is too cold to melt the cheese. Fail!

Such were the ruminations of Nicolas as he worked on a job at a factory that used a laser to cut steel. The light bulb moment hit. Aha! Cut steel into a shape that would hold a taco and then you could bake the taco, melt the cheese, and have peace on earth in our time! Well, maybe not that last one, but you could definitely have a happier dinner table.

Nicolas send me a Taco Rack, his invention, to try and I was super impressed with the craftsmanship (made in America!). It's sturdy stainless steel, so it's good for a lifetime. It's dishwasher safe, which makes it a win in my house. And, bonus, it comes apart to store flat in a drawer! I love that!


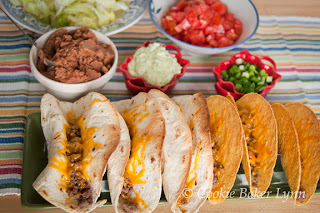
I took my Taco Rack to my sister's house to make tacos. (She eats grains, plus her house is way cleaner than mine.) We tried both corn and flour shells, prebaking to crisp, filling with cooked, grass-fed ground beef and cheese, and then baking to make the cheese melt and the heart sing. OMG, what a difference a baking makes. When I packed up to head home my niece was happily chomping one one of them.

At home, I made the GAPS version. My daughter helped me to dream these up and I named them. They're like little canoes of food. Made from zucchinis. Zucanoes. What do you think?


Zucanoes (GAPS-friendly)

zucchinis
Italian sausage
cheese
toppings
sour cream
salsa


Start with smaller zucchinis. You can't use the end of season baseball bats here because they need to fit on the Taco Rack. Preheat the oven to 350 and line a baking sheet with aluminum foil.

Cut a V-shaped wedge out of the top of the zucchini, leaving the ends alone. If you cut all the way through, they'll leak. Save your wedges for soup, stir-fries, or to eat with dip. With a spoon, scrape out the seeds. Discard the seeds.

Put the Taco Rack on the cookie sheet and place the zucchinis on the taco rack. Bake in the preheated oven for 10-15 min. (The bake time depends on the size of the zucchinis. You want them crisp/tender)

Cook Italian sausage and stuff the zucchinis 2/3 full with sausage. Sprinkle generously with grated GAPS-legal cheese. Return to the oven and bake till the cheese is nicely melted.


Remove from the oven, top with your choice of fresh toppings. I used chopped tomatoes and drizzled sour cream over them. They were amazingly good! 

Now, to reward you for making it to the bottom of the post, a giveaway!

Because he is kind and generous, Nicolas offered to share the joy of oven-baked tacos with one of my US readers. Leave a comment below to be entered in the giveaway drawing. If you mention the Taco Rack giveaway with a link on Facebook, Twitter, or Pinterest, come back and leave another comment letting me know that for extra entries. I'll do a drawing on Friday and let you know who the lucky winner is!