Thursday, January 19, 2012

What To Eat

One of the hardest parts about going grain-free is menu planning. I'm such a creature of habit that it's hard for me to think outside of my standard menu go-to's: hamburgers, tacos, and pizza.

Pizza is particularly hard as we've had a tradition in our house of having pizza every Saturday night.  Ever since I learned how to make a good pizza dough, we've had pizza and a show on Saturdays. We had pizza with Star Trek- The Next Generation. We had pizza with The New Adventures of Lois and Clark. And now we have pizza with whatever we've Tivo'd (that's a verb, right?) You can see that pizza is firmly entrenched in our family culture.

So after our initial foray into grain-free eating, we approached the coming weekend with dismay. No pizza? How's that supposed to work? What do other people eat on Saturday? And what do they eat on Sundays after church with football? You have to have cold pizza for lunch! I think that's like the 11th commandment or something.


It was my grown daughter who came to our rescue. She offered up her recipe that gives full pizza pleasure without grains - pizza in chili. It's an interesting concept - take a bowl of chili and stuff all of your favorite pizza toppings into it, smother it with cheese, and enjoy it with abandon (or with a bottle of wine). It was a hit! You can easily make it to suit your tastes and preferences by changing up the toppings. And really, you don't have to wait until Saturday to have it; that's just us.

Pizza Chili

1 Tbsp olive oil
1 green bell pepper, diced
1 small onion, diced
1 clove of garlic, minced

1 lb. ground turkey, chicken, or beef
1 lb. spicy Italian sausage, sliced (optional)

1 15 oz. can tomato sauce
1 cup marinara sauce
1 28 oz diced tomatoes
1 16 ox can kidney beans, drained and rinsed

Favorite pizza toppings (olives, mushrooms, pineapple, ham, pepperoni, etc.)
sea salt, basil, oregano, thyme (to taste)
Grated mozzarella cheese

1- In a large pot, cook the bell peppers, onions, and garlic in the olive oil until they begin to sweat. Add the ground meat  (and optional sausage, if using) and cook until browned.

2- Stir in the tomato sauce, marinara sauce, diced tomatoes, kidney beans, pizza toppings, and spices. Bring to a boil. Reduce heat; simmer uncovered for about 30 minutes or until chili reaches desired thickness. If it is too thick, add water.

3- Reduce heat and serve in bowls, topped with mozzarella cheese (optional but strongly suggested!).

Sunday, January 15, 2012

What's New


It's strange how some arbitrary things become meaningful. Birthdays that end in zero have much more importance than the rest of the decade. Anniversaries that are divisible by 5 are held in higher esteem than the others. And buying a new calendar makes us feel that somehow there's a new start; everything's new, fresh, and open to reinvention.

One of the things I've been reinventing is our diet. I'm constantly tinkering to see what will help us all be our healthiest. This past Christmas we spent passing the flu around like a White Elephant gift being regifted over and over. We were sick of being sick! So my family didn't grumble too much when I informed them that we were going to be trying something new - going grain-free and sugar-free.

Shocked? I know, me too!

How's it going? Well, it's been interesting. The refrigerator has been fairly bare as I try to figure out what we can eat in place of what we used to eat. Snacks, treats, and meals are all impacted. Empty are the bread drawer and the cookie jar. This is a hardship for the family of the Cookie Baker and former Bread Baking Babe.

My husband's standard lunch is a sandwich and some sort of chips. Well, that's not working out. Take away the bread and chips and you're left with... well ... stuff piled on a plate.

I've figured out that the job of grains is to:

   1- Define portions. A taco is clearly one serving; remove the taco shells and you've just got a big taco salad.
   2- Provide transportation for the meat. Ever try to eat a big double decker hamburger with all the trimmings sans buns? Sloppy mess. Speaking of which, what's a Sloppy Joe with buns? Stew!
   3- Act as a filler. If you eat a bowl of rice with your stir fry, you only eat 1/4 as much of the stir fry, so it stretches further and is more economical.

Once of the hardest things to do without has been bread. No sandwiches. No toast. Nothing to sop up the egg yolk from the morning fried egg. :-(

I realized something had to give when we were at the grocery store and the bread aisle just about did us in. Rolls, loaves, wraps, pitas, and bagels. Ahhh, bagels.....  So I went home and searched one of my favorite sites for special dietary needs,  The Spunky Coconut. I found just what I was looking for - a bread that would be safe for out new diet. I had some pumpkin puree in the fridge leftover from a holiday flurry of pumpkin smoothies and whipped up a loaf.

I wish that I had taken a picture to share with you of my son's happy face when he saw there was bread he was allowed to have. We demolished the loaf in a day and he anxiously asked if I had any more pumpkin puree.

Pumpkin Bread
 - adapted from The Spunky Coconut


1 cup pumpkin puree
4 eggs at room temperature*
1/3 cup coconut sugar (which is low glycemic index)
3 Tbsp liquified coconut oil**
1/4 tsp vanilla creme liquid stevia
1/2 tsp sea salt
2 tsp cinnamon
2 tsp pumpkin pie spice
1/4 cup tapioca flour
1/2 cup coconut flour, sifted (don't skip the sifting!)
1/2 tsp baking soda
1/2 tsp baking powder
1/2 cup chopped walnuts
1/2 cup raisins

1- Preheat oven to 350 deg. F. Line the bottom of a loaf pan with parchment paper and grease the pan.

2- Place all of the ingredients into a large bowl. Beat with an electric mixer. (One advantage of baking gluten-free is that you don't have to worry about over-mixing and getting a tough product.)

3- Scoop the batter into the loaf pan, smoothing it to make an even loaf.

4- Bake for about 50 minutes. Remove from oven and let rest in pan for 5 minutes then remove from pan and allow to cool on a cooling rack.

Serve with butter or cream cheese.

*If the eggs are cold, it will cause the coconut oil to harden. To bring refrigerated eggs to room temperature, float them in a bowl of warm water for about 5 minutes.

** To liquify the coconut oil, spoon it into a small, heatproof bowl and set that in a larger bowl of very warm water.

Saturday, December 31, 2011

Happy New Year!


Can it be that another year has already whizzed past? It's been a busy year. Between baking, homeschooling, vacationing, hosting cooking camps, and watching my granddaughter grow up, I haven't been posting nearly as much as I would've liked to. I'm not making a resolution of it, but I will try to be a bit more consistent in the coming year.

So here's a toast to the year gone by and the one yet to come. May the joy increase, the inevitable pains be productive, the lessons be learned quickly, and the calories not count.

I'm toasting with a glass of the best eggnog I've ever had. I've never been a big fan of egg nog. My family always got excited when the cartons showed up in the grocery store and I would buy it for them. But the gloopy texture and the odd taste didn't please my palate, so I'd pass.

But this fall a friend told me about his family's tradition of making eggnog. More specifically, Gramma made the egg nog. A gallon at a time. Every Christmas. Even on vacation.

He related how one Christmas the extended family was on vacation together in Mexico and it just wouldn't be Christmas without Gramma's eggnog. So they hiked into to town to buy the supplies for a gallon of eggnog. After hiking back with their burdens, Gramma put together the splendid libation, and they took turns stirring it for the 40-50 minutes needed to thicken it. Then it needed to sit in the refrigerator overnight to let the flavors meld. Having nothing else on hand, she poured the eggnog back into the plastic jugs that had held the milk.


The next morning, arriving back after some frolic time, they were appalled that the jugs were empty and in the garbage can. The cleaning crew told them they'd thrown the milk away since it had obviously gone bad. Aaaaaaahhhhhhhhhhhhh!!!!

Back to town. More supplies. More stirring. Then after more chilling, the cleaners held at bay, Christmas was back on. There was eggnog at last!

If the eggnog was worth that kind of perseverance, I just had to try. And, yes, it's worth it. Light, delicious, frothy, and not overly sweet. One small glass is never enough. I've become an eggnog fan!

You could make the recipe as written, but then you'll probably kick yourself and say, "Why didn't I make more??" If you want a whole gallon, multiply the recipe by 4.

I used raw, whole milk and farm fresh eggs from healthy chickens. If you are uneasy about using raw egg whites, you can substitute powdered egg whites for that. And if you are not comfortable pouring rum into your eggnog, you can use rum flavoring (which is alcoholic, too). If there are kids at your gathering, you can put the rum on the side so adults can add their own to taste. And if anyone dislikes nutmeg, putting it on the side accommodates their tastes as well.


Gramma Jane's Famous Eggnog 
 - adapted from Better Homes and Gardens New Cookbook, 1968 Edition
  serves 6 to 8

1/3 cup sugar
2 eggs, separated
1/4 tsp salt
4 cups whole milk
3 Tbsp sugar
1 tsp vanilla
Rum to taste
Freshly ground nutmeg to taste
1/2 cup whipping cream (optional)

1- In a large saucepan beat the 1/3 cup sugar and the egg yolks. Add salt. Stir in the milk.

2- Cook over medium heat, stirring constantly, until mixture coats a spoon. It will not be as thick as a custard. (I timed it while making a gallon. This took about 50 minutes. Taking turns stirring is a good way to make it easier.)

3- Pour this mixture into a medium mixing bowl and set that into an ice bath to speed the cooling. Stir occasionally as it cools.

4- When the mixture is cooled, beat the egg whites until foamy. With the mixer going, gradually add the 3 Tbsp sugar, beating until soft peaks form (when you pull the beater out of the egg whites, they should make little mountains that floomp over at the tip).

5- Add the beaten egg whites to the custard and mix thoroughly. Add the vanilla, rum (unless you'll be serving it on the side), and nutmeg. Chill 3 or 4 hours.

6- Pour the eggnog into a punch bowl or cups. Dot with dollops of whipped cream and add a dash of freshly grated nutmeg.


Thank you Jane for sharing the recipe.

Thursday, December 22, 2011

Christmas Crack


It's been 4 years now since I shared on my blog the perilous substance known as Killer Crack Peanut Butter Fudge. I've been strong and resisted the temptation to make it for quite a while now, but I've gotten some terrific comments from readers who have. My favorite was this:

This is the fudge my husband rebukes, the way any good evangelical man rebukes sin, fearing and secretly lusting after it. He literally carries plates of this stuff to the neighbors so that it will not dwell under his roof, or on his waist. And yet I keep making it. The making AND the rebuking; a weird holiday tradition now.

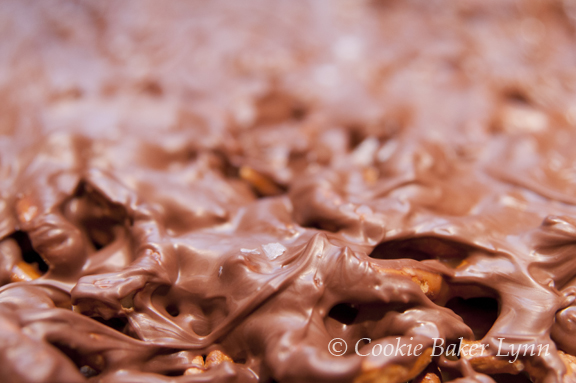
Yes, I am all about holiday traditions and keeping it festive for my readers. With that goal in mind, I present to you my latest concoction, Chocolate Caramel Pretzel Crack. This is the evil cousin of the Killer Crack Peanut Butter Fudge. It's pretty simple to make, and yet it's irresistible. And once you've tried it, you are helpless; you simply must go back for more. And more. And....well, you get the picture.


What is it, you ask? A layer of pretzels, a layer of caramel, a layer of chocolate, and then a sprinkling of Crack. And by crack I mean sea salt. Either chunks or flakes will do, just so long as you get a nice hit of salt with every sweet, sticky, gooey, chocolatey, crunchy bite. It's seriously amazing.

 I've made it three times now. The first time was just playing around with the idea, the second time was refining it and the third time was because the second pan went so fast I didn't take any pictures! And the third pan has been cut up and put into containers to be given away because I don't want my family to be in such a carb coma that they can't open presents on Christmas. But I'd better get those containers out the door quickly, or else certain unnamed family members might "accidentally" happen to pry open a container (even if it's already in a sealed box ready to be mailed) and "accidentally" fall face first into it. Not pointing fingers or naming names. I don't want to spoil Christmas. I'm just saying it's a possibility.

 
If you're looking for the ultimate last minute gift, the perfect hostess present, or just a decadent treat for your co-workers or yourself, this is it. Go buy some pretzels, cream, and chocolate and in a couple of hours (you can wait for the chocolate to set up, can't you?) you can be in serious salty-sweet heaven.


Chocolate Caramel Pretzel Crack


8 oz. pretzels
1 cup heavy cream
5 Tbsp unsalted butter
1 tsp sea salt
1/4 cup water
1-1/2 cup sugar
1/4 cup light corn syrup
1 lb. good milk chocolate, chopped
Sea salt (Fleur de Sel or Maldon Sea Salt are good choices)


1- Line a jelly roll pan (10-1/2 x 15-1/2-inches) with parchment paper and butter the paper. (Mine is a seasoned stoneware pan, so I skipped the parchment paper.)

2- Spread the pretzels in an even layer in the pan. Break up a few pretzels to fill in gaps as needed.

3- In a small saucepan combine the cream, butter, and salt. Bring to a boil over medium heat and remove from the heat. Set it aside.

4- In a large saucepan combine the water, sugar, and corn syrup. Stir gently just to combine. Be careful to not splash the sugar crystals up onto the sides of the pan. Cover the pan and bring to a simmer over medium-high heat. The steam from the simmering will help to wash any errant sugar crystals from the sides of the pan.

5- When the sugar is dissolved, remove the lid from the pan. Continue simmering until the liquid turns a golden caramel color. If your liquid is getting dark in one area and not in another, DO NOT STIR. You can pick up the pan and gently shake it side to side the even out the color.

6- When the liquid is golden caramel color, add the cream mixture and stir. The mixture will bubble up, so be careful. Simmer and stir with a clean wooden spoon until a candy thermometer in the mixture reaches 248 deg. F, approximately 15 min.

7- Pour the caramel over the pretzels evenly.

8- After the caramel has set, melt the chocolate in the top of a double boiler. For a prettier presentation, you can temper the chocolate. (I was attempting to temper the chocolate, but got distracted, so it didn't go well, hence the artistic swirliness of the chocolate. If that happens to you, don't worry. People will think you went to an extra effort to get those swirls, so if they compliment you, just say thank you.)

9 - Spread the melted chocolate evenly over the caramel layer.

10- Sprinkle sea salt sparsely over the top of the chocolate layer.

11- When the chocolate has set up but not hardened, use a pizza cutter or a knife to cut it into squares.


Thursday, December 8, 2011

Eureka!


Oh, man, I thought I was all set for Christmas. All of the planning and shopping done, just wrapping and shipping left to do. Wrong. Someone went and did something amazing, transferring their name from Santa's Good List to the Most Excellent List.

When I was typing up my last post I looked and looked for the recipe. I searched in all of the likely spots -the shelves that holds my cookbooks, the other other shelves that hold my cookbooks, the other other shelves that hold my cookbooks (what do you think, too many cookbooks?) and in the magazine holders that hold all my old Bon Appetite's and other cooking magazines. I came up empty handed and frustrated. I decided that since I hadn't posted since the paleozoic era (or close to that), I'd just throw up the post as is and hope that one of my faithful readers would know just what I was talking about and be able to supply the recipe. And there were many good suggestions, but none was it.

My husband saw my frustration and quietly went on a quest. While I had given up on the recipe and had moved on to other tasks, he methodically worked his way through all the possible hiding places, thoroughly checking each one. Then, with a pleased smile of satisfaction, he set the errant Baking Sheet in front of me.

"Where did you find it?" I squealed, leaping up to kiss him. He modestly informed me that it had gotten jammed behind the magazine holders and had slipped down and gotten somewhat squashed under them. What a guy! Santa's going to have to find an extra special way to reward this good boy. Maybe something with lace....


Whole-Grain Soft Molasses Cookies
 - adapted from King Arthur's Baking Sheet - Julie Christopher

1/2 cup (4 oz) applesauce
1 cup (7 oz) sugar
3/4 cup (6 oz, 1-1/2 sticks) unsalted butter, softened
1/4 cup (3 oz) molasses
1 large egg
1/3 cup (2-1/4 oz) crystallized ginger, minced
1-1/2 cups (6-1/4 oz) King Arthur Unbleached All-Purpose Flour
2 cups (6-3/4) King Arthur Whole Wheat Pastry Flour
2 tsp baking soda
1/2 tsp salt
1 tsp ground cinnamon
2 tsp ground ginger
1/2 tsp ground cloves
1/2 tsp ground allspice
Sugar for dipping

1- Drain the applesauce for several minutes in a fine strainer set over a bowl to remove excess liquid.

2- In a large bowl, cream together the applesauce, sugar, and butter; beat at medium speed until well blended (about 3 minutes). Add the molasses, egg, and crystallized ginger; beat until well combined.

3- In a separate bowl, whisk together the flours, baking soda, salt, and spices. Gradually add the flour mixture to the sugar mixture, beating slowly until blended. Chill the dough for at least an hour. If you bake it the same day, the cookies will be crispy, flatter, and chewy. If you bake on the second or third day, the cookies will be taller and softer (like in my photos).

4- When you're ready to bake, preheat the oven to 375 deg. F. Line two baking sheets with parchment paper.

5- Scoop the dough by tablespoons and form into 1-inch balls. (If the dough gets sticky while you're working with it, pop the dough back into the refrigerator to chill it.) Dip the tops of the balls into the sugar and place them, sugar-side up, 3 inches apart on the prepared baking sheets.

6- Bake for 10-11 minutes, until set, but still soft and puffy in the center. Remove the cookies front he oven and allow them to cool for 5 minutes before transferring them to a rack to finish cooling completely.

Makes about 30 cookies.

Monday, December 5, 2011

Surprise Cookies


Christmas gift giving is tricky.  There is a decision to make- do you go for a big surprise, with the possibility that the recipient will not like the gift, or do you have them pick it out, making sure the size and color are correct, then wrap it and hand it to them?

I love surprises. That tingly feeling of anticipation as they hold your wrapped package in their lap, wondering what on earth it could be, not daring to hope, but hoping anyway that it might be that one  thing they really wanted. The tension builds as they gently ease open the wrapping paper (or tear it off, if that's the way they roll). And then, if you shopped/planned/or made correctly, the look on their face makes it all worthwhile.

Early in my marriage I tried for surprises and they always failed. First of all because my husband has an almost supernatural gift for knowing what's inside a wrapped package. I tried wrapping a tie rolled up into a squishy ball, foregoing the standard and obvious tie box. My husband, picked it up, gave it a squeeze, and said, "Oh, that's a tie." I was quite depressed. Then I tried the box within a box gambit. He'd pick it up, shake it, listen critically, and announce the contents. Boo again. He guessed the cologne before he even picked up the box, smelling it three feet away from the tree.

Finally my husband realized that knowing what all of his presents were a week before he even unwrapped them drained Christmas morning of a lot of its fun. He now has a strict no guessing policy. He doesn't shake, squeeze, or sniff any packages under the tree. Until Christmas morning. Then he releases his inner Karnack and has a good time.

But the other reason my surprises fail is because of finances. Since he pays the bills, unless I pay cash, he knows about it. And accumulating a stack of cash isn't something I'm good at. I do many things fairly well, but none of them generate income, so I'm stuck either asking him for money to buy him a present (which he always vetoes, saying he doesn't need anything) or buying in a very modest price range.

Last year I finally managed to surprise him. I'd been saving cash in my super secret cash stash and when I found a really good deal on Amazon on something he had on his wish list, I asked my daughter to order it and handed her the cash. She kept it at her house and brought it over Christmas eve, sneaking it into the house while my husband was occupied with the grand baby.

Christmas morning he was happy, amazed, and confused when he opened his gift. He said thank you many times, then asked over and over "How did you do it?" It drove him nuts. I loved that best of all.

Today's cookies are molasses cookies. An obvious choice for Christmas time and always welcome. What's the surprise part about it? Um, (she coughs in embarrassment and nervously shuffles feet), it's the recipe. There is no recipe today. You see, I made these cookies a while ago. I've been too busy with life to stop and take pictures of stuff I've made recently, so I was really scraping the bottom of the barrel for this post. And after I'd gotten it written, I could not find the recipe. I'd helpfully written the notation that it came from a King Arthur's Baking Sheet and was Whole Wheat Molasses Cookies. So, if any of you happen to have the recipe, please email it to me and I'll post it. Till then, I'll keep looking. And hopefully I've inspired you to go bake your own favorite molasses cookie.


Wednesday, November 23, 2011

Please Pass The Cupcakes


My memories of Thanksgiving don't match up with current reality. In my childhood, Thanksgiving was a wonderful time when we brought out the very best of everything. The linen, china, and candles made the dining table a glittering, shimmering tableau of beauty. The heavenly smells wafting from the kitchen had us all drooling with anticipation for the coming feast. My mother sternly warned us not to snack, but black olives were always pilfered from the cut glass bowl in which they resided. When the perfectly browned turkey was carried out and set on the table, and the plates were loaded up with slices of meat, great globs of mashed potatoes and stuffing, over which rivers of gravy were poured,  it was torturous to sit patiently through the grace. 


My current reality is that I spend 3 days baking and then collapse at the table while everyone eats. Is it just a lot more fun and special when someone else does all the work? In a word, yes. I know this to be true because this year we had two Thanksgiving dinners. (My, that does sound porky, doesn't it?)


The first dinner was an early Thanksgiving feast that we put on as a send-off for my son who's on his way to boot camp (he joined the Naval reserves). He and his wife came over to break bird with us and give thanks for our blessings. While I didn't go all out (no pies, to everyone's disappointment), it was still essentially a traditional Thanksgiving dinner. 


For our second dinner, we were invited to my daughter's house. She and her husband did all the work, cleaning, baking and prepping for two days ahead of time, then serving us a beautiful meal. All we brought was wine and gravy. That was much more like it! So, apparently, the key to a happy, relaxed meal is to have someone else fix it for you. 


The only downside to eating at someone else's house is the lack of leftovers when you get home. Normally I hate leftovers clogging up my refrigerator, but Thanksgiving leftovers are as much a part of Thanksgiving as the main meal is. How can you properly watch a football game without a turkey-cranberry sandwich or a plate of turkey and stuffing, with extra gravy? Can it be done? 


More importantly to me, what do you eat for breakfast the day after Thanksgiving if there is no leftover pumpkin pie? Pumpkin pie has squash, milk, and eggs, so what part of that doesn't say healthy breakfast to you? But if the leftover pie is languishing in someone else's kitchen, you either have to suck it up and have oatmeal, or bake your own pie. Or cupcakes.


Yes, I said cupcakes. These beauties are even healthier than pie because there's no crust. They're just delicious pumpkin pie taste in cupcake form. So there's no fussing to get straight edges when you cut a piece of pie (you pie nibblers out there know what I'm talking about!), just single-serving goodness, ready to go. Plus without having to make a crust (my pie downfall), they're a snap to make. I'd say, "easy as pie," but they're easier!


Pumpkin Pie Cupcakes
  - adapted from Baking Bites
2/3 cup all-purpose flour
1/4 tsp baking powder
1/4 tsp baking soda
1/4 tsp salt
2 tsp pumpkin pie spice
1 15-oz. can pumpkin pie puree
1/2 cup sugar
1/4 cup brown sugar
2 large eggs
1 tsp vanilla extract 
3/4 cup half and half or evaporated milk 
Whipped cream (for topping)


1 - Preheat the oven to 350F. Line the cups of a mini muffin tin with paper liners. (You can't skip the liners, or you won't be able to get the cupcakes out neatly.)
2- In a medium bowl, whisk together flour, baking powder, baking soda, salt and pumpkin pie spice.

3- In a large bowl, whisk together pumpkin puree, sugar, brown sugar, eggs, vanilla and half and half until well combined. Add in dry ingredients and whisk until no streaks of flour remain and batter is smooth.

4- Fill each muffin cup about 3/4 full. They won't really rise.

5- Bake for 11-14 minutes. Cool cupcakes in pan. They will sink as they cool.
Chill cupcakes before serving. Top with lightly sweetened whipped cream.


Makes 24, possibly a few more.

Tuesday, November 15, 2011

Chocolate Can't Fix Everything


Every relationship that you have changes you. Sometimes the changes are subtle, like emulating a friend's hairstyle, or the way in which they answer the phone, and sometimes they are drastic, like making a career choice or moving across the country, just to be with a friend. People brush up against your life and leave their fingerprints on it.

Sometimes that might be words of wisdom that come back to you at just the right time. Sometimes it's the memory of an extravagant act of selflessness that prods you to be a better friend. And sometimes it's pieces of pain, shared in quiet moments.

One of my friends once confided in me that her marriage was loveless. Not that either cheated on the other, just that there was no emotion, no passion. I had often wondered why she married this bland man, unremarkable in looks, personality, or finances and one day posed that question to her. She responded, "Because he asked. And I didn't think anyone else ever would." I cried inside, thinking of both of them living in a settle-for, I-can't-do-any-better-than-this marriage.

Another friend was in a truly unhappy marriage. Her husband was demanding, treating her as if she were a slave rather than a cherished gift from God. He was verbally abusive to her and I often found her in tears. I offered our home as a sanctuary for her daughter so that she could drop her off if the fighting got too ugly. More than one late night she came to visit.

One Sunday I sat behind my friend and her husband in church. From the set of her shoulders I knew that she was crying. She left the service early and when I went outside, she was sitting in her car, tears streaking down her cheeks. Though her face was saying, "just leave me alone," I motioned for her to roll down the window. I took her hand and kissed it, leaving an imprint of my lipstick on her hand, a kiss to take home. It made my heart ache that I couldn't do anything to fix it and make everything better.


And what could I say to my very dear friend who's husband of 20 years drained their bank account and left her and their 4 children for the woman he'd been having an affair with for 10 years? I offered to buy her a t-shirt that says, "It's better to have loved and lost than still be married to the crazy b-----d," but that wouldn't fix it all and heal the pain of loss and betrayal.

If only chocolate could fix everything. I'd make a batch of these bars and take them to every hurting woman in my life. But some days it seems like that would be a mountain of bars. I can't do it alone. So I have a challenge for you bakers out there. Make your favorite treat, then, rather than eating the whole batch and moaning about the size of your hips, wrap them up individually in cellophane and put a little ribbon around each one. Tuck some into your purse and see how many hurting people you can find that day to give them out to. And if you run out of hurting people to bless, try just brightening someone's day. There's nothing like the smile of someone who's been randomly given a cookie!


My Heart Breaks For You Bars
(aka Thousand Dollar Bars - adapted from King Arthur Flour)

shortbread layer:

1 cup (2 sticks) unsalted butter, at room temperature
1 cup confectioners' sugar
2 teaspoons vanilla extract
2 cups King Arthur Unbleached All-Purpose Flour


caramel layer:

2 cups caramel, cut into small chunks
3 tablespoons heavy cream


chocolate layer:

3 cups chopped milk chocolate or dark chocolate, melted
1 tablespoon coconut oil (optional)
Crunchy sea salt for garnishing


1- Preheat oven to 300 Deg. F. Line a 9 x 13-inch pan with parchment paper, leaving enough to hang over the edges.

2- In a medium-sized bowl, beat together the butter, sugar and vanilla. Add the flour. At first the mixture may seem dry, but will come together as you continue to beat at medium speed.

3- Take the dough (it will be somewhat stiff) and press it evenly into the pan. Lightly flouring your fingertips will help with any sticking.

4- Prick the crust all over with a fork. The holes will allow steam to escape and the crust will bake evenly with fewer bubbles.

5- Bake the crust until it's lightly golden brown on top and the edges are deeper golden brown, about 35 to 45 minutes. Remove from the oven and set it aside to cool completely.

6- Once the crust is cooled, melt the caramel and cream over low heat in a small saucepan. Pour the caramel over the cooled crust and set in the refrigerator for 30 minutes to chill and firm up.

7- Melt the milk or dark chocolate slowly in a double boiler or over very low heat. If it seems very thick, add a tablespoon of shortening to thin it. Pour evenly over the chilled caramel layer and spread to cover all of the caramel. Sprinkle the sea salt over the chocolate layer. Return to the fridge until the chocolate is well set. Cut into 2" x 2" squares to serve. (The chocolate may shatter if you cut it straight from the fridge, so you might need to let it warm up just a tad before cutting.) It's best to store these bars in the refrigerator.

8- These bars can also be cut and dipped in milk chocolate to resemble Twix ® bars. After the caramel layer has chilled firm, cut down the length of the pan, splitting the bars into two long, narrow bars. Then cut each long strip into "fingers". Dip the chilled bars into melted chocolate, place on parchment paper to set, sprinkle with sea salt, and allow to set up for several hours.

(Note: It's waaaaay easier to spread the chocolate on top, rather than dipping them, but dipping gives a nice, all-over layer of chocolate that's wonderful. Either way, they're delicious. And don't forget the crunchy salt. Salt + chocolate + caramel + shortbread = fabulous. If cookies could fix problems, these would do the job!)